

What is JetBackup?
JetBackup makes copies of your account on a schedule. Think of it as a photo album of your website. Each photo is a backup from a certain day. You pick a day and restore from it.
Not every hosting plan has JetBackup turned on. If you cannot find it in your cPanel, ask Hostvento support. You can open a support ticket.
Read this first
Warning: Restoring can replace the current files or data. Anything newer than the backup can be lost. If you can, download a copy of your current files first.
Steps
- Log in to cPanel.
- Scroll down to the Files section and click JetBackup 5. If you do not see it, use the search box at the top of cPanel and type
JetBackup.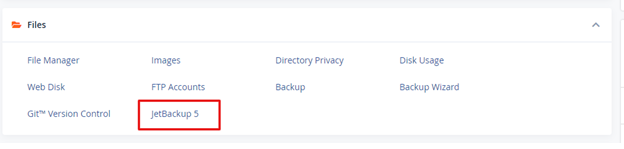
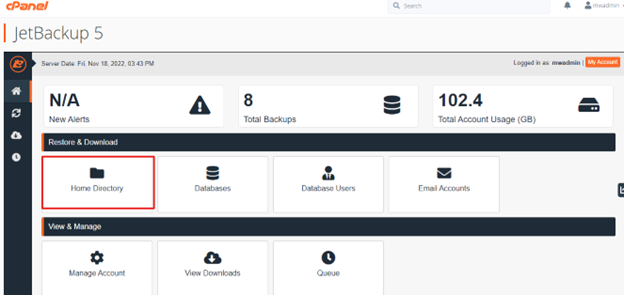
- Look at the choices on the page. You will see things like Full Account, Home Directory, Databases, Email and Cron Jobs. Click the one you need.
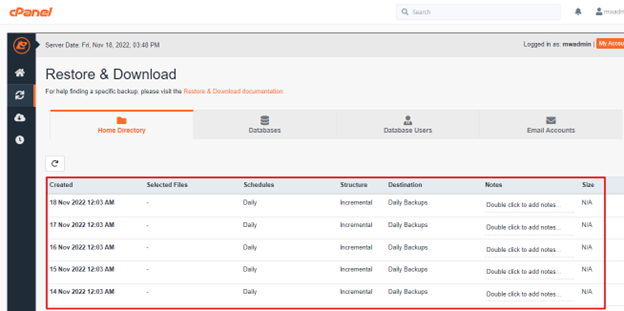
- Pick the backup date. The list shows the dates of the available copies.
- Click Restore next to the date you want.
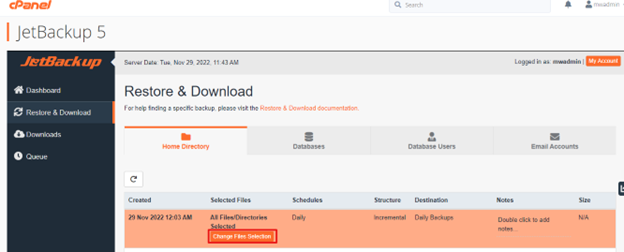
- Choose what to restore. For files, you can often pick single files or folders. For databases, tick the database name.
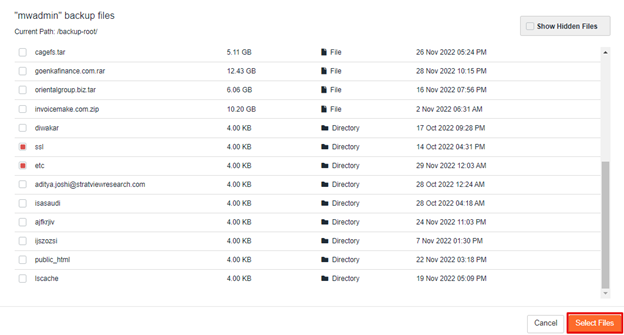
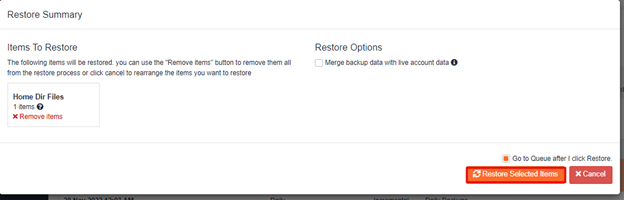
- Read the message. Then click Restore or Confirm.
- Wait. The page shows the job in a queue. When it says it is done, open your website to check it.
Restore only one file
Often you only deleted one file. Choose File Manager or Home Directory in JetBackup. Walk through the folders to the file. Tick it, and restore only that. This is safer than restoring the whole account.
Download instead of restoring
You can also download a backup to your computer. This lets you look at it first. Look for a Download button next to the backup.
Quick recap
- JetBackup keeps dated copies of your account.
- Open it in cPanel, choose what to restore, pick a date.
- Restoring can overwrite newer data.
- For one lost file, restore only that file.