

WordPress.com and WordPress.org
WordPress.com is a service where WordPress runs on their servers. WordPress itself is also free software that you install on your own hosting. Moving means you take your content from the first and place it in the second. Then you control your own site.
Before you start
- Install WordPress on your Hostvento hosting. Use the app installer in your control panel. Your welcome email tells you how to log in.
- Keep your WordPress.com site online until you are done.
Steps
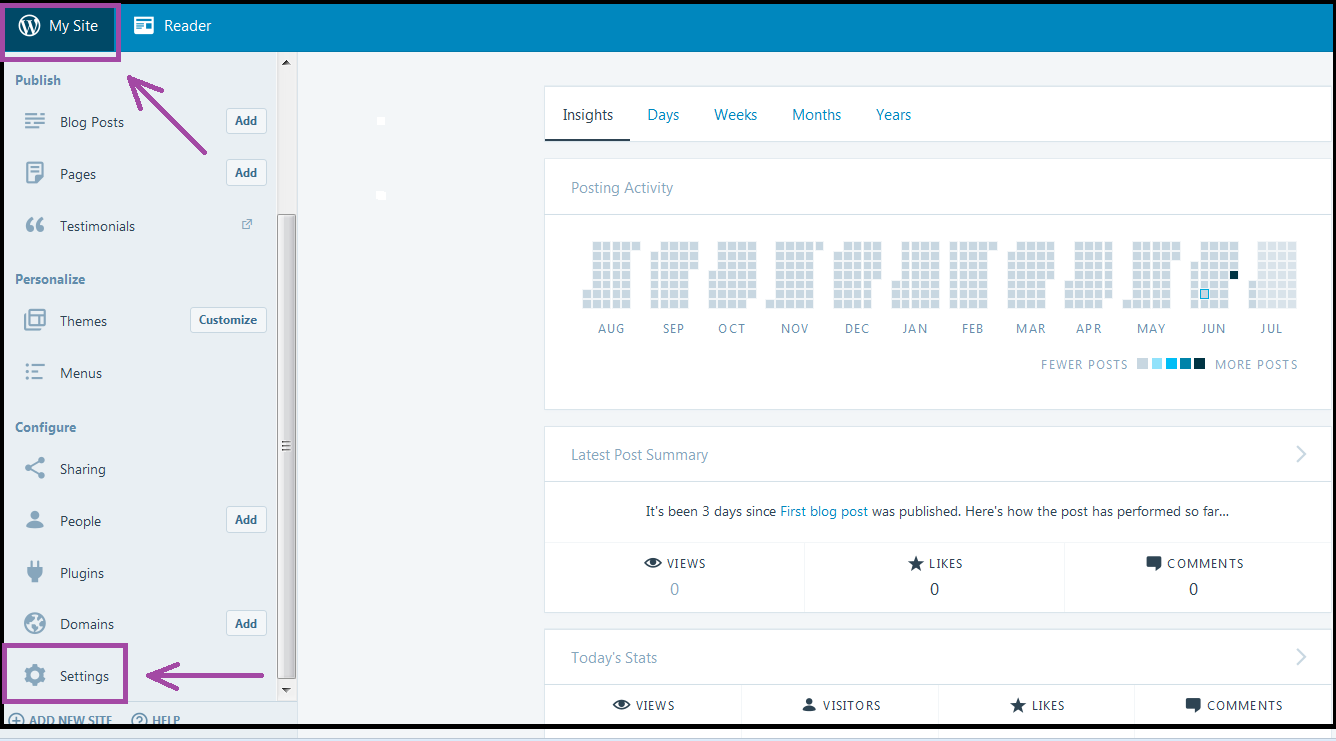
- Log in to your WordPress.com site.
- Go to Tools, then Export. On some accounts this is under Settings.
- Choose to export All content.
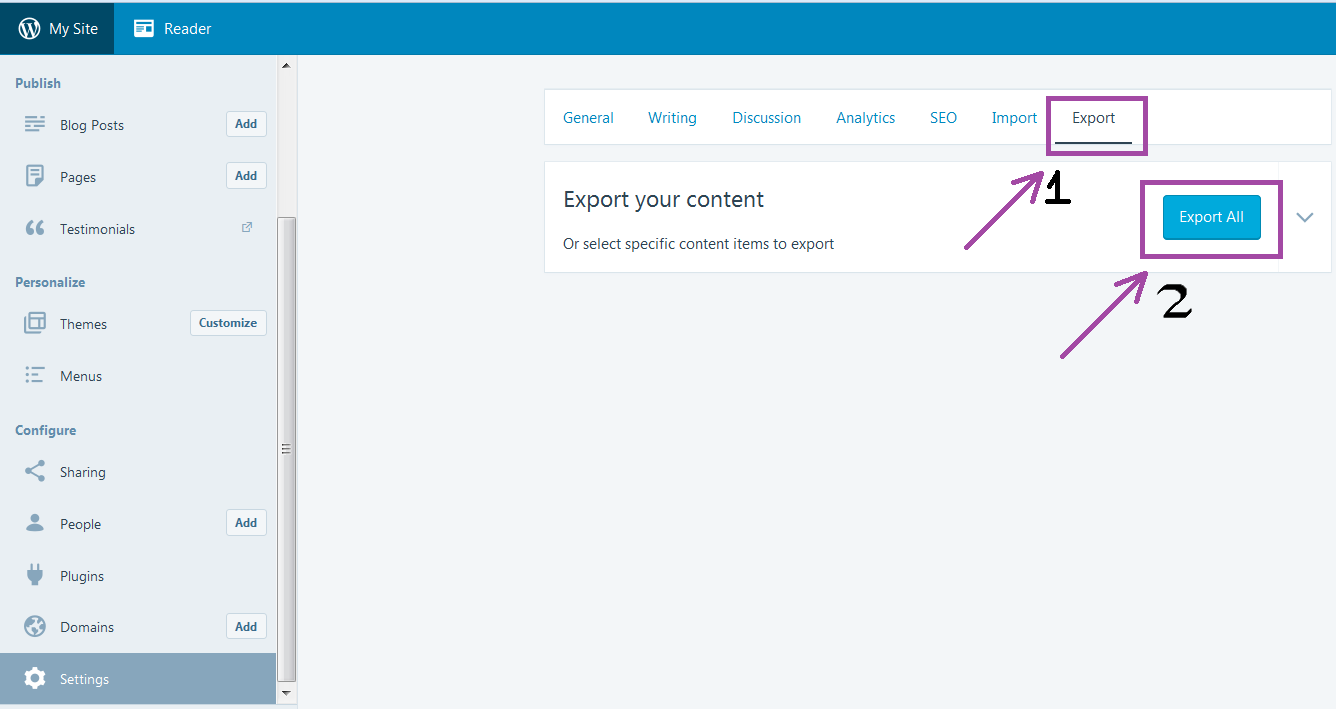
- Click Download and save the file. It is a zip file with an XML file inside. An XML file is a text file that stores your posts in an organized way.
- Unzip the download on your computer, if the import tool needs the XML file alone.

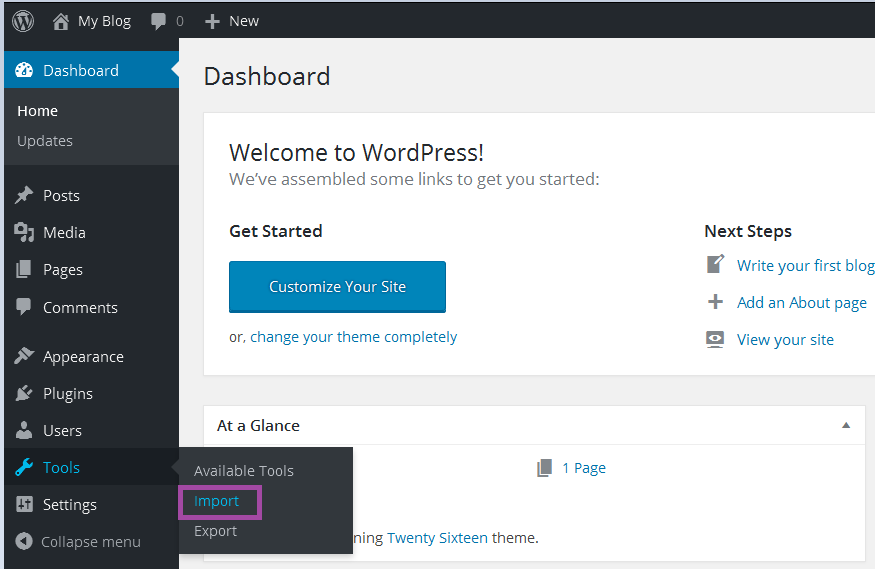
- Log in to your new WordPress dashboard on Hostvento hosting.
- Go to Tools, then Import.
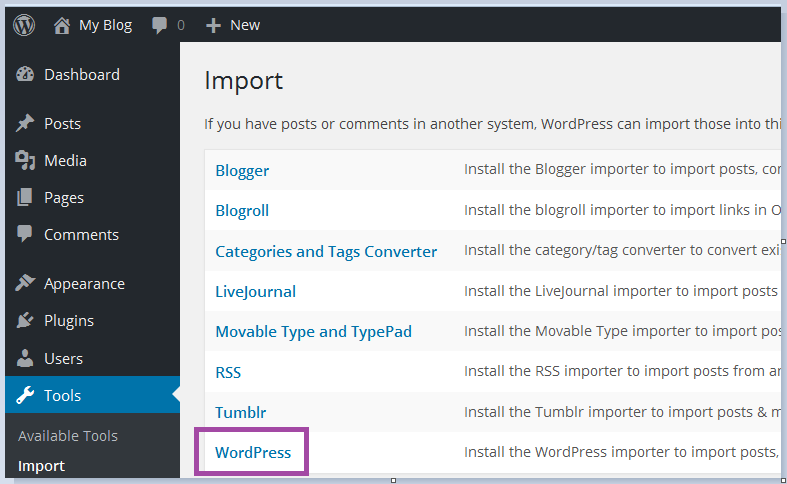
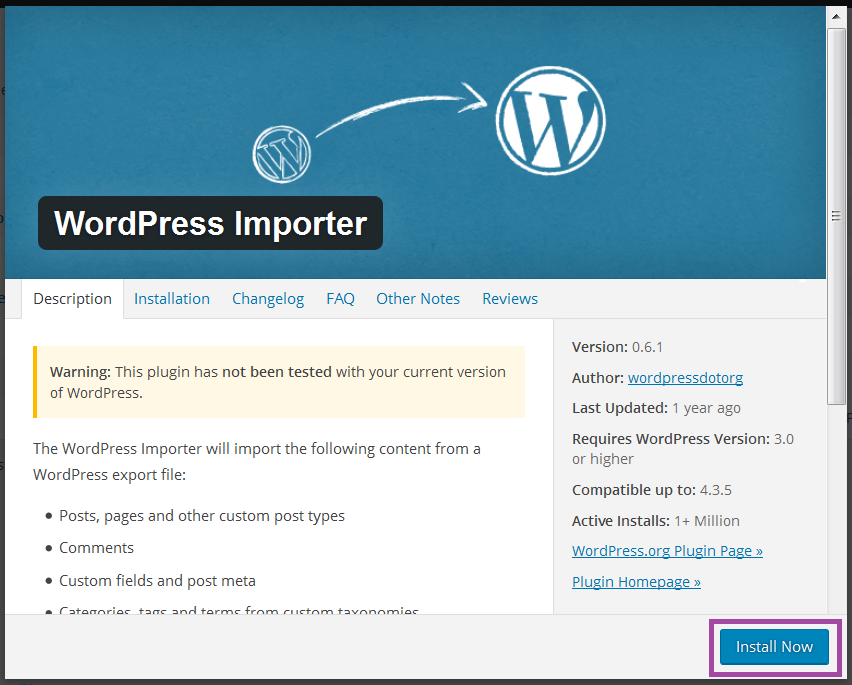
- Under WordPress, click Install Now, then Run Importer.
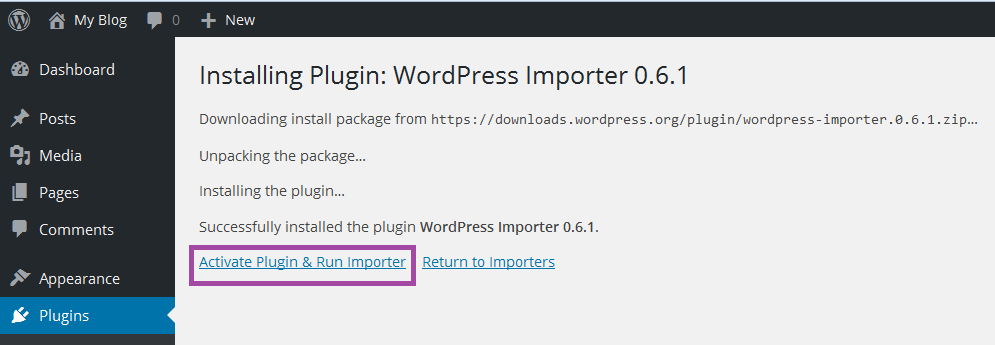
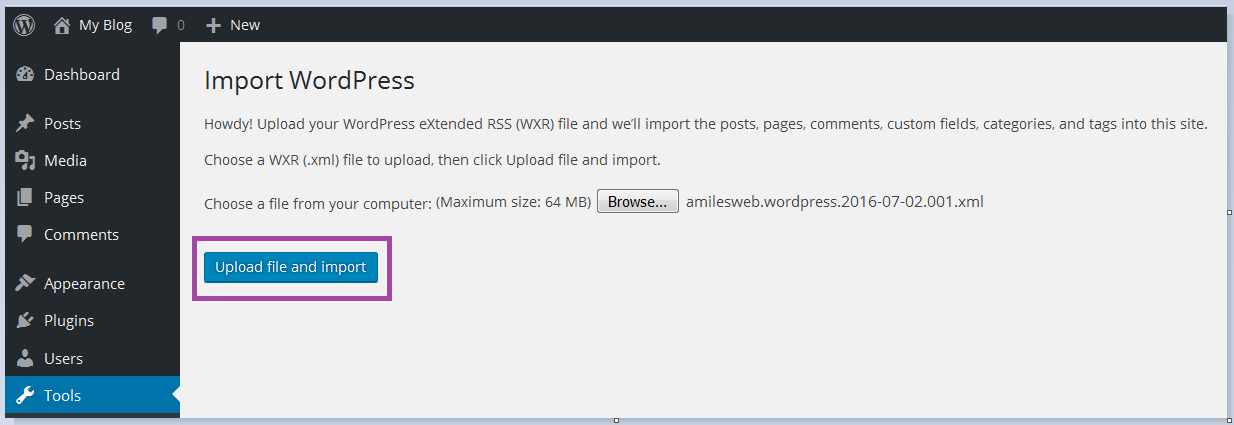
- Click Choose File, pick the XML file, and click Upload file and import.
- Choose an author for the posts. Tick Download and import file attachments, so pictures come along.
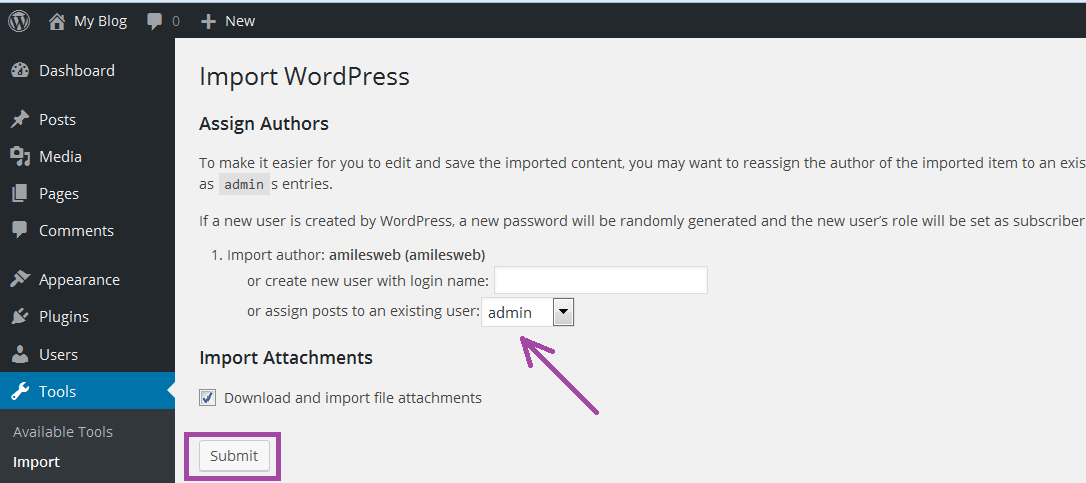
- Click Submit and wait.
After the import
- Check Posts, Pages and Media.
- Pick a theme under Appearance. Themes from WordPress.com may not be the same, so your design may look different.
- Set your permalinks under Settings, then Permalinks.
- If you use a custom domain, point it to Hostvento hosting. Ask support for the right DNS values. DNS is like a phone book that tells computers where your site lives.
Tip: If the file is too big, ask Hostvento support to raise the upload limit. Open a support ticket.
Quick recap
- Install WordPress on your Hostvento hosting first.
- Export all content from WordPress.com.
- Import the file with Tools, Import, WordPress.
- Check your content, pick a theme, then point your domain.