
What is a local server?
A local server is a small web server that runs on your own computer. Tools like XAMPP or Local create one. It lets you build a site in private. Nobody else can see it until you move it to a real host.
A WordPress site has two parts. The first part is the files, such as themes, plugins and pictures. The second part is the database. A database is like a big filing cabinet that stores your posts, pages and settings.

Before you start
- Your domain name should already point to your hosting account.
- Find your cPanel login in your welcome email. Ask Hostvento support if you cannot find it.
- Keep a copy of your local site folder. Never work on your only copy.
Steps
Part 1: Get your files and database ready
- Open your local site folder. It is often called
htdocsorpublic_html.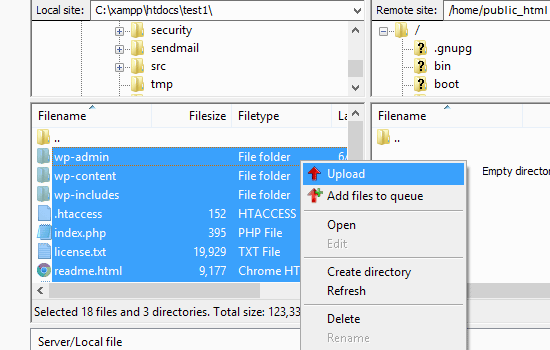
- Select all the files inside and make a ZIP file.
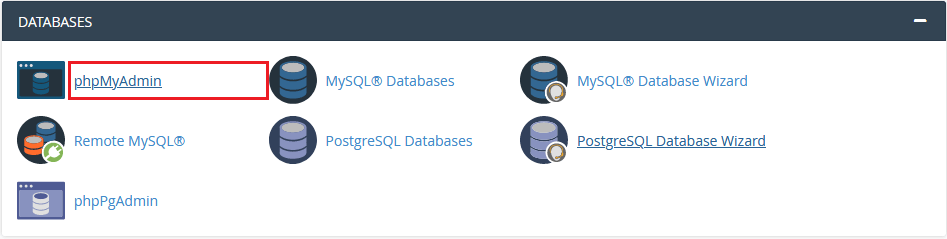
- Open phpMyAdmin on your computer. It is a web tool for managing databases.
- Click your WordPress database in the left list.
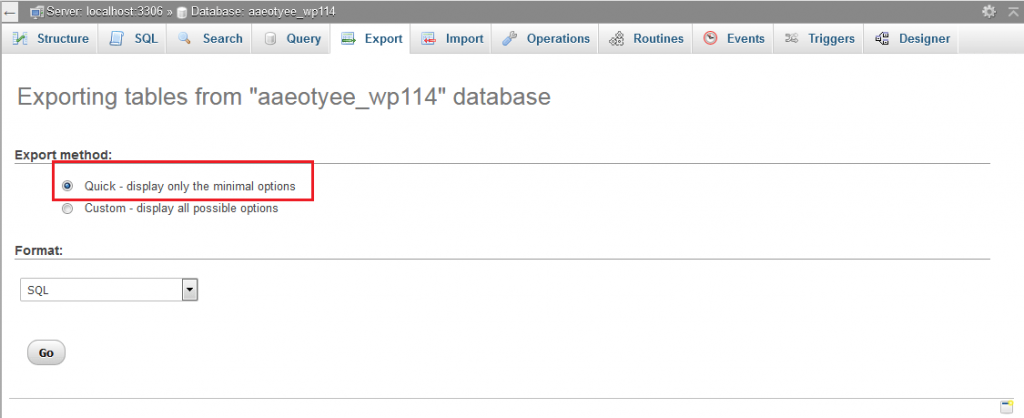
- Click Export, then Go. A
.sqlfile downloads.
Part 2: Create a new database on your host
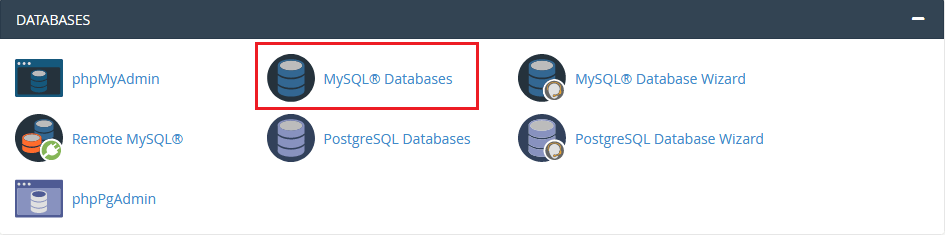
- Log in to cPanel and open MySQL Databases.
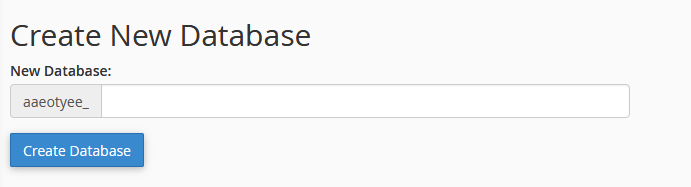
- Create a new database and a new user with a strong password.
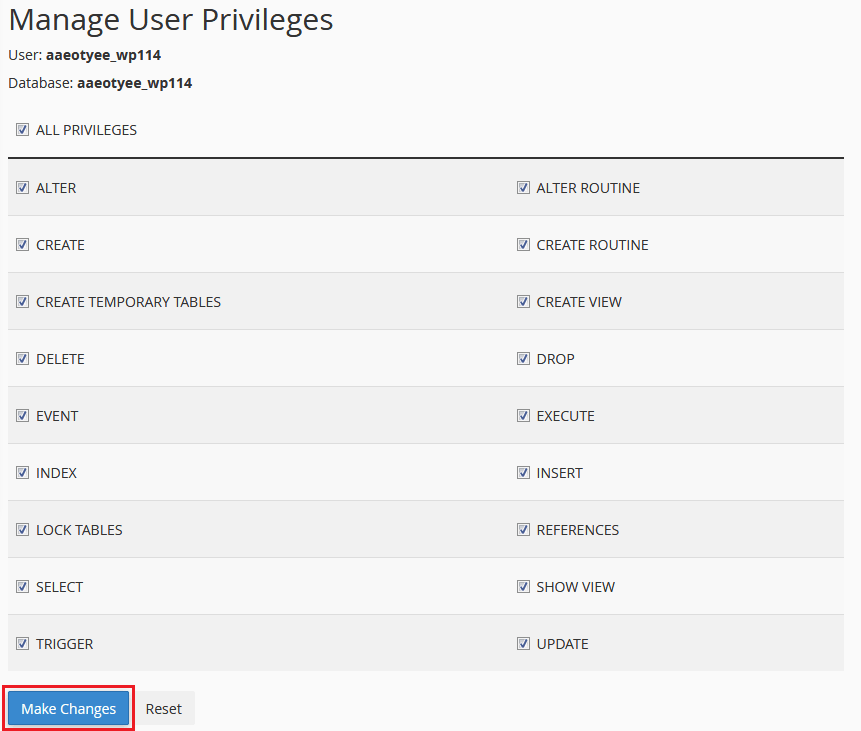
- Add the user to the database and choose All Privileges.
- Write down the database name, user name and password.
Part 3: Upload and import
- Open File Manager in cPanel and go to
public_html. - Click Upload and add your ZIP file.
- Right-click the ZIP file and choose Extract.
- Open phpMyAdmin in cPanel and click your new database.
- Click Import, choose your
.sqlfile and click Go.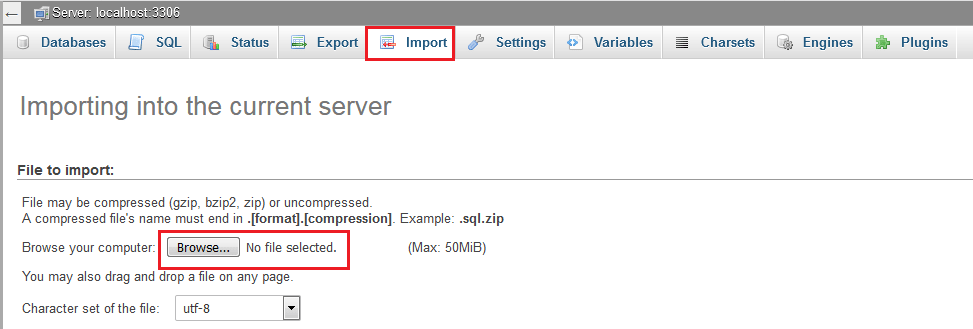
Part 4: Fix the settings
- In File Manager, right-click
wp-config.phpand choose Edit. - Change
DB_NAME,DB_USERandDB_PASSWORDto the new details. - Save the file.
- In phpMyAdmin, open the table
wp_options. Your table prefix may differ.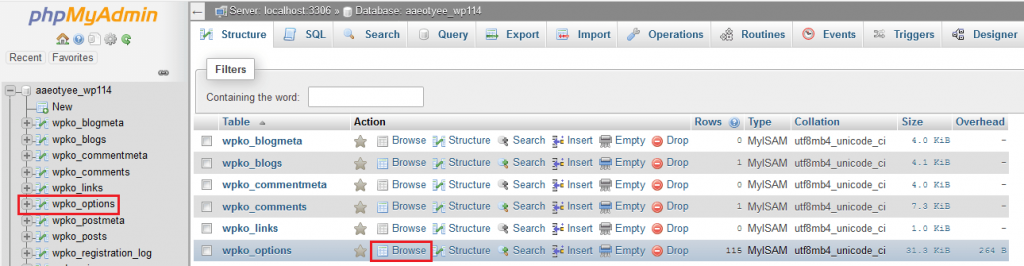

- Change the values of
siteurlandhometo your live address, for examplehttps://example.com.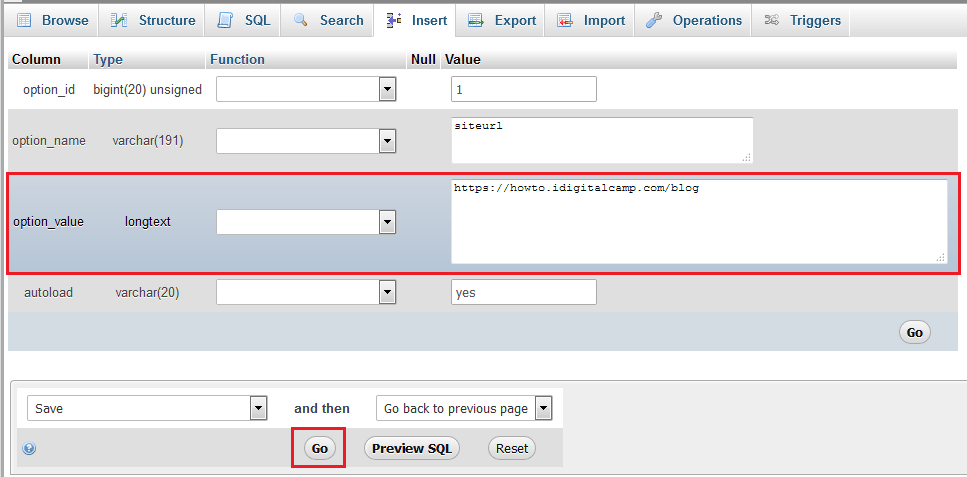
- Visit your domain and check the site.
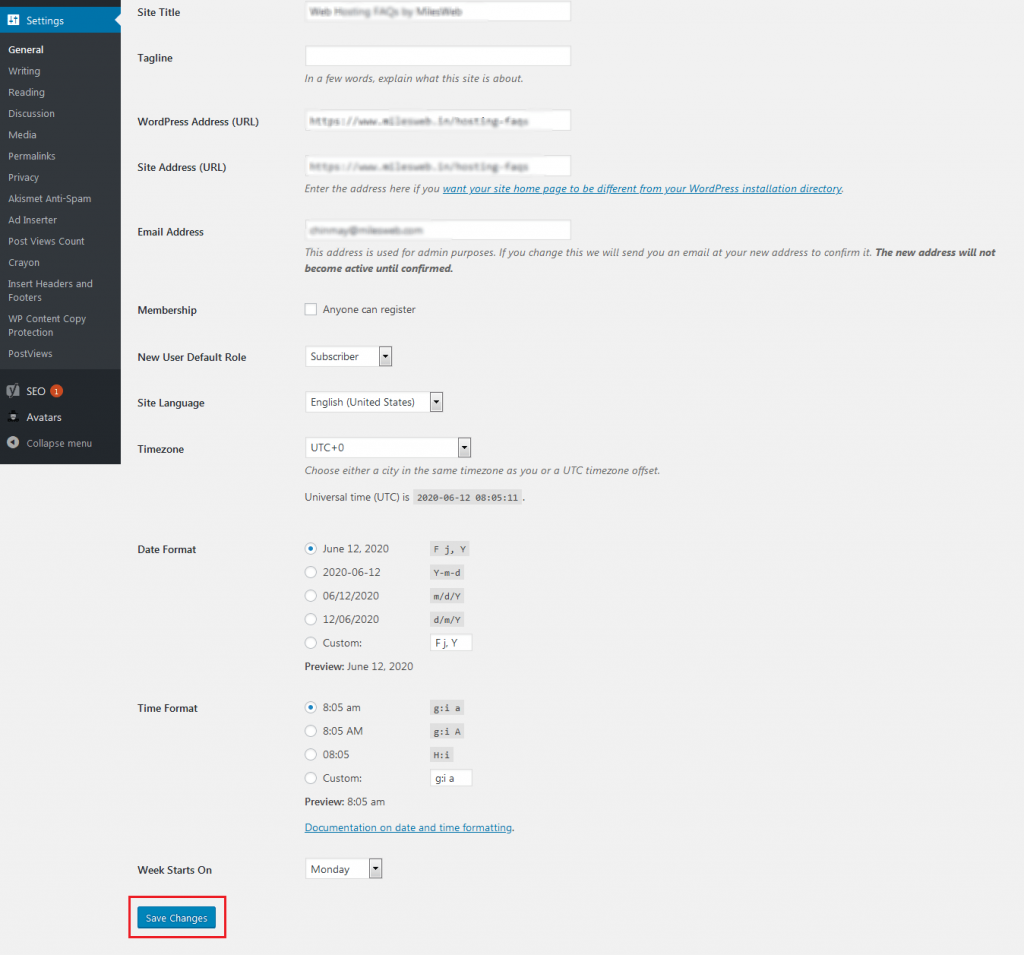
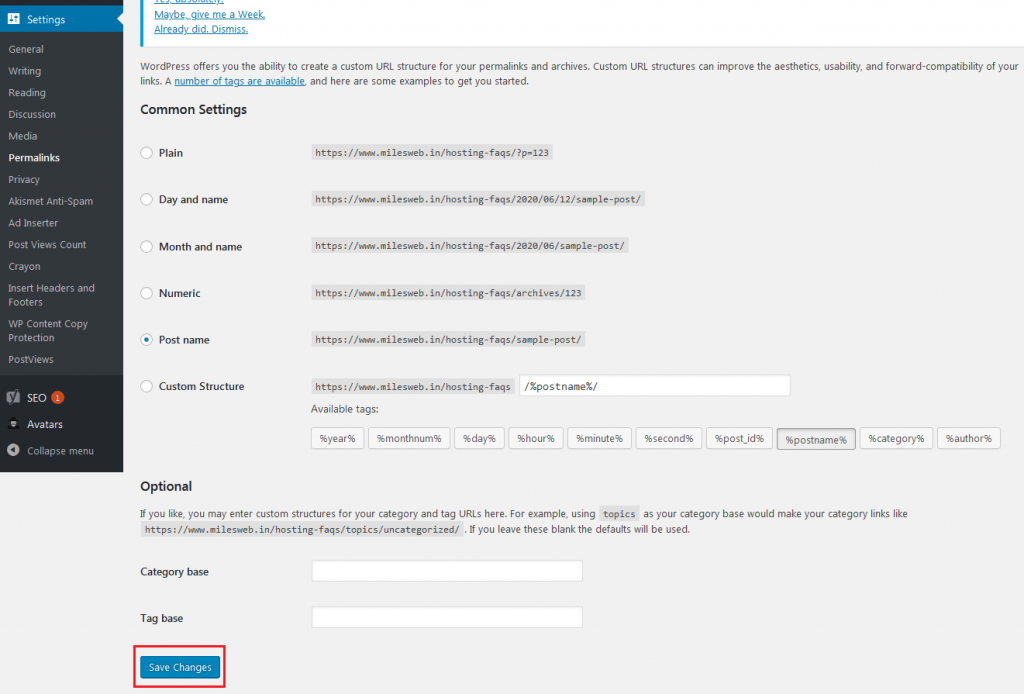
Tip: Old links to your local address may stay inside posts. In WordPress, go to Settings, then Permalinks, and click Save Changes. A search-and-replace plugin can fix the rest.
Warning: Importing into a database that already holds data can overwrite it. Take a backup first.
Quick recap
- Zip your local files and export your database.
- Create a new database and user in cPanel.
- Upload and extract the files, then import the database.
- Update
wp-config.phpand thesiteurlandhomevalues.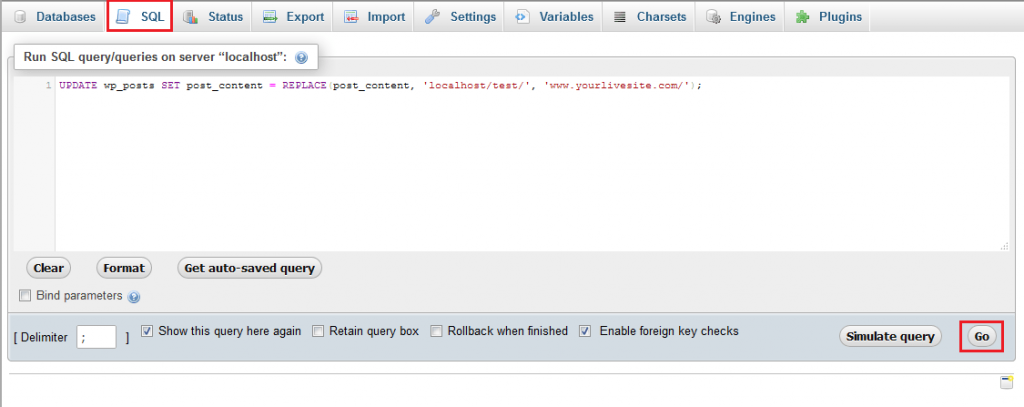
- Ask Hostvento support if you get stuck.