

What is DKIM?
DKIM stands for DomainKeys Identified Mail. Think of it as a wax seal on a letter. When you send an email, your server adds a secret digital signature. The receiving server checks the signature against a public key stored in your domain's DNS. DNS is like a phone book for the internet. It turns a website name into a number that computers understand.
If the signature matches, the receiver knows the email really came from you. This lowers the chance that your emails land in the spam folder.
Before you start
- Your domain must use the DNS of your hosting account. If your DNS is somewhere else, you must add the DKIM record there by hand.
- Have your DirectAdmin login details ready. They are in your welcome email. You can also open DirectAdmin from your client area.
Steps
- Log in to DirectAdmin.
- Find the section called Email Accounts or Email Manager. You can also use the search box at the top and type Email.

- Open Email Accounts, then look for DKIM or Domain Keys. On some setups it sits under Account Manager or DNS Management.
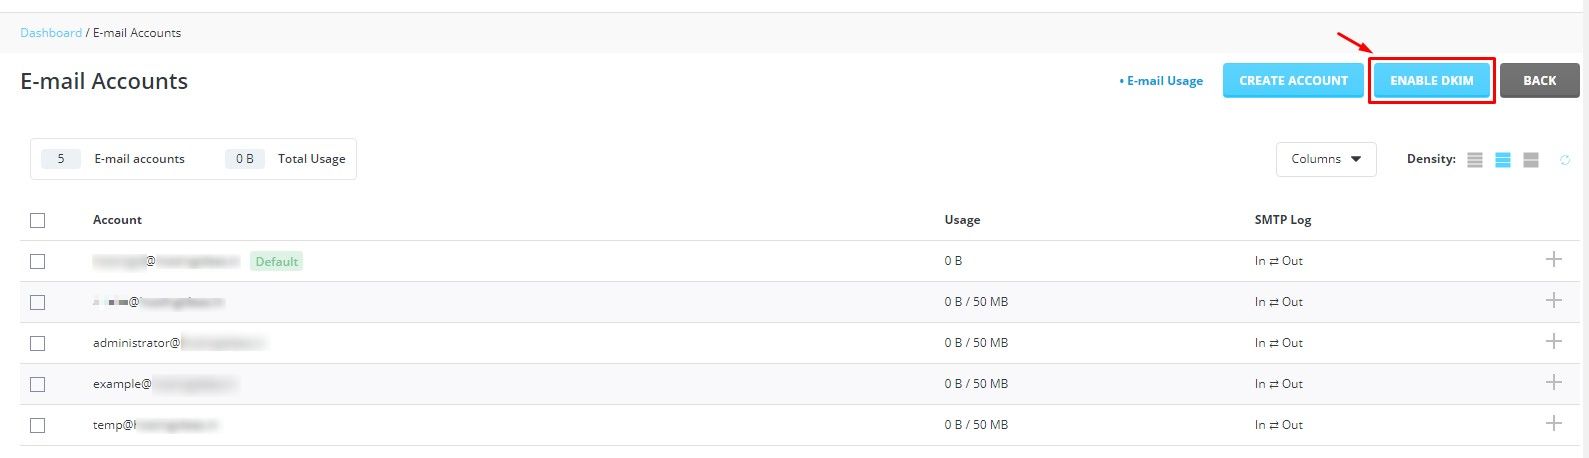
- Choose the domain you want from the domain list at the top.
- Tick the box or click the button that enables DKIM for that domain. It may be named Enable DKIM.
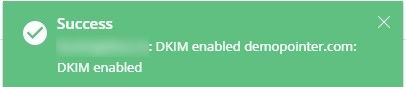
- Click Save. DirectAdmin makes a key pair and adds a DKIM record to your DNS zone.
- Open DNS Management and look for a record named
x._domainkeyof type TXT. If you see it, DKIM is on.
Tip: DNS changes can take a few hours to spread across the internet. Wait before you test.
How to check that it works
- Send an email from your domain to a personal mailbox, such as a free webmail account.
- Open the message and choose Show original or View source.
- Look for the line
dkim=pass. That means it works.
If you cannot find the DKIM option
Menu names change between DirectAdmin versions and skins. Your plan may also hide some tools. If you cannot find it, open a support ticket and ask Hostvento support to help.
Quick recap
- DKIM is a digital signature that proves your email is real.
- Turn it on per domain in the email section of DirectAdmin.
- DirectAdmin adds a TXT record named
x._domainkeyto your DNS.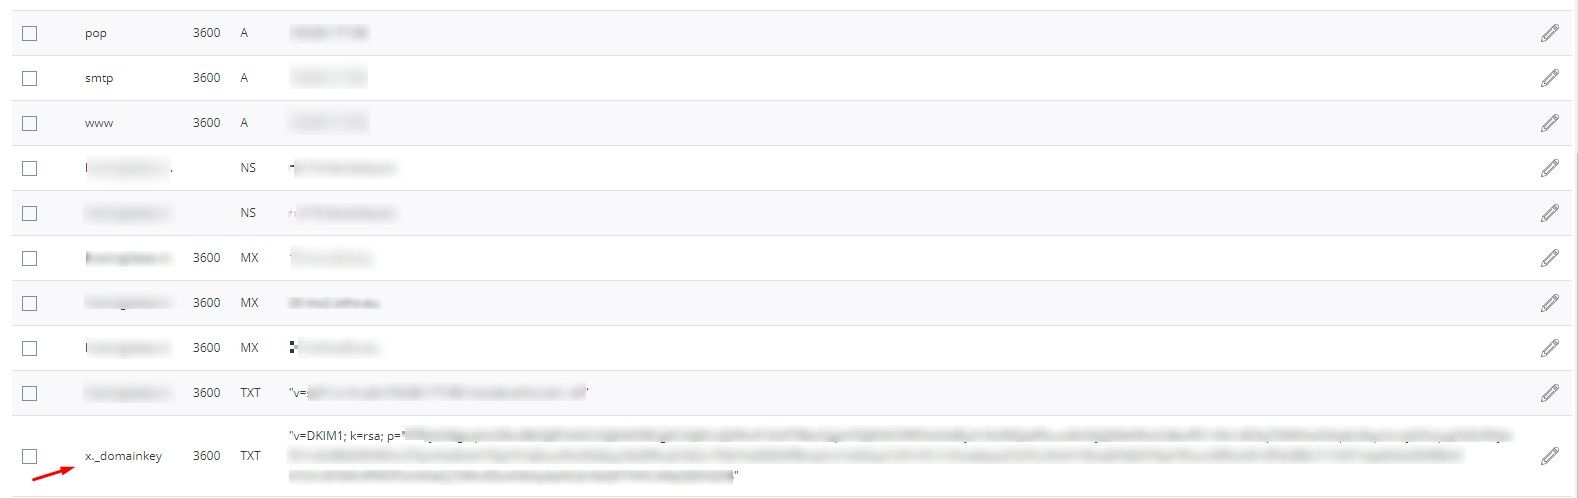
- Wait a few hours, then send a test email and look for
dkim=pass.