

What does this mean?
An IP address is a number that identifies a computer on the internet, like a house number. A server may have many IP addresses. Normally, all accounts send mail from the main one.
If one account sends spam, the main IP can get a bad name, and everyone's mail suffers. A dedicated IP for an account keeps its mail reputation separate. Reputation is how much other mail servers trust an IP.
This guide needs root access. Root is the all-powerful admin user on your server.
Warning: A wrong mail setting can stop email from sending. Take a backup of the Exim configuration before changes.
Before you start
- The server must have extra IP addresses. Ask Hostvento support how to get them for your server.
- The account must use a dedicated IP in WHM.
Steps in WHM
- Log in to WHM as root.
- Open Account Functions, then Change Site's IP Address. In some versions, it is under Site Software or IP Functions.
- Pick the account.
- Choose the dedicated IP from the list.
- Click Change.
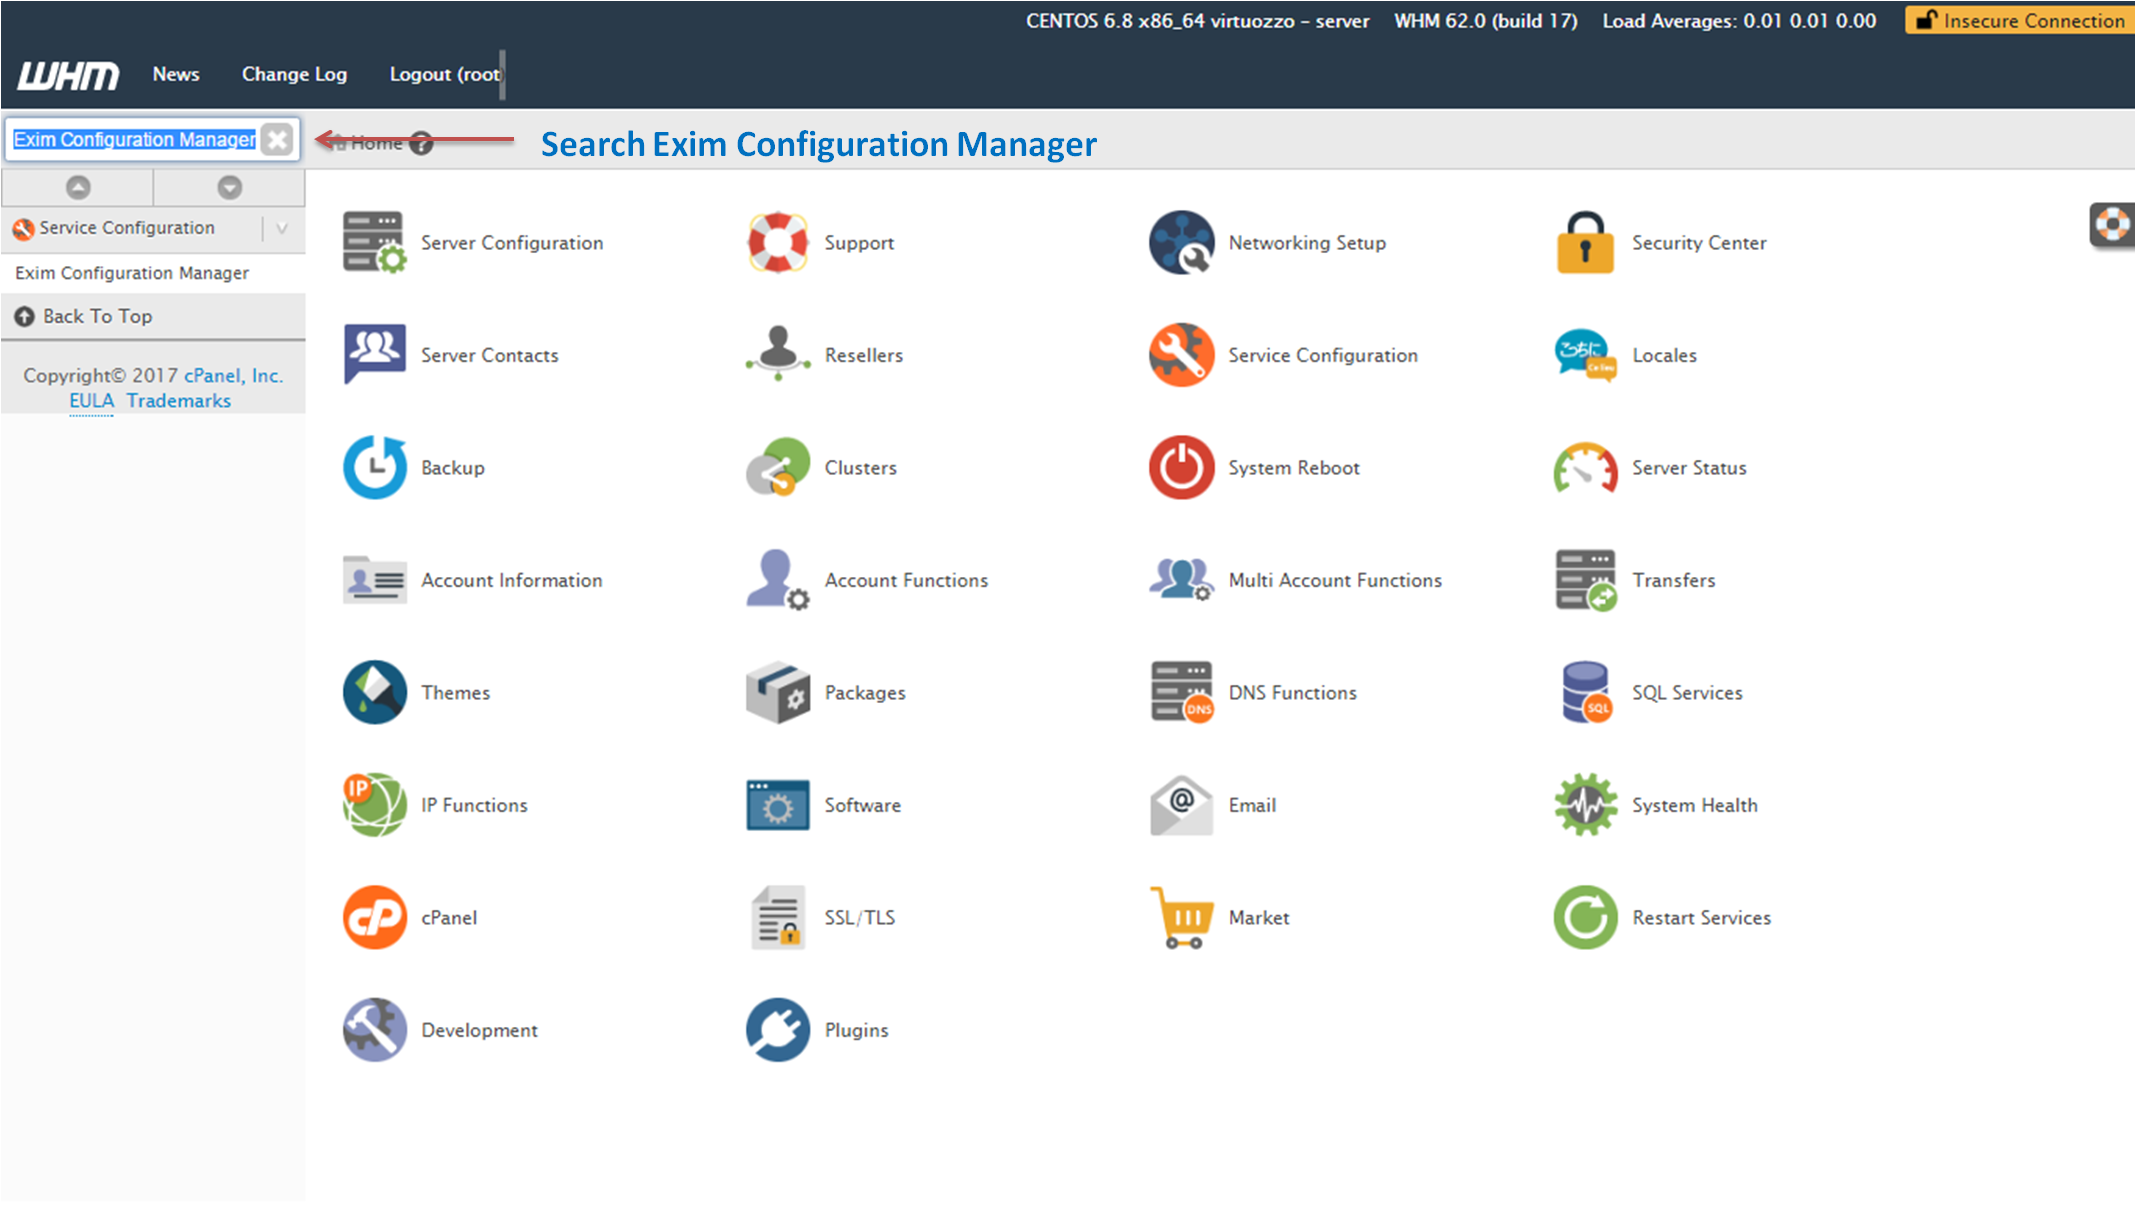
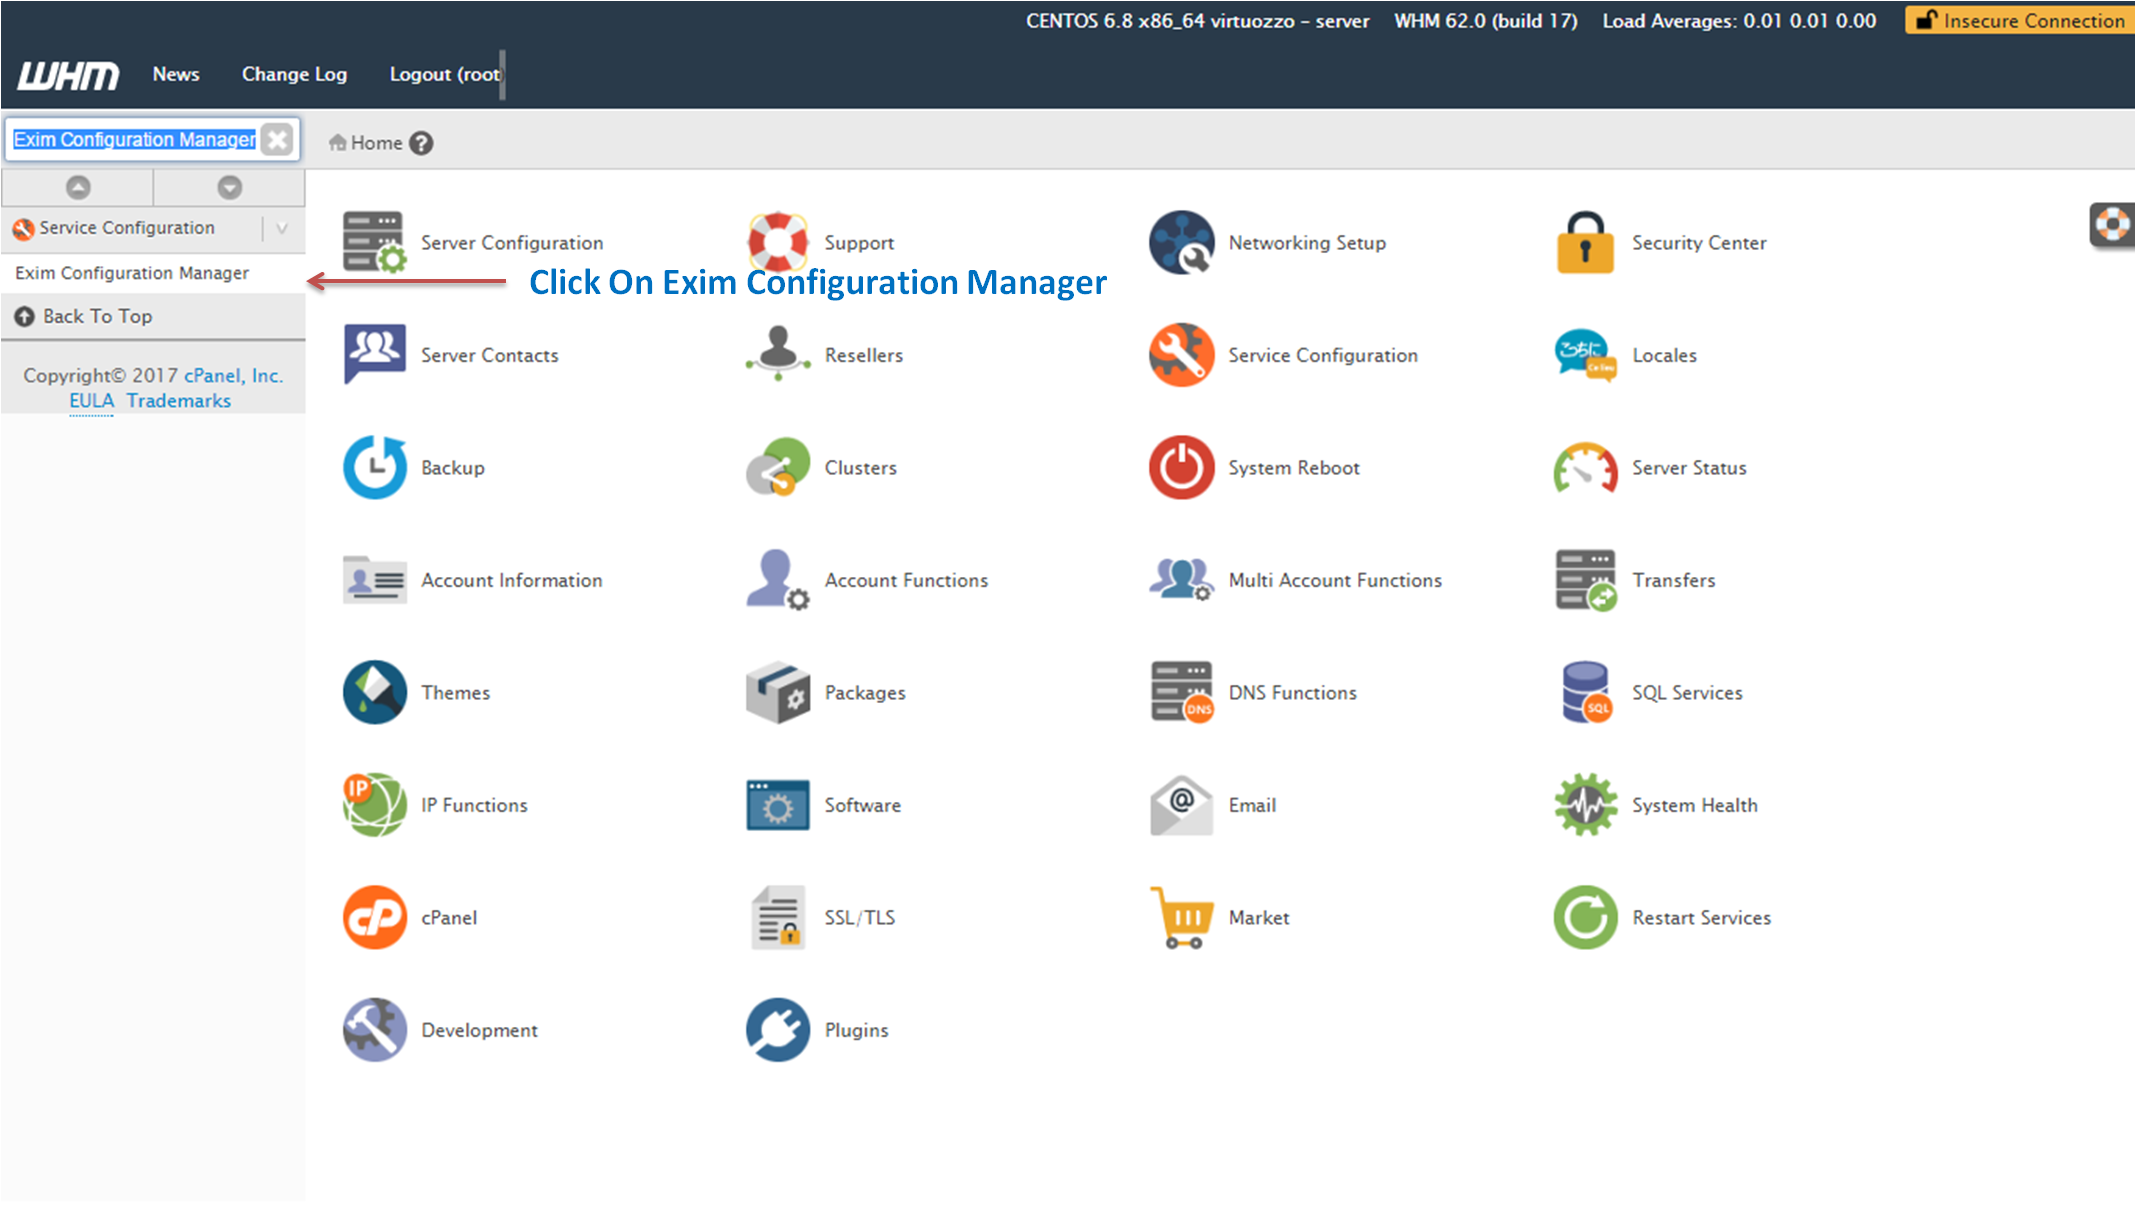
- Open Service Configuration, then Exim Configuration Manager.
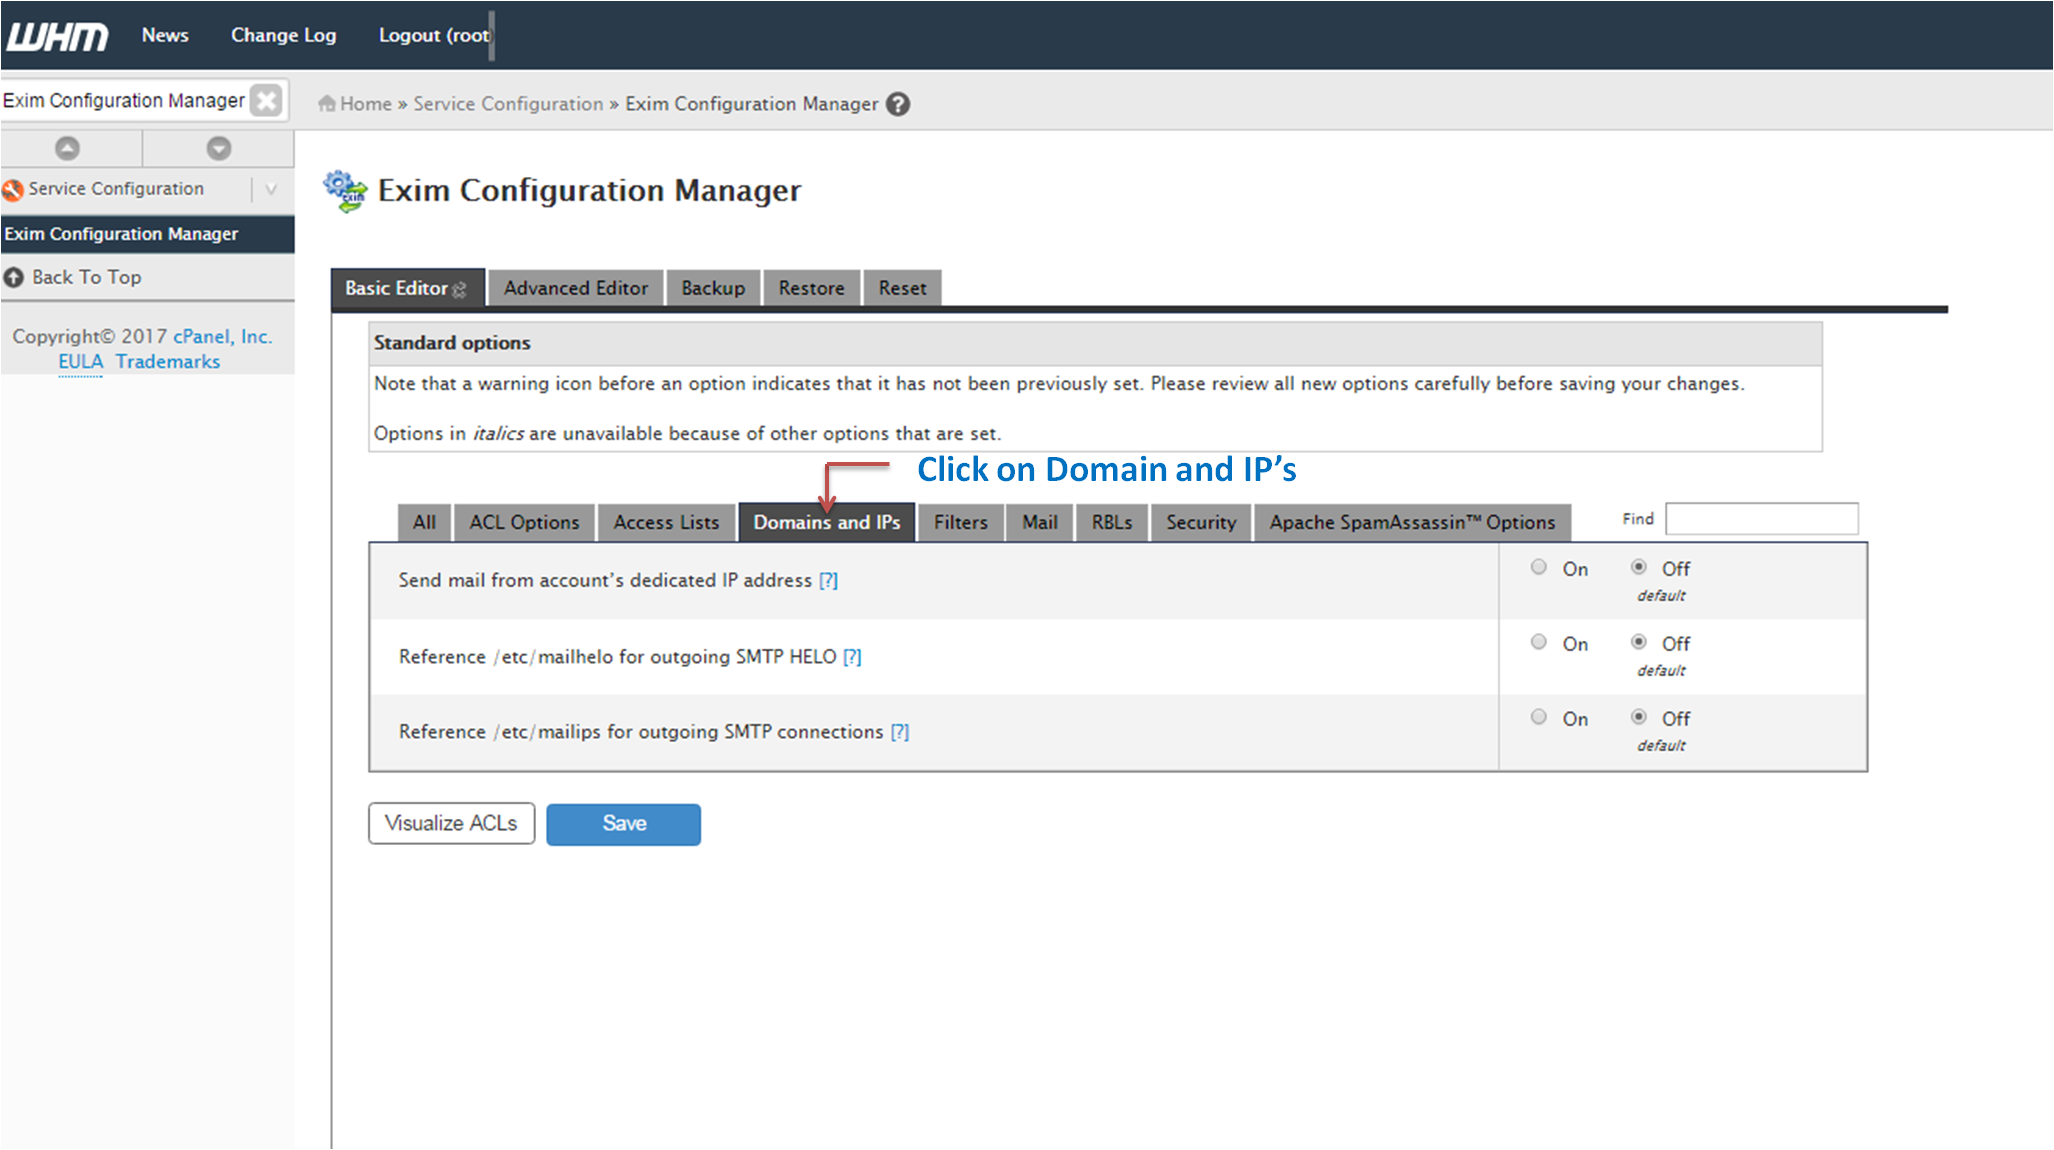
- Open the Basic Editor.
- Find Send outgoing mail from the IP that matches the domain name in the email. It may be named Reference /etc/mailips for outgoing email.
- Set it to On.
- Scroll down and click Save.
Exim is the program that sends mail on cPanel servers.
Using the mailips file
You can also set the IP by hand. The file /etc/mailips lists which IP each domain uses.
- Open a terminal over SSH as root.
- Edit the file.
nano /etc/mailipsThis opens the file in a text editor.
- Add a line with the domain, a colon and the IP.
example.com: 203.0.113.10This tells Exim to send mail for example.com from that IP.
- Save the file and exit the editor.
Do these after the change
- Ask Hostvento support to set a PTR (reverse DNS) record for the new IP.
- Add the IP to your SPF record. SPF is a DNS line that lists servers allowed to send mail for your domain.
- Send a test email to a Gmail address. Check the headers for PASS on SPF.
Tip: Raise sending slowly on a new IP. Large bursts from a fresh IP can be marked as spam. Open a support ticket if you get stuck.
Quick recap
- A dedicated IP keeps one account's mail reputation separate.
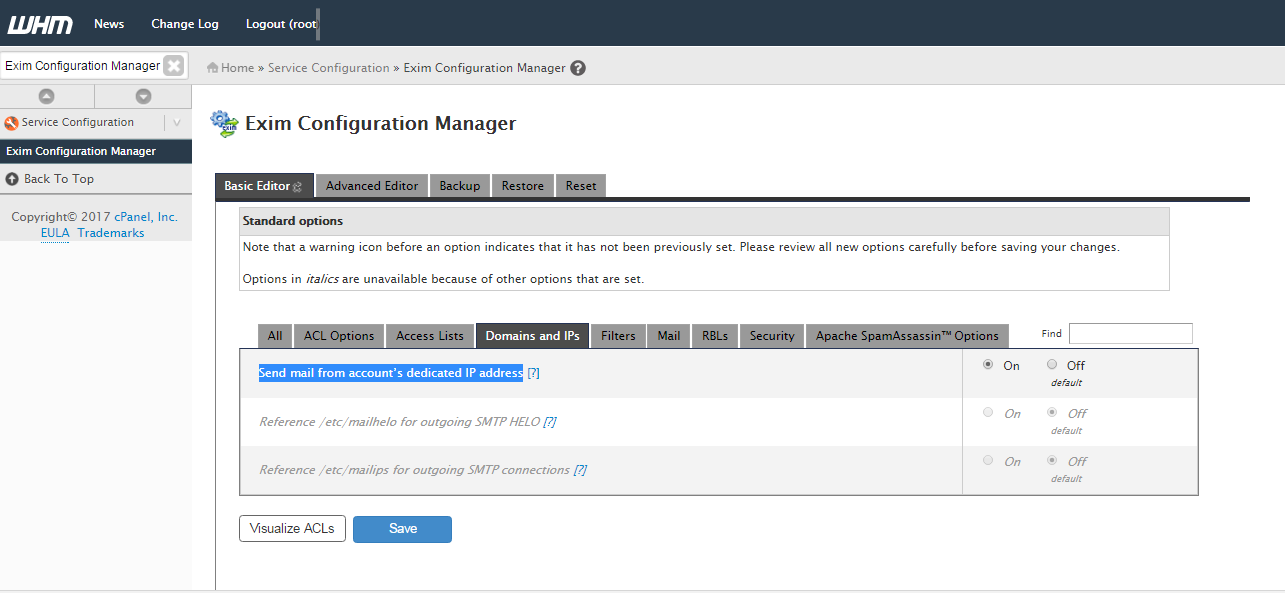
- Assign the IP in WHM, then enable per-domain IP use in Exim.
- Update PTR and SPF records.
- Test with a real email.