

Note: This guide needs root access to WHM. VPS and dedicated server customers have it.
What is this about?
PHP is a language that runs many websites. Different sites need different PHP versions. An old shop may need an older version. A new blog may want the newest one. An extension is a small add-on that gives PHP an extra skill.
WHM is the admin panel for the whole server. cPanel is the panel for one website account. On cPanel servers, a tool called EasyApache 4 lets you keep many PHP versions side by side.
Install more PHP versions
- Log in to WHM. Use the address and root login from your welcome email. If you cannot find them, ask Hostvento support.
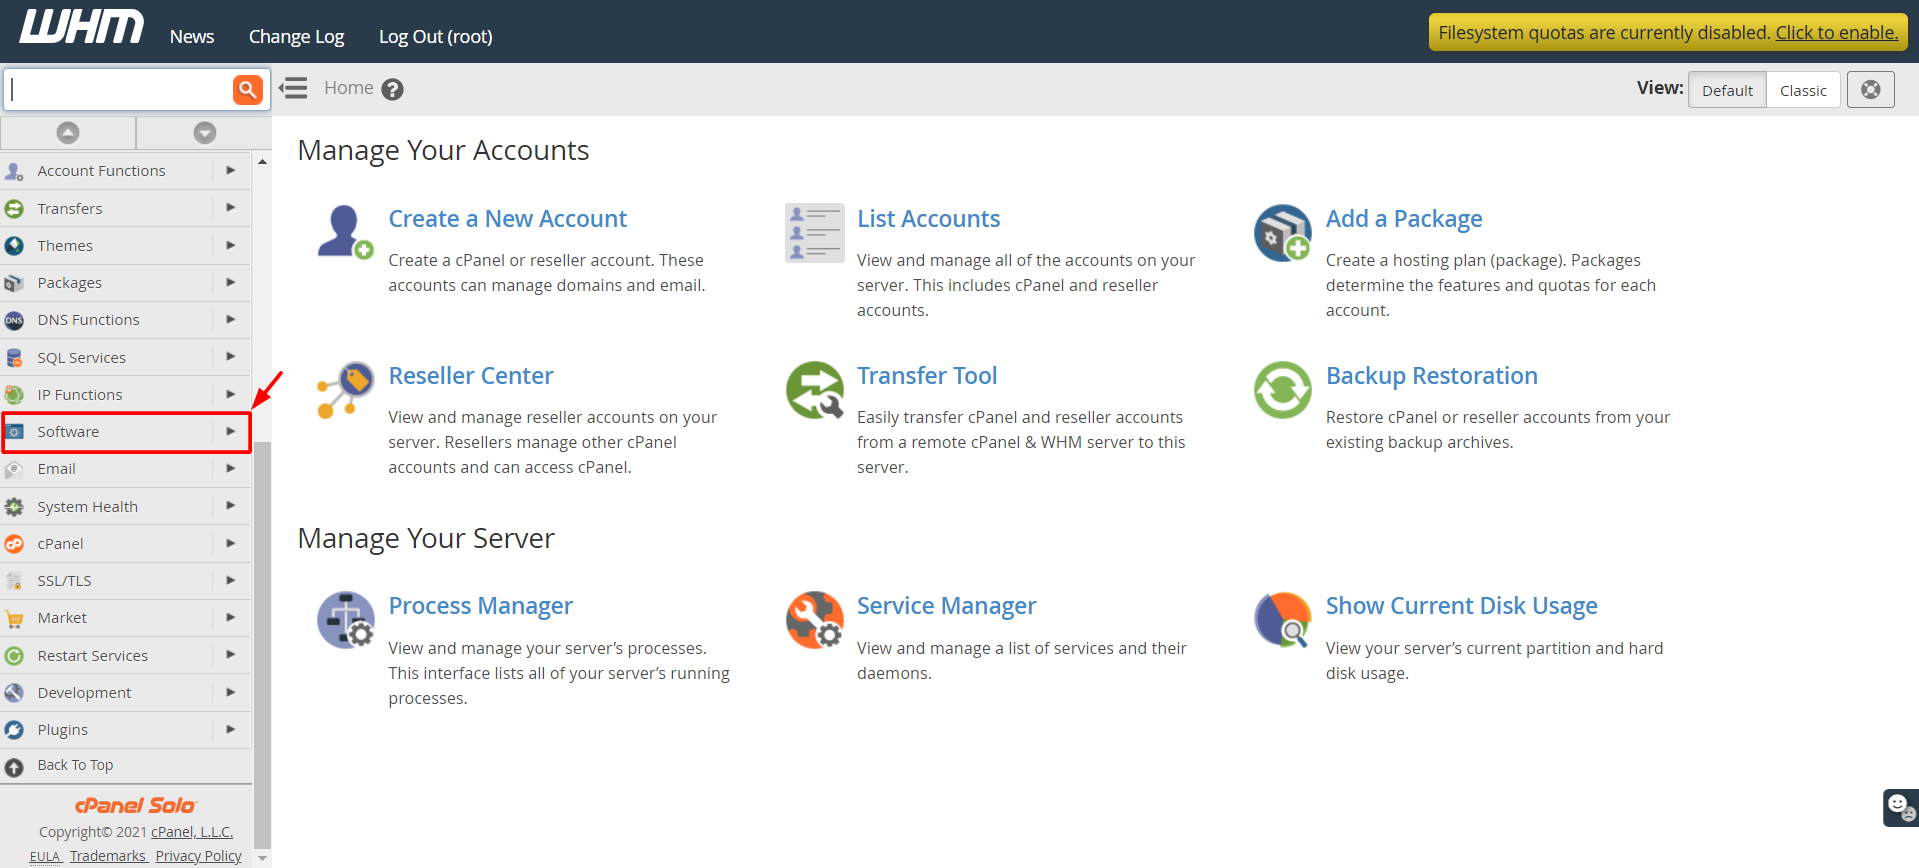
- In the search box on the left, type EasyApache 4. Open it.
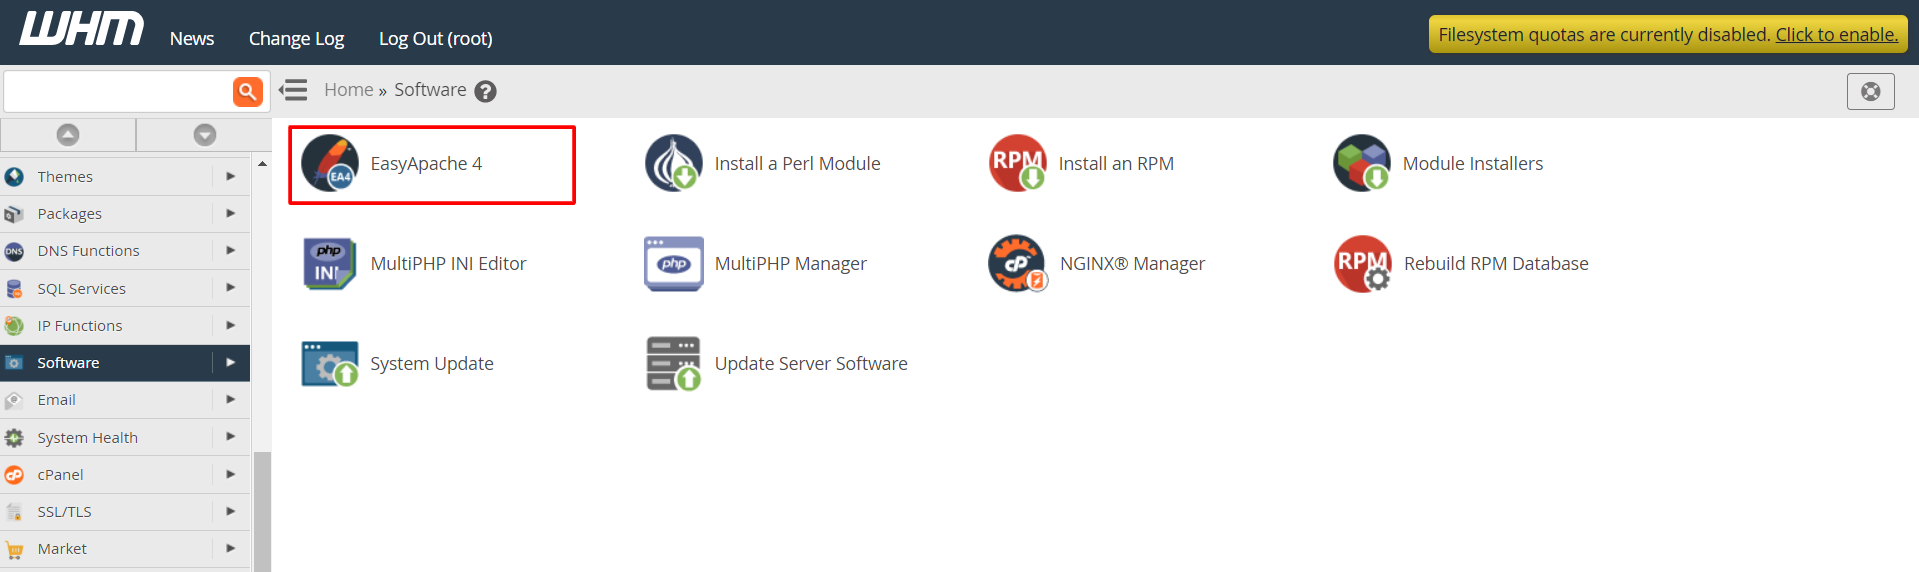
- Under Currently Installed Packages, click Customize.
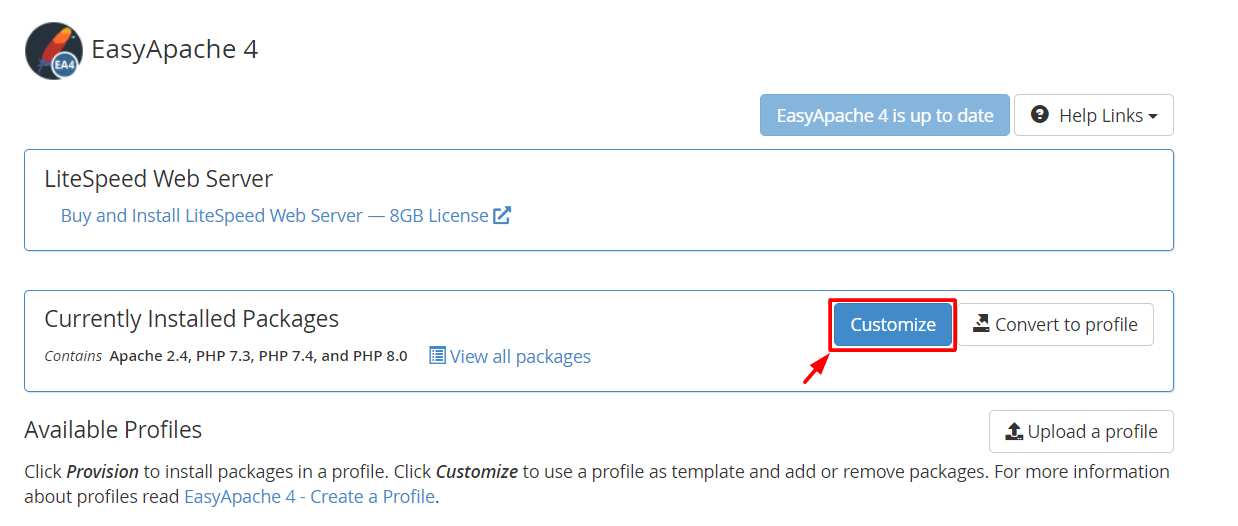
- Choose PHP Versions on the left.
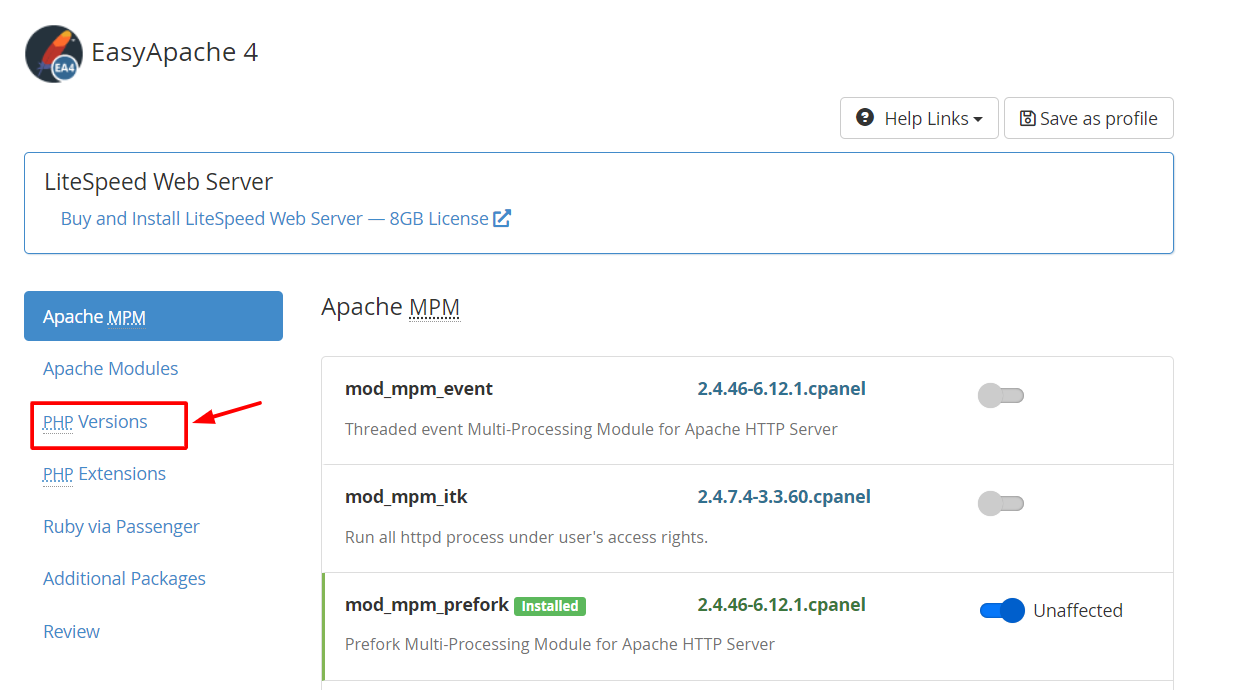
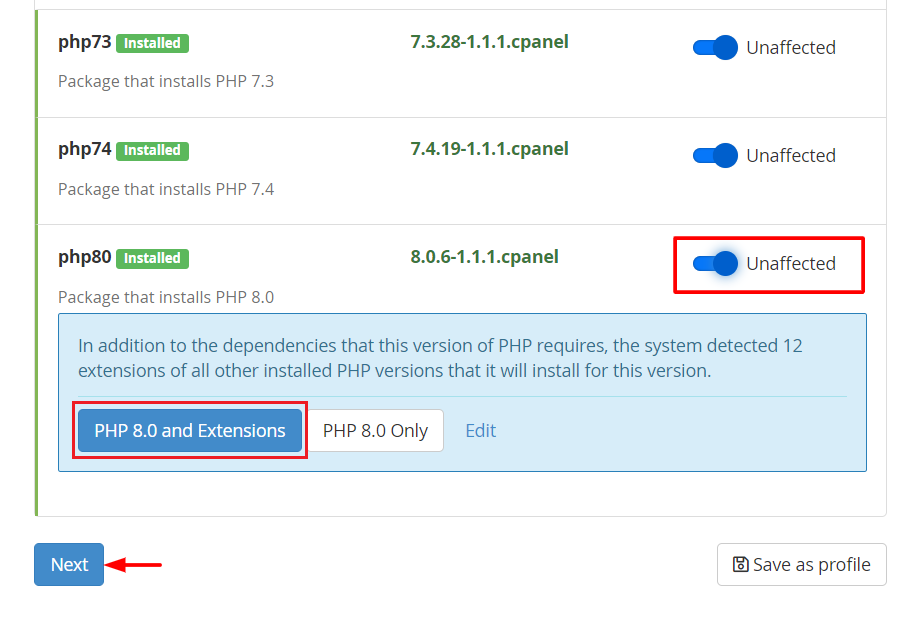
- Switch on each version you want, for example 8.1 and 8.2. Use only versions that are still supported.
- Click Next.
Add extensions
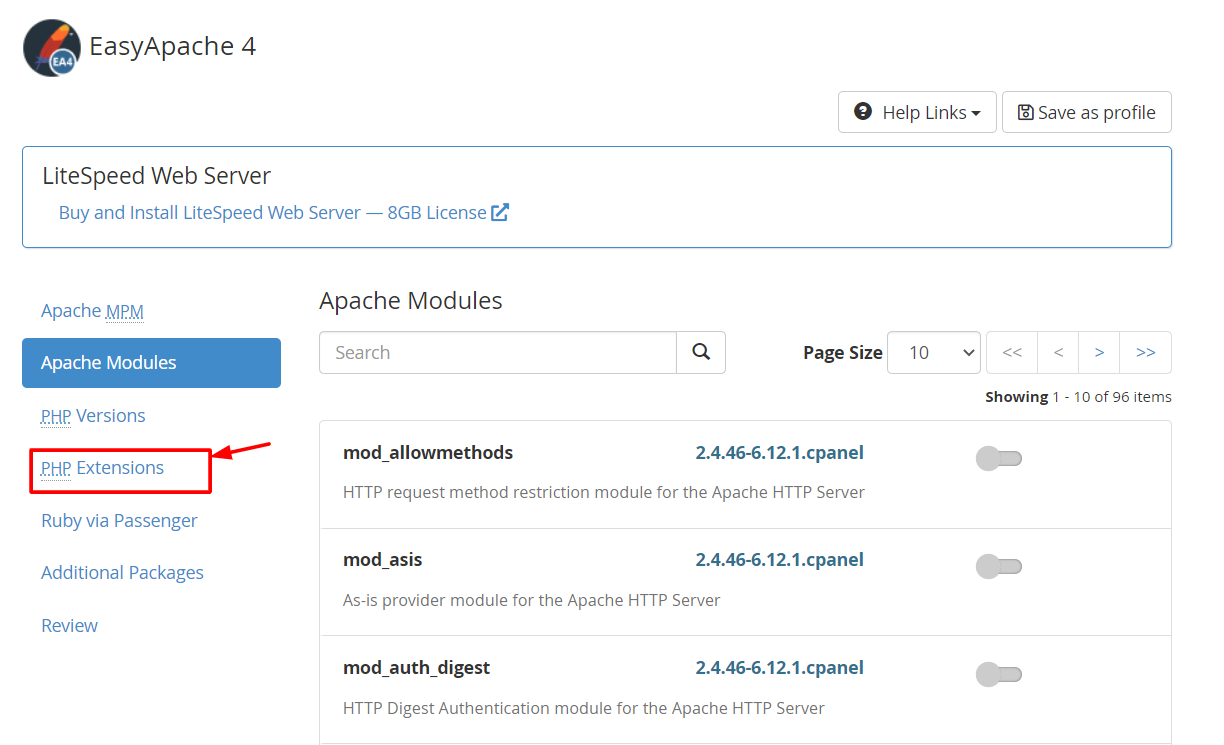
- Still in the customize screen, choose PHP Extensions.
- Find the extension you need, such as
imagick,intlorredis. A search box helps.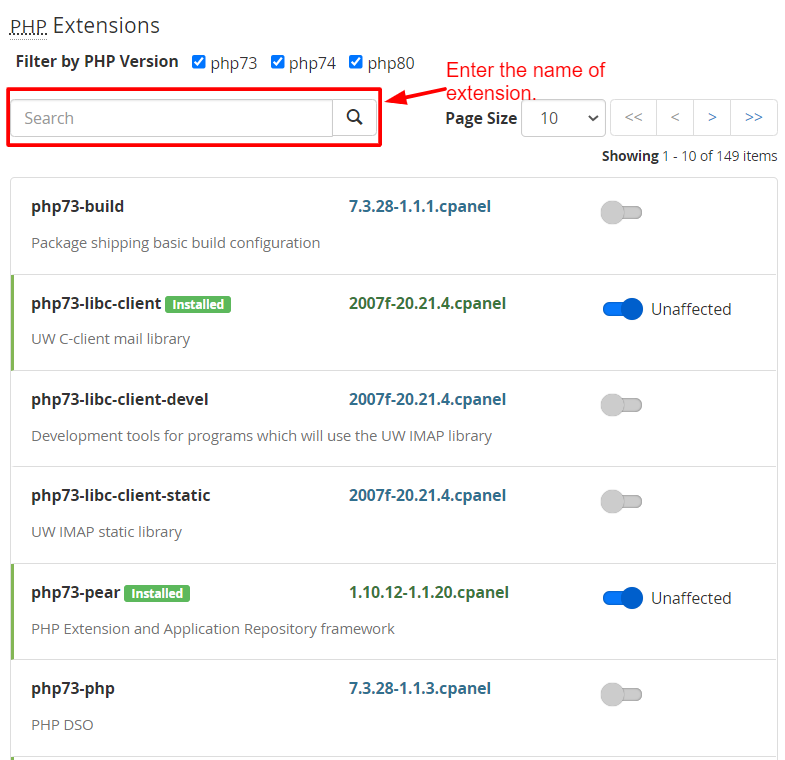
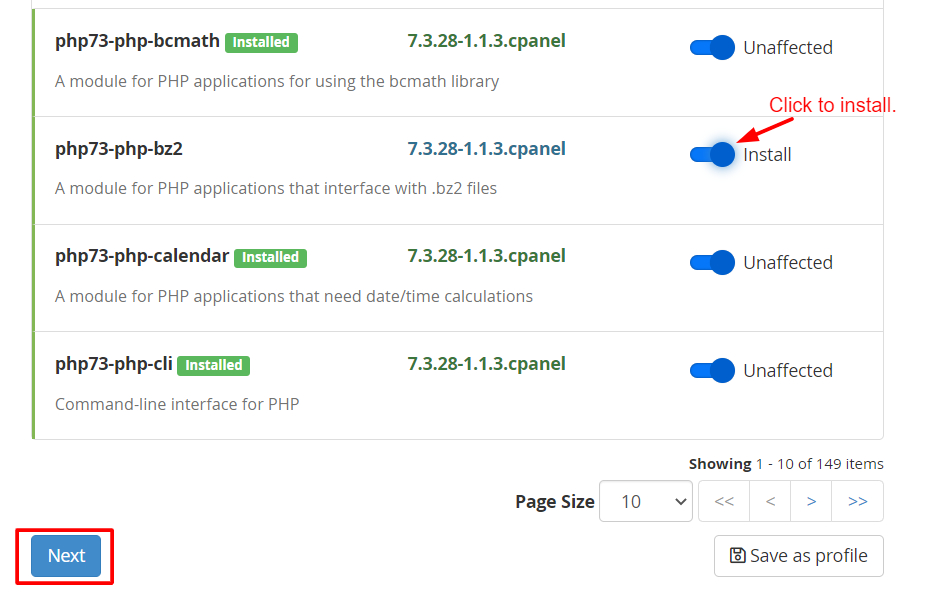
- Switch it on. The list is per PHP version, so repeat for each version.
- Click Next until you reach the review page.
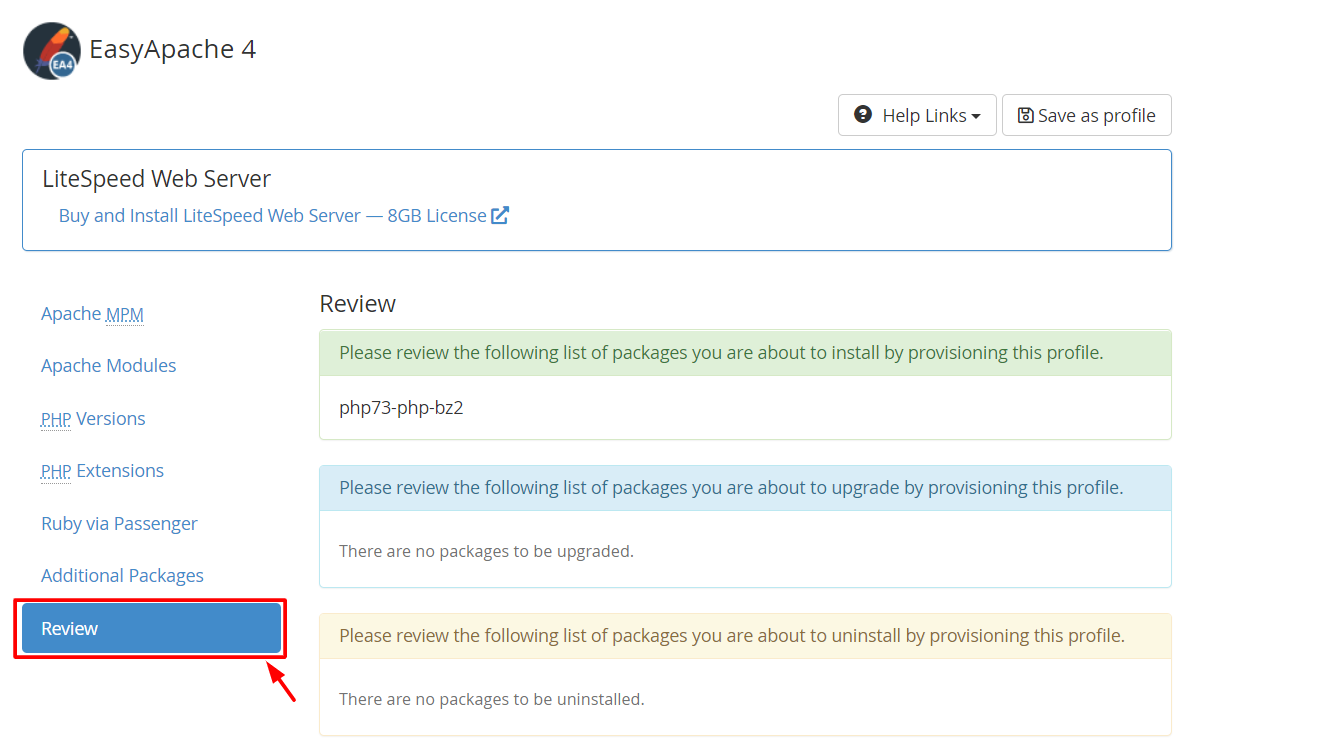
- Check your choices. Then click Provision.
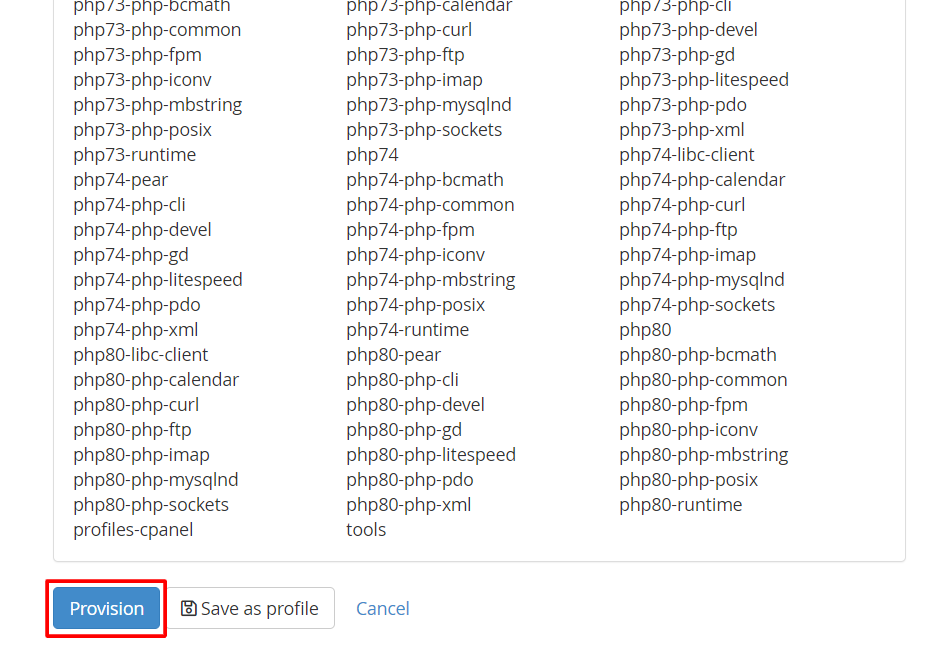
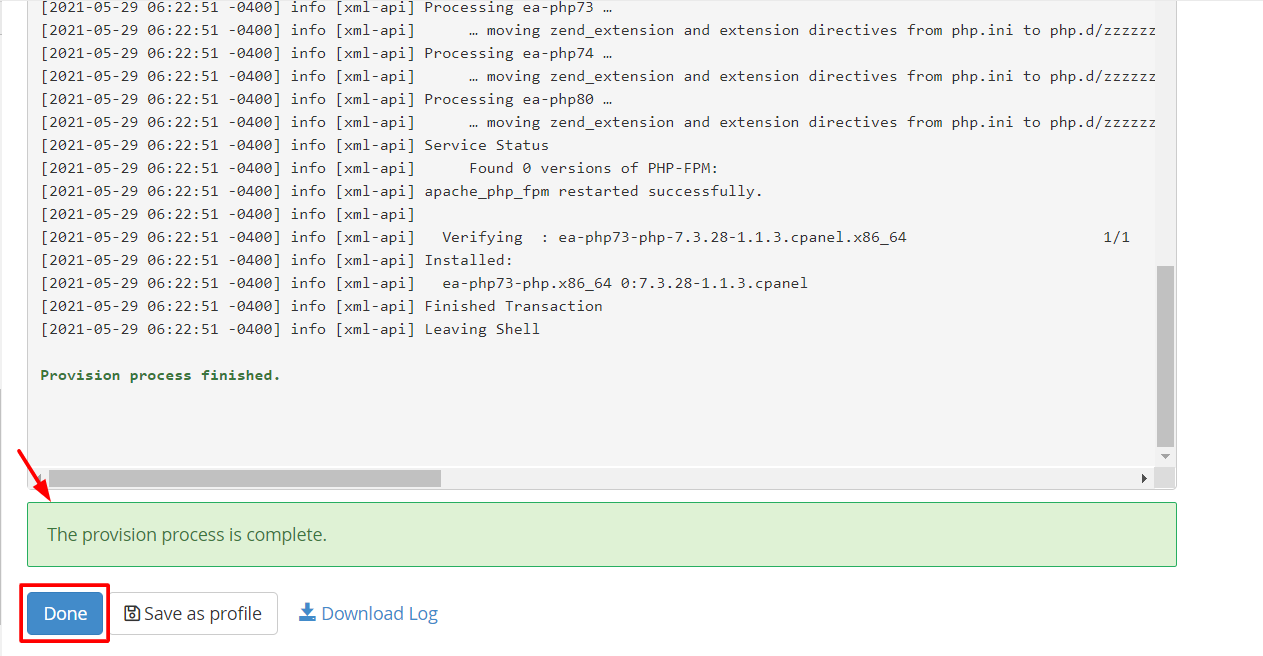
- Wait. The server builds the new packages. Do not close the page. It can take several minutes.
Warning: Provisioning restarts the web server. Sites may be down for a short time. Take a backup first and do it at a quiet hour.
Pick a version for a website
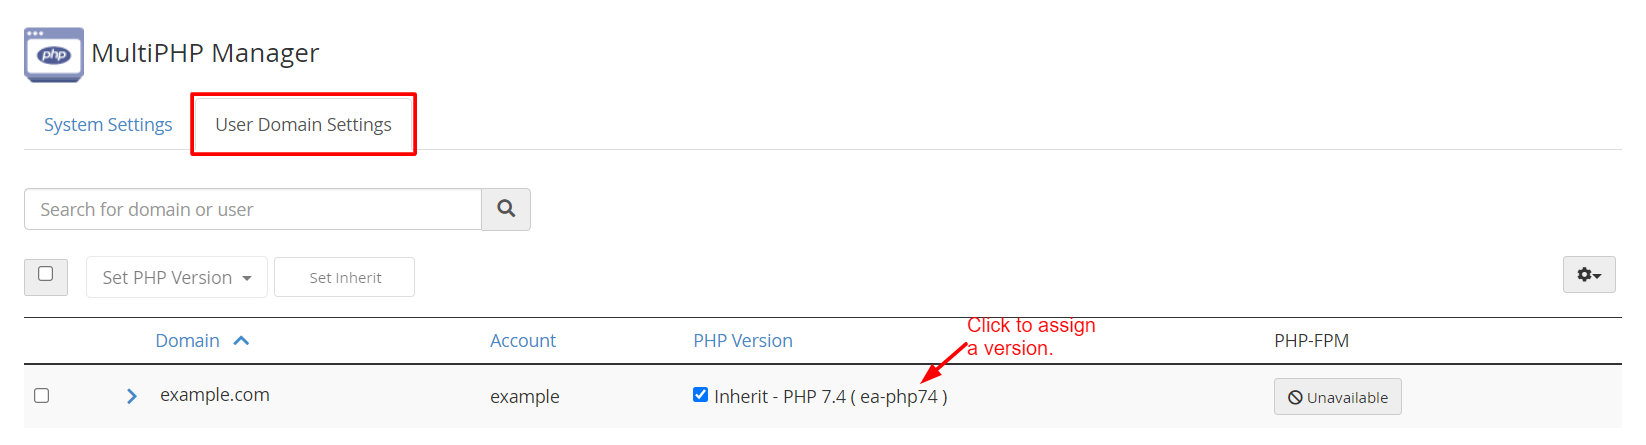
- In WHM, search for MultiPHP Manager and open it.
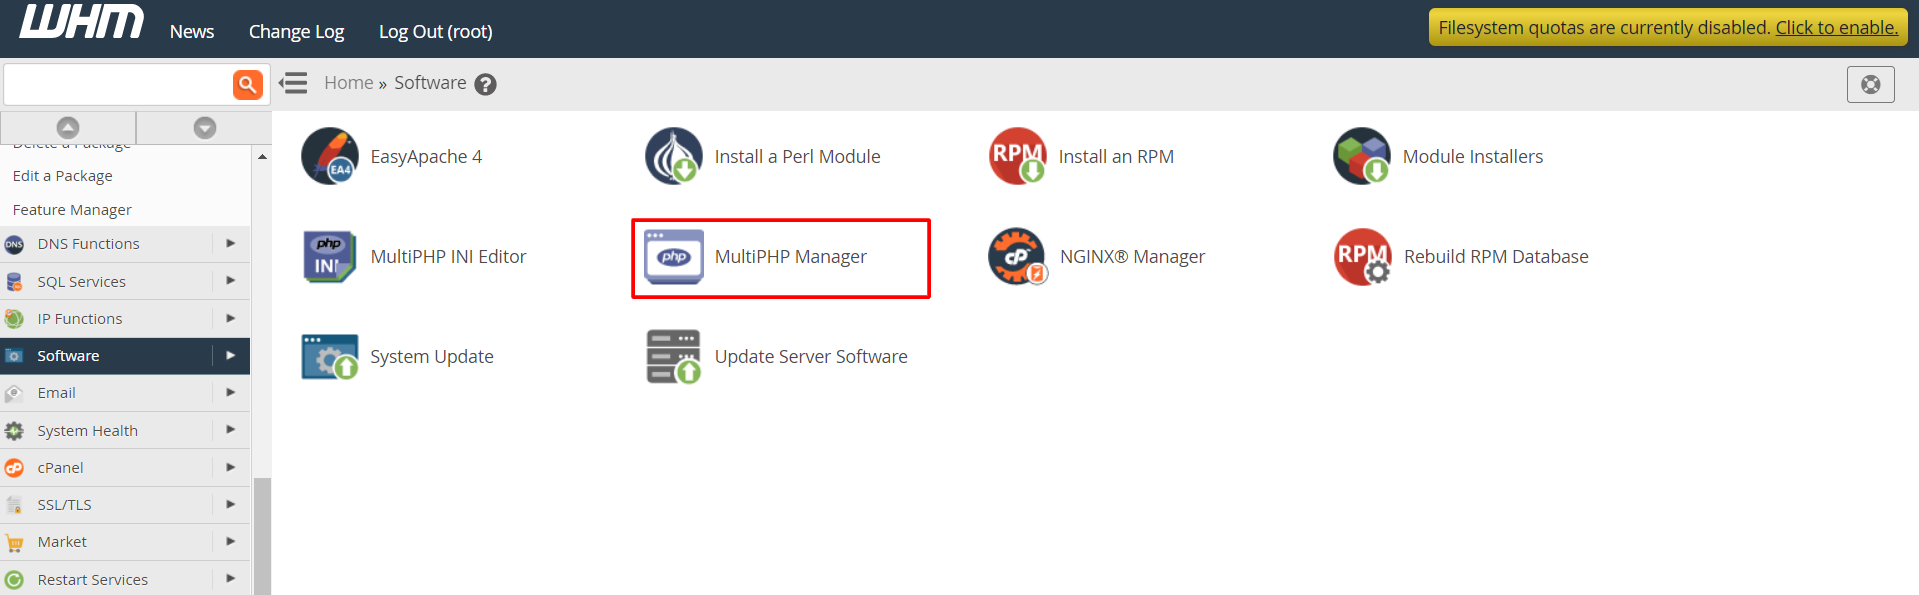
- Tick the domain you want to change.
- Choose the new PHP version from the list.
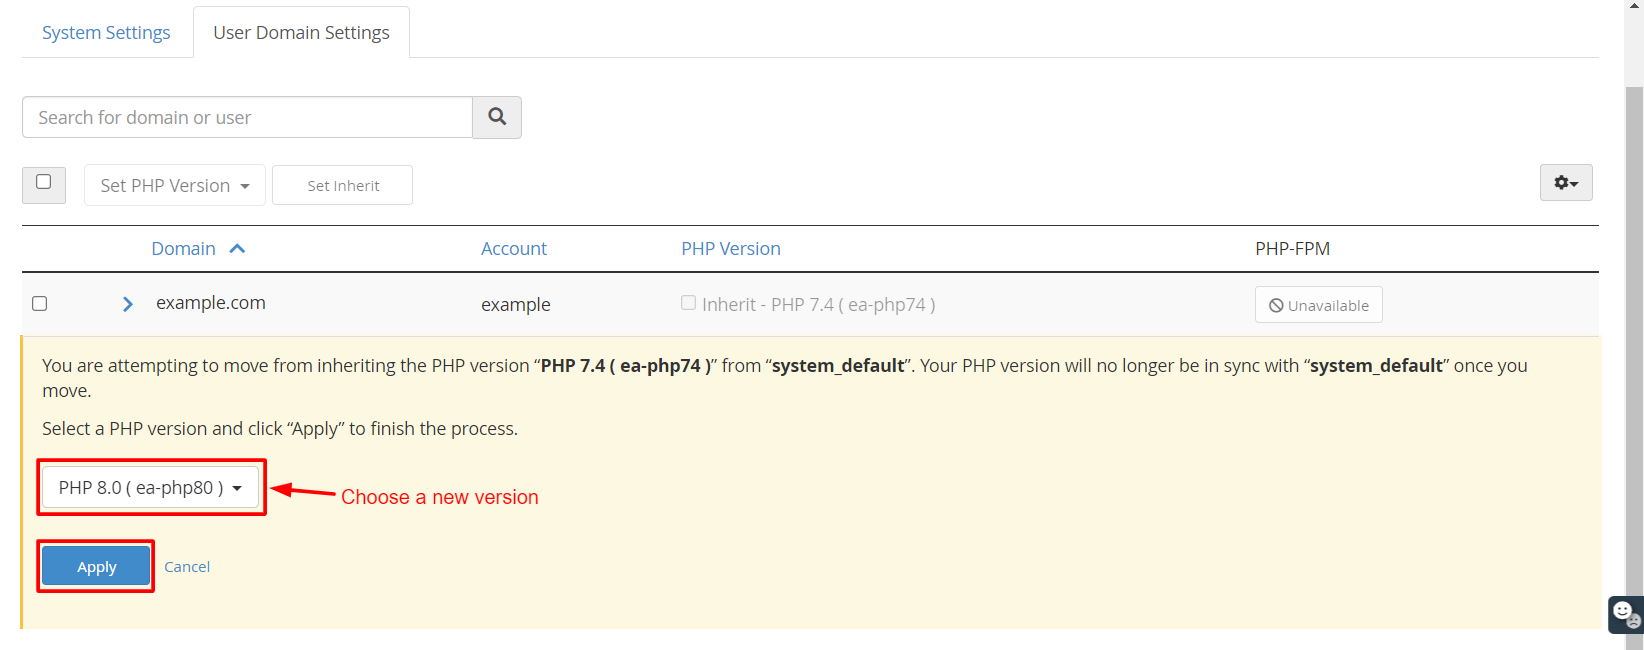
- Click Apply.
Test the site after the change. If it breaks, switch back to the old version.
Fine-tune settings
Search for MultiPHP INI Editor in WHM. It lets you change values like memory limit for each version.
Quick recap
- Use EasyApache 4 to install PHP versions and extensions.
- Provision to build them. The web server restarts.
- Use MultiPHP Manager to give each site its version.
- Back up first and test every site afterwards.