

What is Multisite?
WordPress Multisite lets one WordPress install run many websites. Think of an apartment building. There is one building, but many flats. Each site has its own content. They share the same WordPress files, plugins and themes. A group of sites like this is called a network.
You can set the sites up in two ways:
- Subdomains, like
blog.example.com. - Subdirectories, like
example.com/blog.
Subdirectories are only offered on a fresh WordPress install, or one that is not older than a month. Subdomains need an extra DNS step. DNS is the internet's phone book. A wildcard DNS record makes every subdomain point to your hosting. Ask Hostvento support if you need help.
Warning: this changes your core files. Take a full backup of files and database first. Also, turn off all plugins before you start.
Steps
- Log in to your WordPress dashboard.
- Go to Plugins, then Installed Plugins. Select all and choose Deactivate.
- Open File Manager in your hosting control panel, or connect with FTP.
- Open the file
wp-config.phpin your WordPress folder, and click Edit. - Just above the line that says "That's all, stop editing", add:
This turns on the network setup option.define( 'WP_ALLOW_MULTISITE', true ); - Save the file.
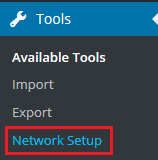
- Go back to the dashboard. Go to Tools, then Network Setup.
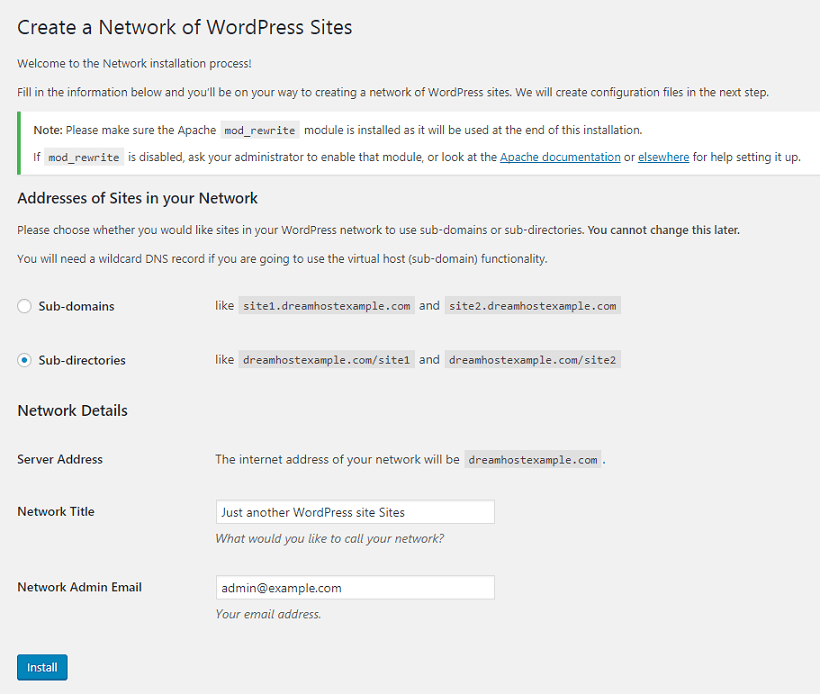
- Choose Sub-domains or Sub-directories.
- Type a Network Title, and check the admin email.
- Click Install.
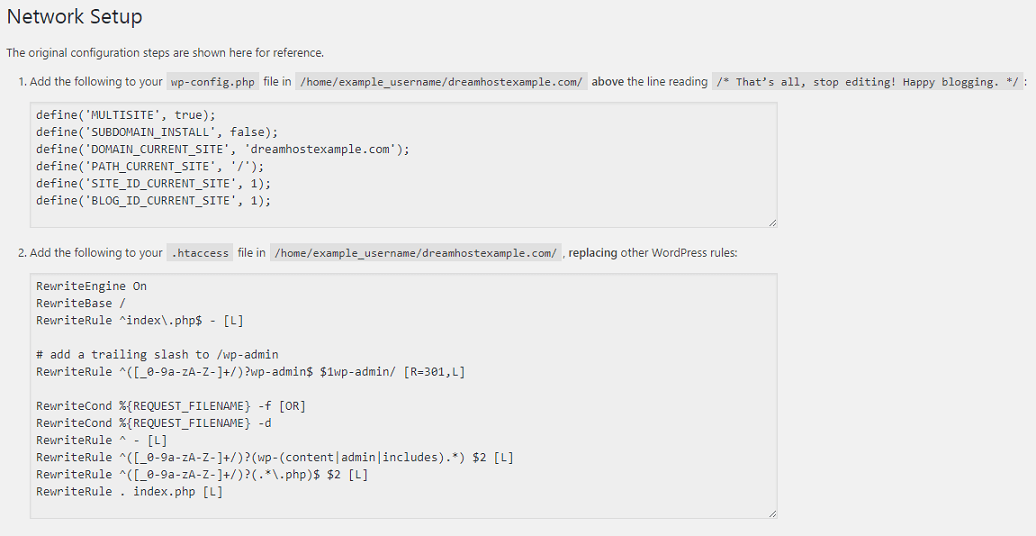
- WordPress shows two blocks of code. The first goes into
wp-config.php. The second goes into.htaccess. Copy each block and paste it exactly as told, replacing old lines when it says so. - Save both files.
- Log out, then log in again.
- Re-activate your plugins one by one. Check that the site still works.
The .htaccess file is hidden in some File Manager views. Look for a setting called Show Hidden Files.
Check the result
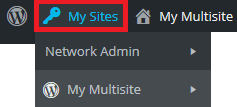
- In the top bar, hover over My Sites. You should see Network Admin.
- Click it, then go to Sites, then Add New Site to make your first extra site.
Quick recap
- Multisite runs many sites from one WordPress install.
- Back up and deactivate plugins first.
- Add
WP_ALLOW_MULTISITEtowp-config.php. - Use Tools, then Network Setup, and paste the two code blocks.
- Log in again and re-activate plugins.