

What is Google Tag Manager?
Google Tag Manager is a free tool from Google. It helps you add tracking codes to your site in one place. A tracking code is a small piece of code that counts visitors or watches clicks. Each code is called a tag.
Think of it as a box with a single plug. You plug the box into your site once. After that you add or remove tags inside the box, without touching your site again.
Before you start
- Go to the Google Tag Manager website and sign in with a Google account.
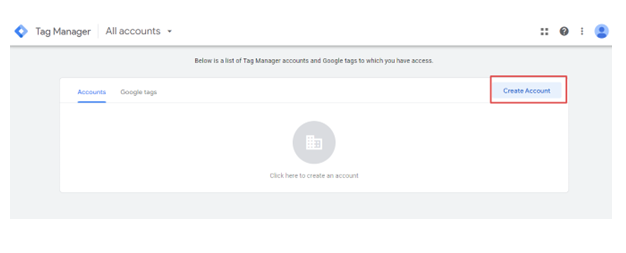
- Click Create Account.
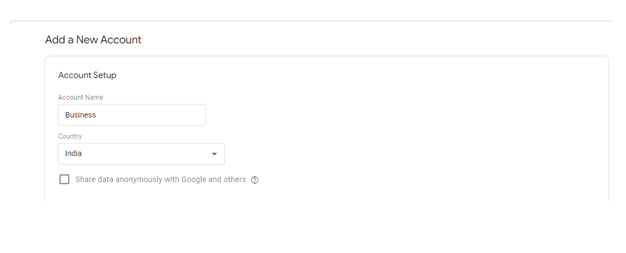
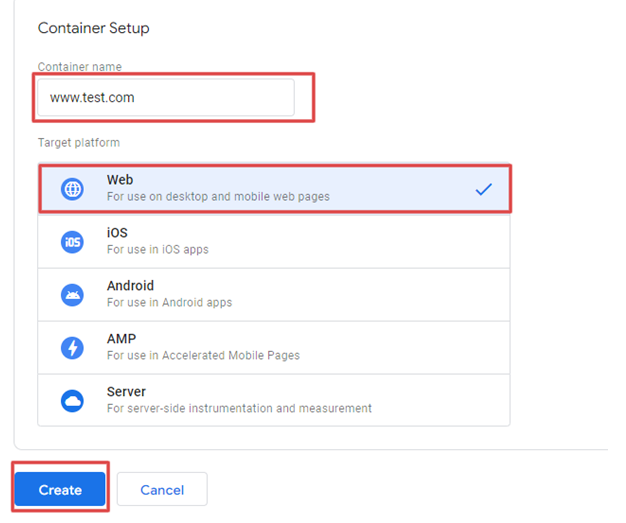
- Type an account name and your website address. Choose Web as the target.
- Accept the terms.
- Copy your container ID. It starts with
GTM-, for exampleGTM-XXXXXX.
Add it with a plugin
A plugin is an add-on for WordPress. This is the safest way for beginners.
- Log in to your WordPress dashboard.
- Go to Plugins and click Add New.
- Search for Google Tag Manager. Pick a well-reviewed plugin that was updated recently.
- Click Install Now and then Activate.
- Open the plugin's settings. Look under Settings or in the new menu it adds.
- Paste your container ID in the box.

- Click Save Changes.
Check that it works
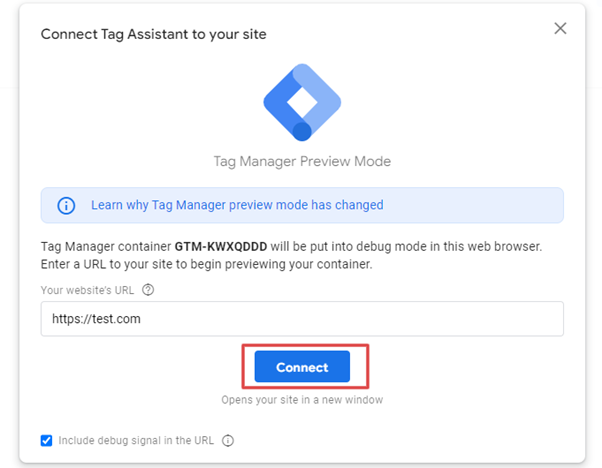
- Go back to Tag Manager and click Preview.
- Type your site address and click Connect.

- Your site opens in a new tab. If the container loads, the setup is correct.
Add it by hand (advanced)
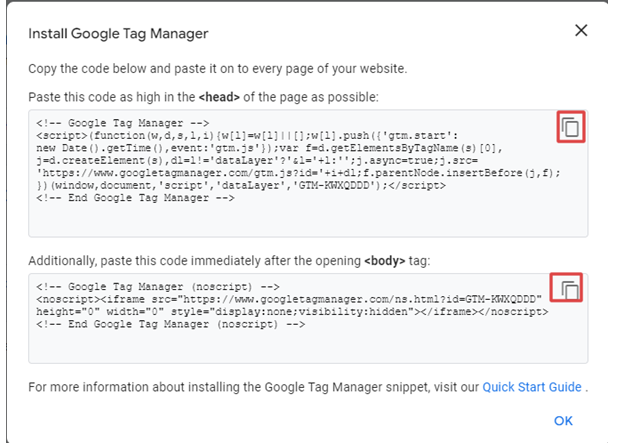
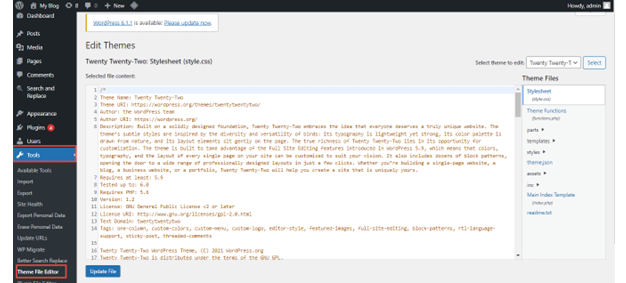
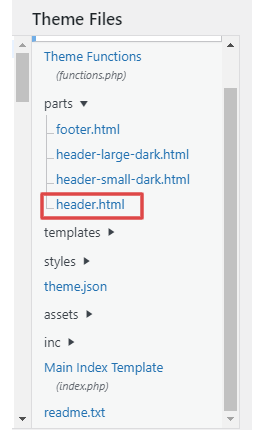
Tag Manager gives you two pieces of code. One goes as high as possible inside the <head> of every page. The other goes right after the opening <body> tag. Many themes have a place for header and footer code. Back up your site before editing theme files. A small typo can break the site.
Tip: Do not add the same container twice. It will count every visit double.
Quick recap
- Tag Manager holds your tracking codes in one place.
- Create a container and copy the
GTM-ID.
- Paste the ID into a Tag Manager plugin and save.
- Use Preview to test.