

What is this about?
A database is where WordPress stores your users, posts and settings. Think of it as a big filing cabinet. phpMyAdmin is a tool that lets you open that cabinet and look inside. You find it in cPanel, the control panel for your hosting.
An administrator is a user with full power over the site. Use this method only if you cannot log in any other way. Try the "Lost your password?" link first.
Warning: a wrong change can break your site. Take a backup of the database first. In phpMyAdmin, click Export and then Go to save a copy.
Steps
- Log in to your client area at https://secure.hostvento.com/clientarea.php and open cPanel from your hosting service.
- Click phpMyAdmin in the Databases section.
- Click your WordPress database on the left. If you are not sure which one, check
DB_NAMEin thewp-config.phpfile.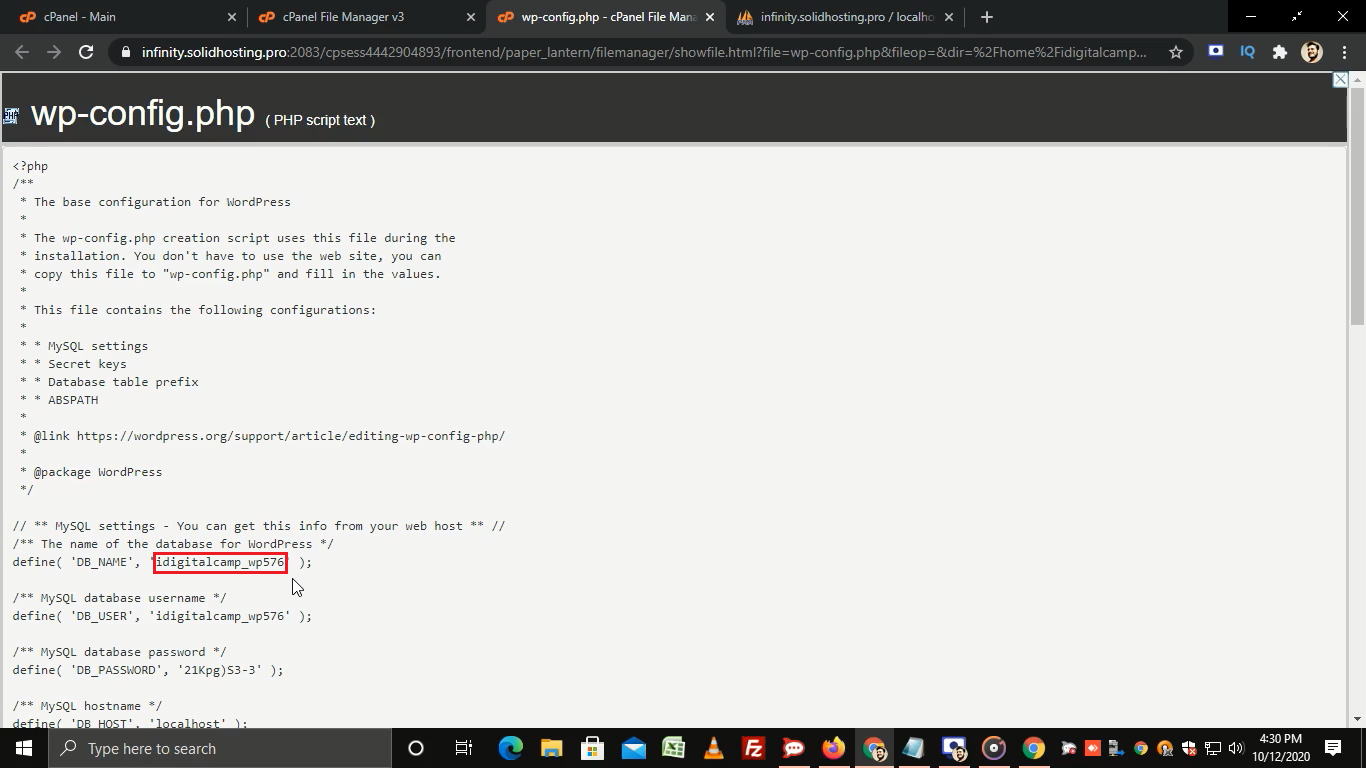
- Click the table
wp_users. Your prefix may differ fromwp_.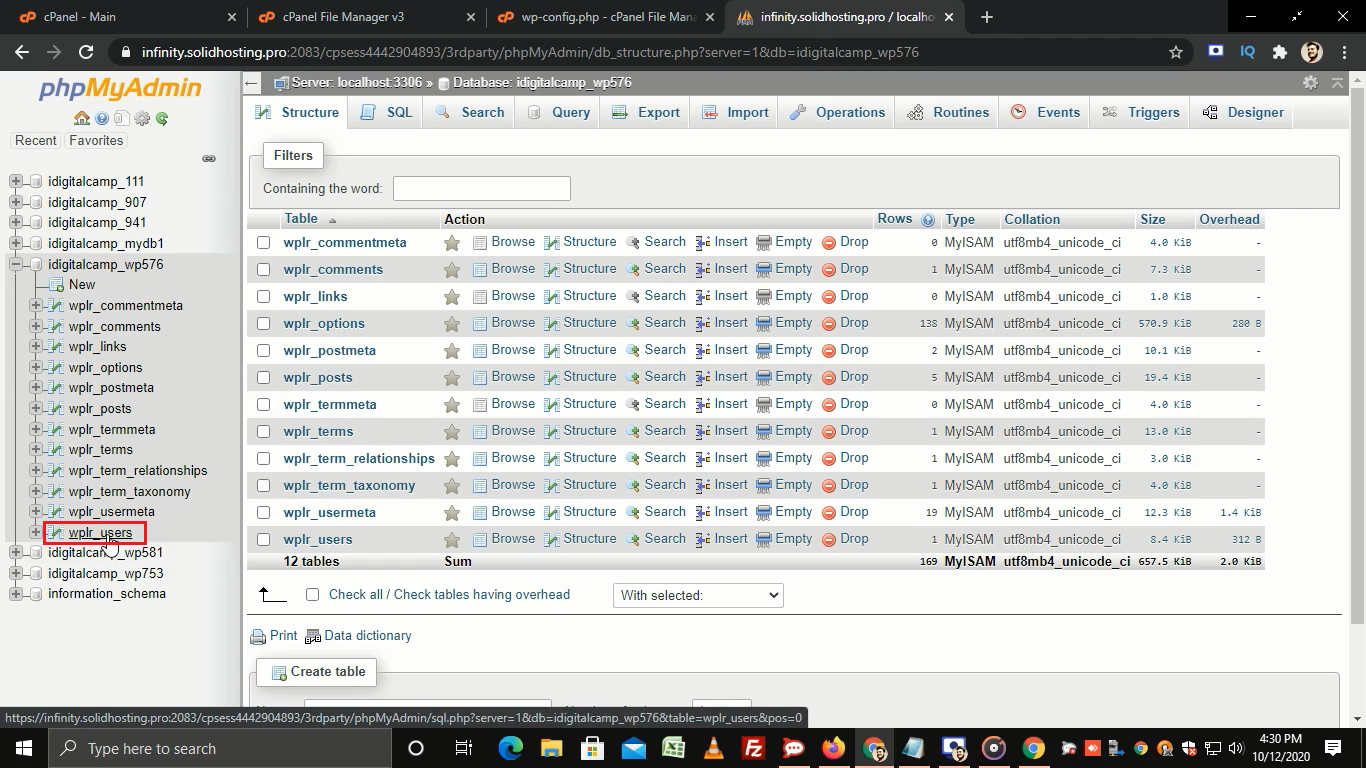
- Click the Insert tab.
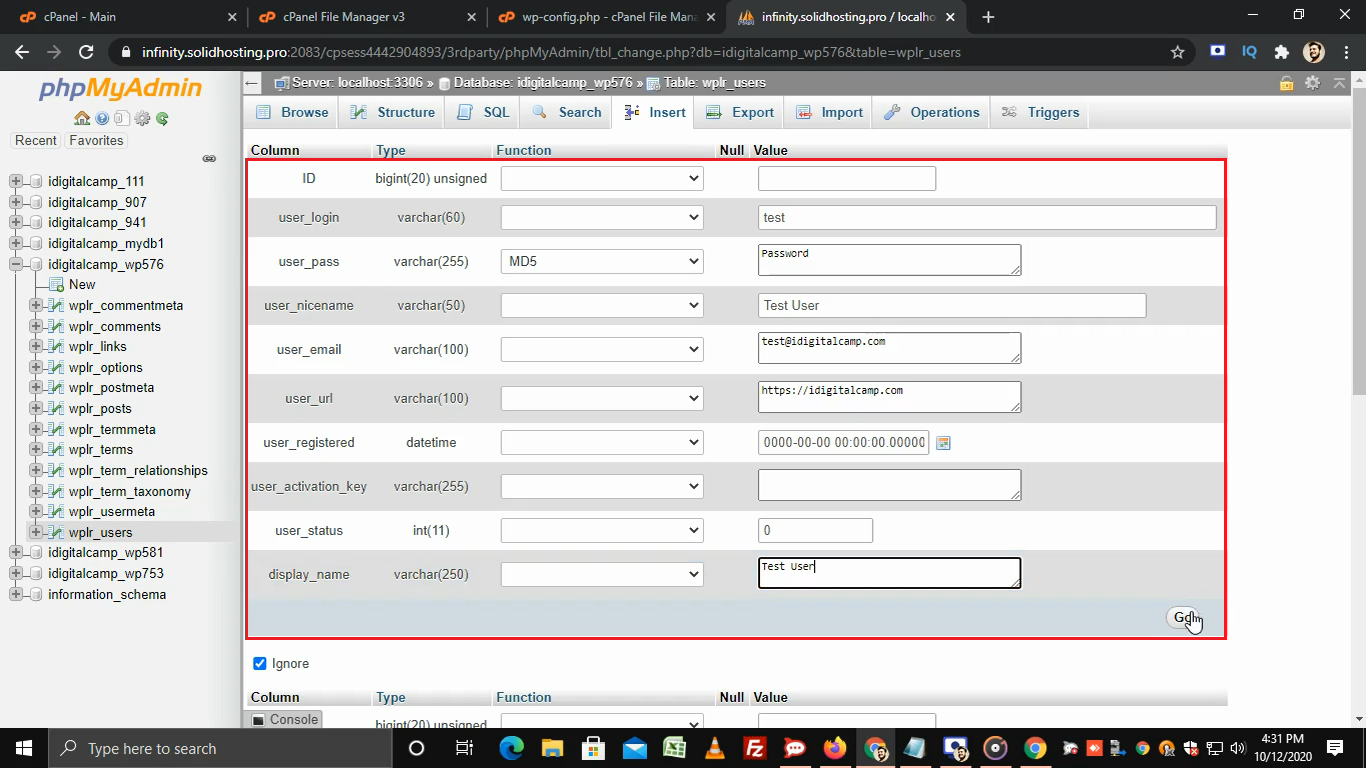
- Fill in these fields:
user_login: the new usernameuser_pass: a password. Pick MD5 in the Function drop-down beside it.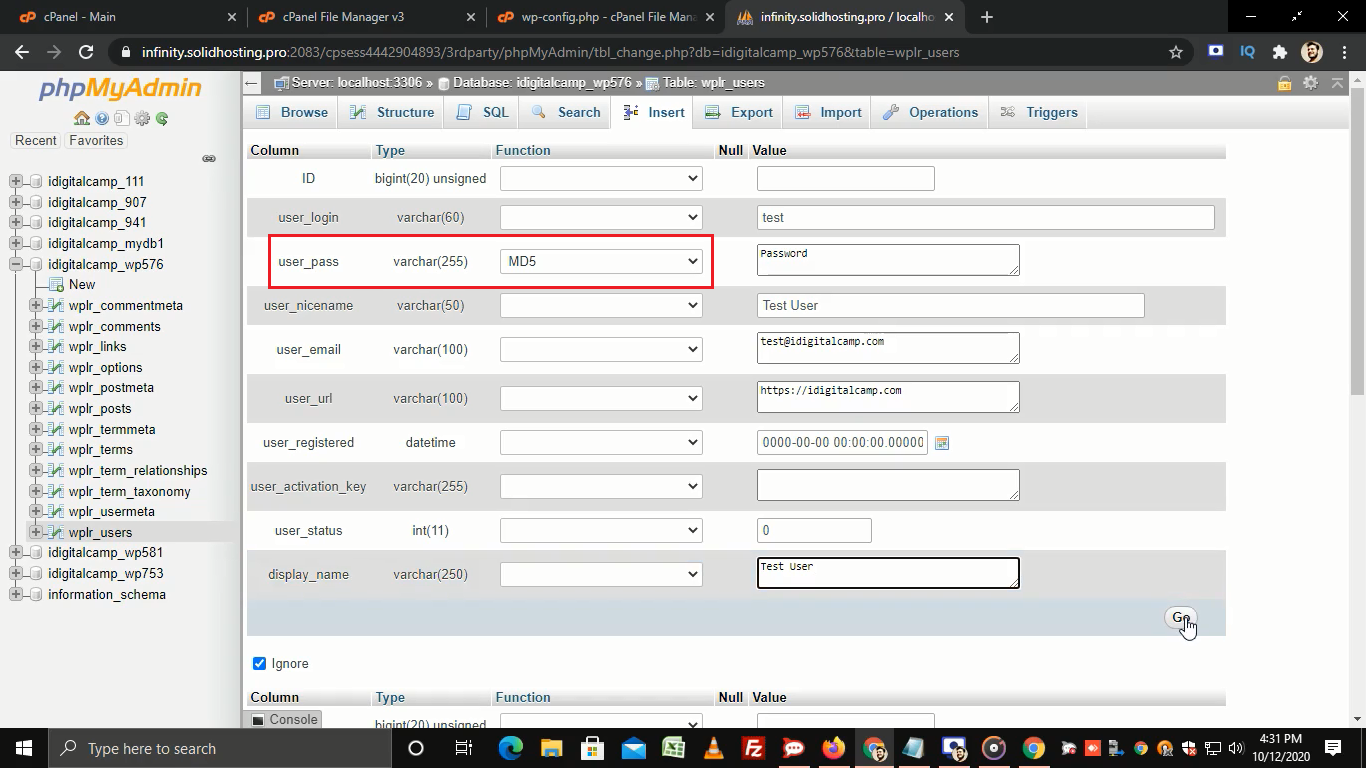
user_nicename: the same as the usernameuser_email: your email addressuser_status: 0display_name: the name to show
- Click Go. Note the new
IDnumber shown for the user. - Open the table
wp_usermetaand click Insert. - Add the first row:
user_idis your new ID,meta_keyiswp_capabilities, andmeta_valueis:a:1:{s:13:"administrator";b:1;}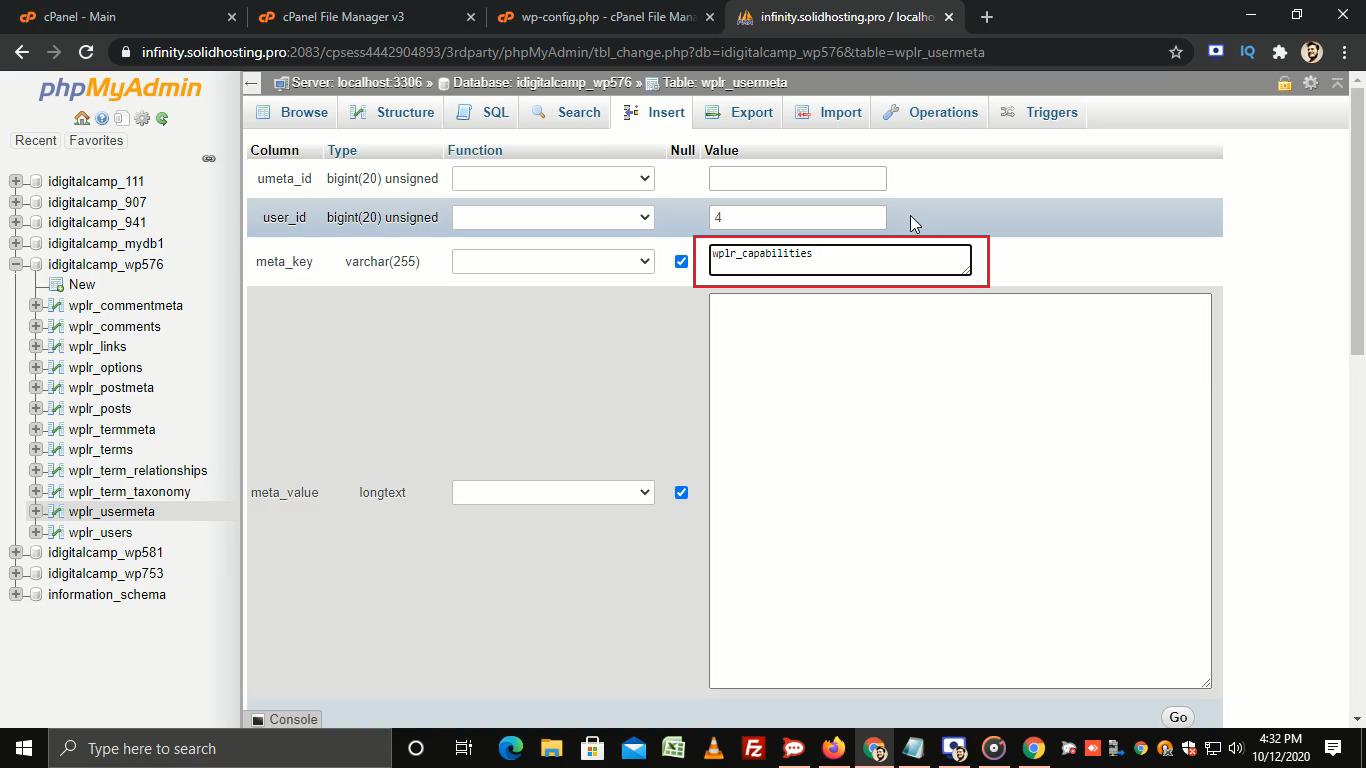
- Click Go, then insert a second row:
user_idis your new ID,meta_keyiswp_user_level, andmeta_valueis10.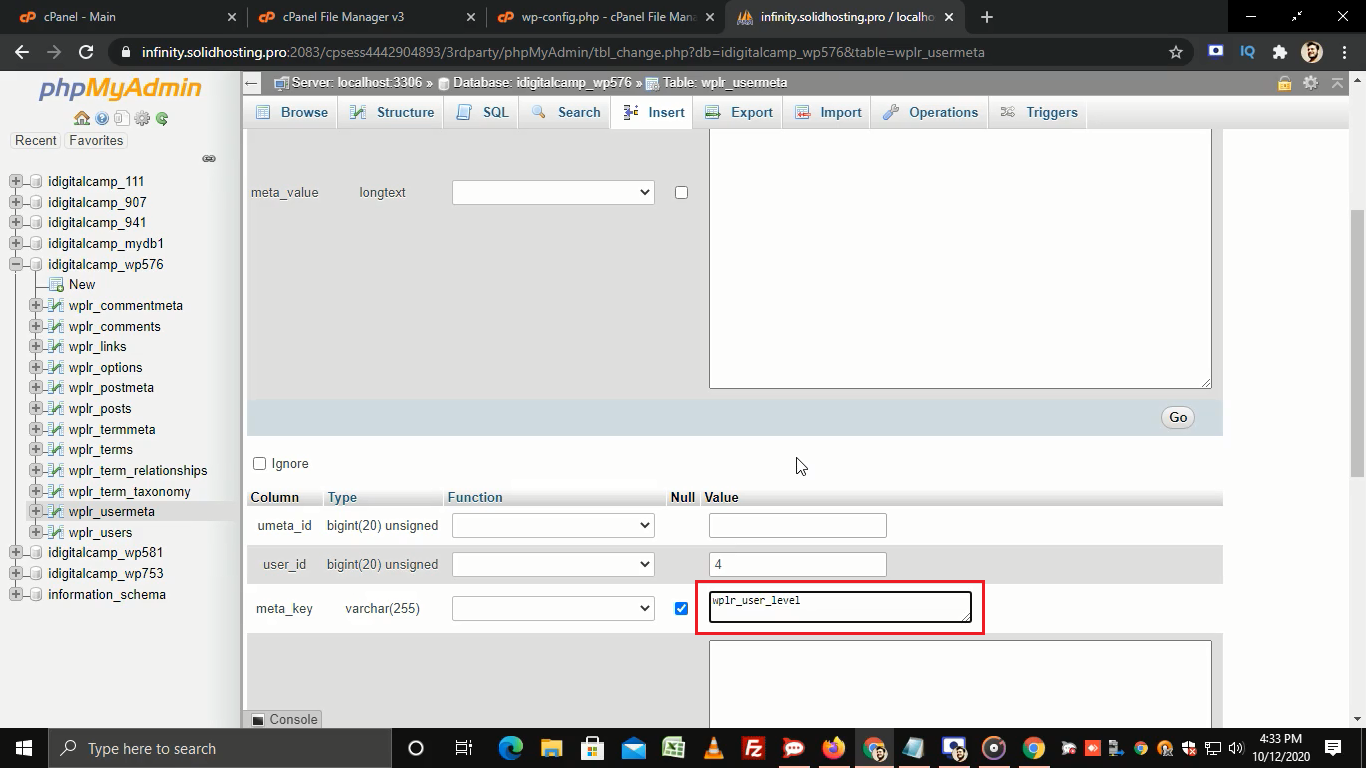
- Click Go. Log in with the new username and password.
If your table prefix is not wp_, use your own prefix in the meta_key names.
Tip: After you log in, change your password in the dashboard. WordPress then stores it in a stronger form than MD5.
Quick recap
- Back up the database before you change it.
- Add a row to the users table with a new username and an MD5 password.
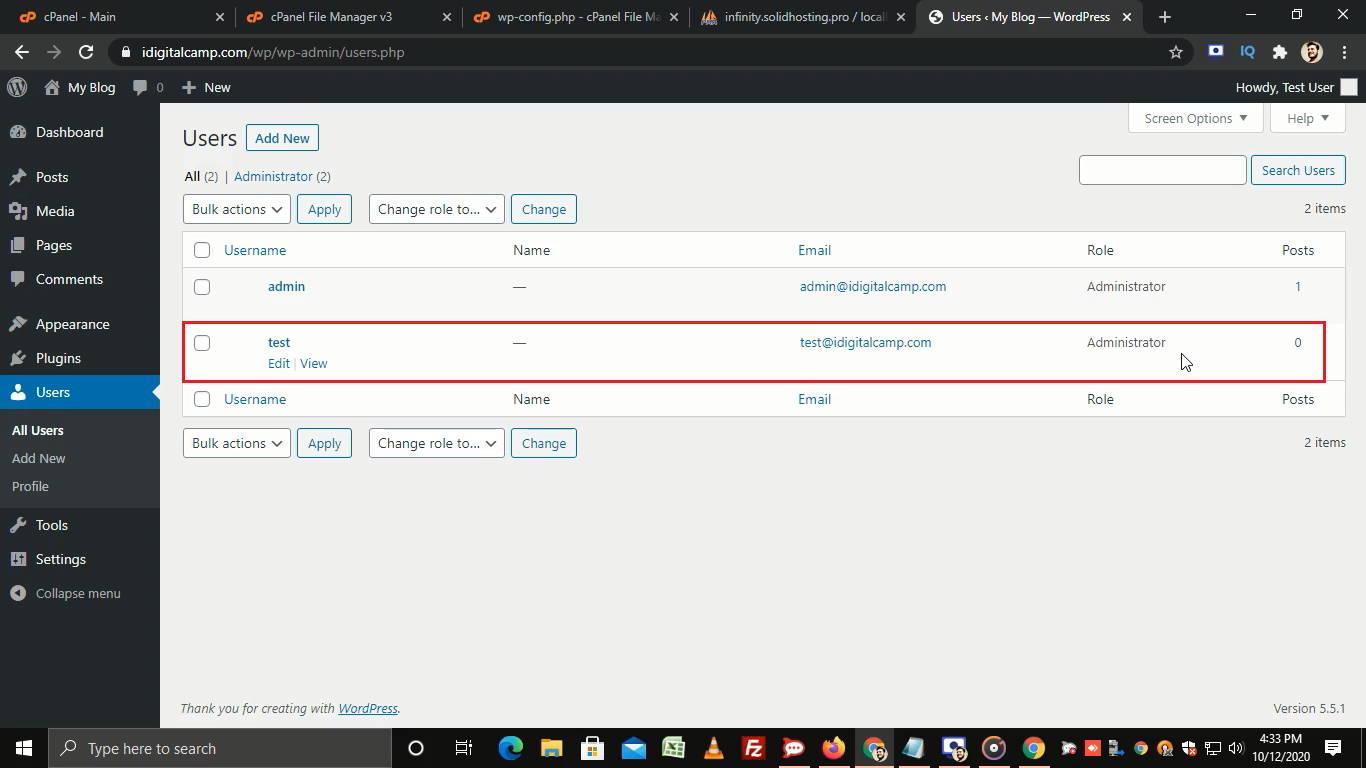
- Add the capability and level rows in the usermeta table.
- Log in, then set a new strong password.