

What is WordPress?
WordPress is free software for building websites and blogs. You write posts in a simple editor, and WordPress shows them on your site. It works like a ready-made house. You only choose the furniture.
To use it, you install it on your hosting account. There are two ways. The easy way uses an auto-installer in your control panel. The manual way uses files and a database.
What you need
- A hosting account with a domain name pointing to it.
- Your control panel login. You can find it in your welcome email, or in your client area at https://secure.hostvento.com/clientarea.php.
Easy way: use the auto-installer
Many control panels include an auto-installer such as Softaculous. Ask Hostvento support if it is on your plan.
- Log in to your hosting control panel.
- Find the auto-installer section and click WordPress.
- Click Install.
- Choose your domain. Leave the folder box empty if you want the blog on the main address.
- Type a site name and a short description.
- Pick an admin username and a strong password. Write them down safely.
- Enter your email address.
- Click Install and wait until it finishes.
Manual way
- Download the newest WordPress ZIP file from the official WordPress website, wordpress.org.
- In your control panel, open File Manager and go to
public_html. - Click Upload and add the ZIP file.
- Right-click the ZIP file and choose Extract. Move the files out of the
wordpressfolder intopublic_html. - Open MySQL Databases in the control panel. A database is where WordPress stores your posts.
- Create a database, then create a user with a strong password.
- Add the user to the database with all privileges.
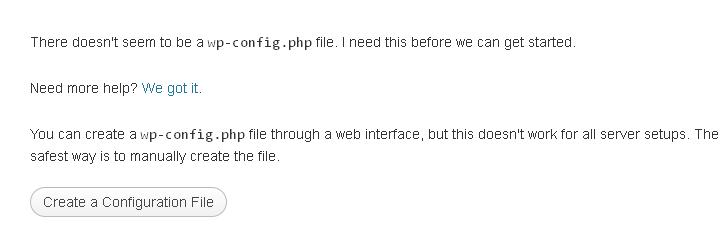
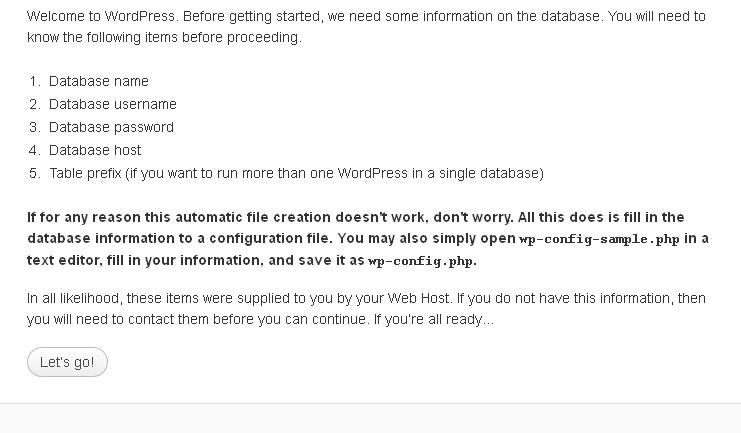
- Visit your domain in the browser. The WordPress setup screen appears.
- Enter the database name, user, password, and keep the host as
localhost.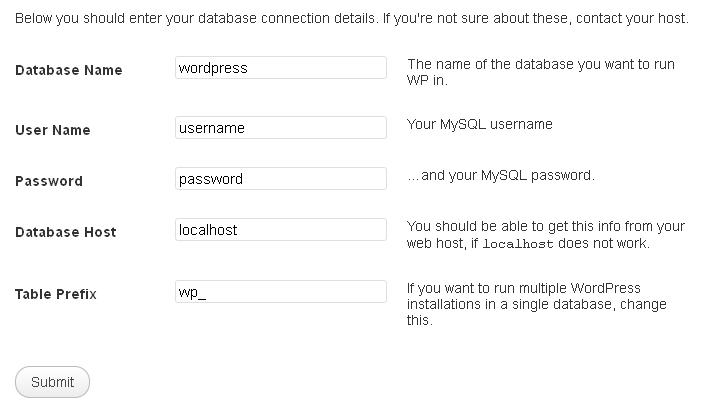

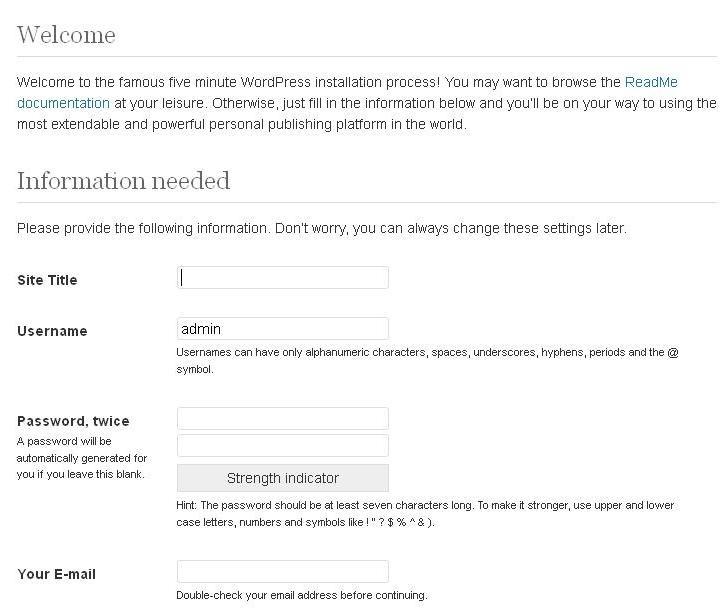
- Follow the screens to set the site title and your admin login.
Log in to your new blog
- Go to
yourdomain.com/wp-admin. - Enter your admin username and password.
- You will see the dashboard. Click Posts, then Add New to write your first post.
Tip: If a domain is new, it may take some time to point to your hosting. If anything fails, open a ticket at https://secure.hostvento.com/submitticket.php.
Quick recap
- WordPress is free software for blogs and sites.
- An auto-installer is the fastest way to install it.
- The manual way needs files plus a database.
- Log in at yourdomain.com/wp-admin to start writing.