

What are shipping zones?
WooCommerce is a plugin that turns WordPress into an online shop. A shipping zone is an area of the world where you ship, such as one country or a few states. You make a zone and then add shipping methods to it. A shipping method is a way of charging, such as a flat fee.
Steps to add a shipping zone
- Log in to your WordPress dashboard.
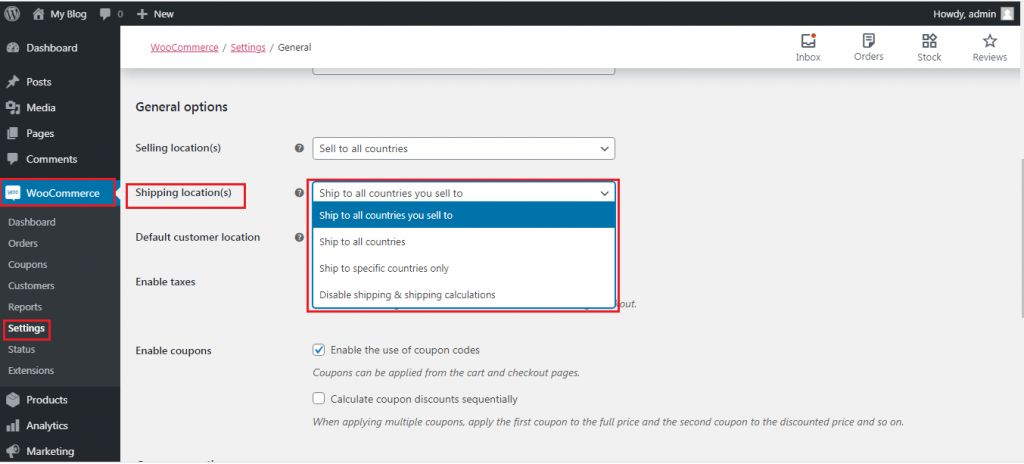
- Go to WooCommerce and then Settings.
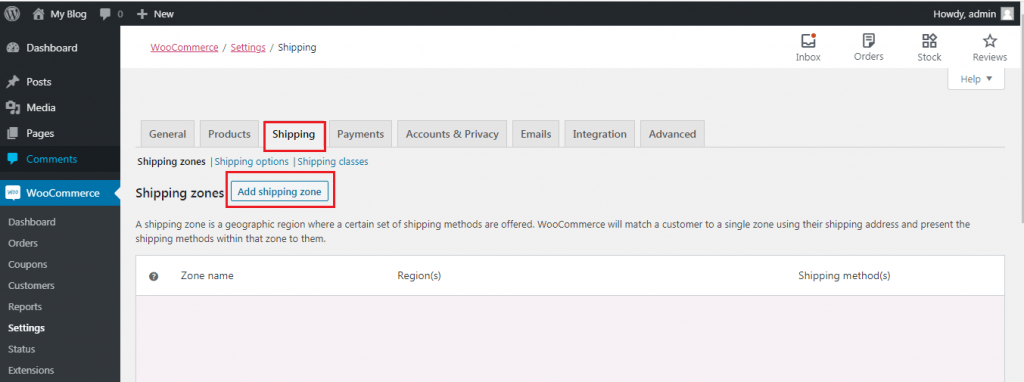
- Click the Shipping tab.
- Click Add shipping zone.
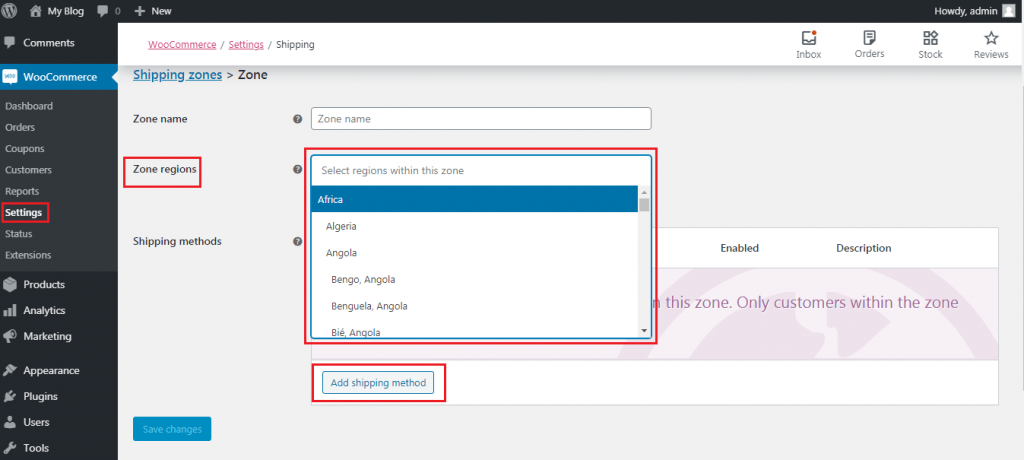
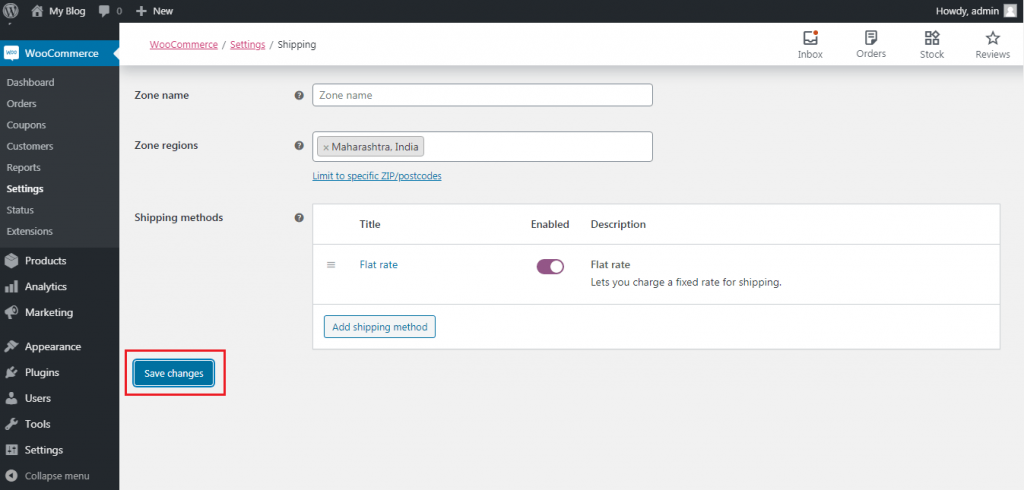
- Type a name for the zone, for example "Home country".
- In Zone regions, pick the countries or regions it covers.
- Click Add shipping method.
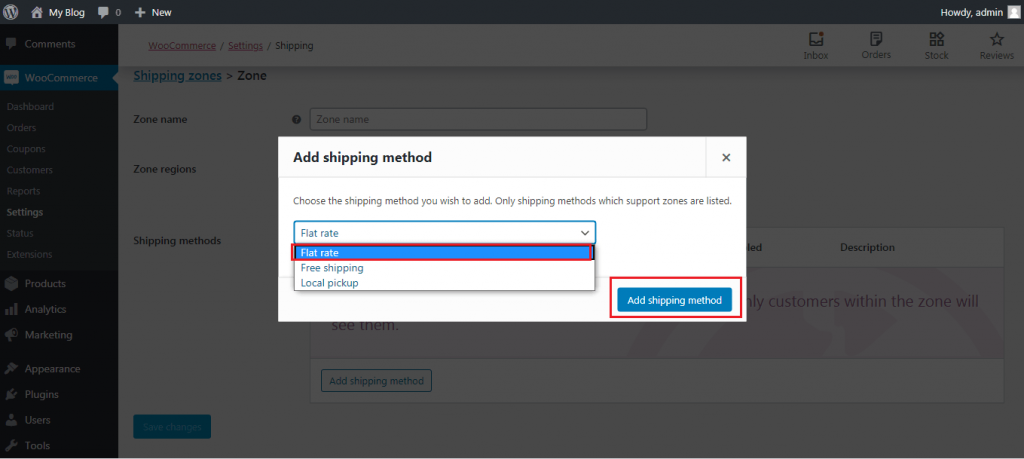
- Choose a method and click Add shipping method again.
- Click Save changes.
The common shipping methods
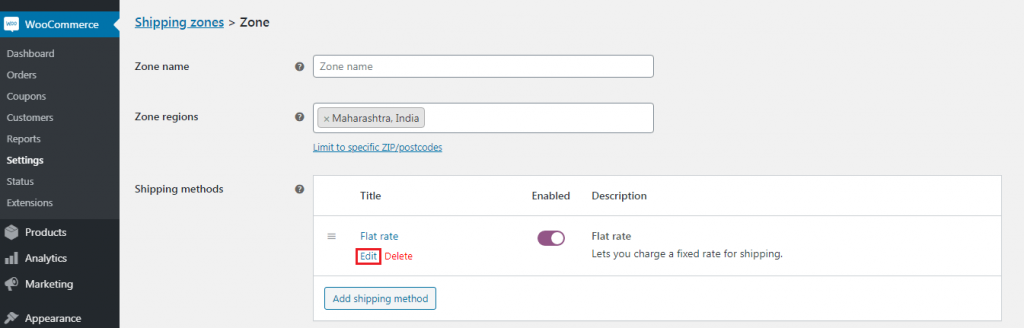
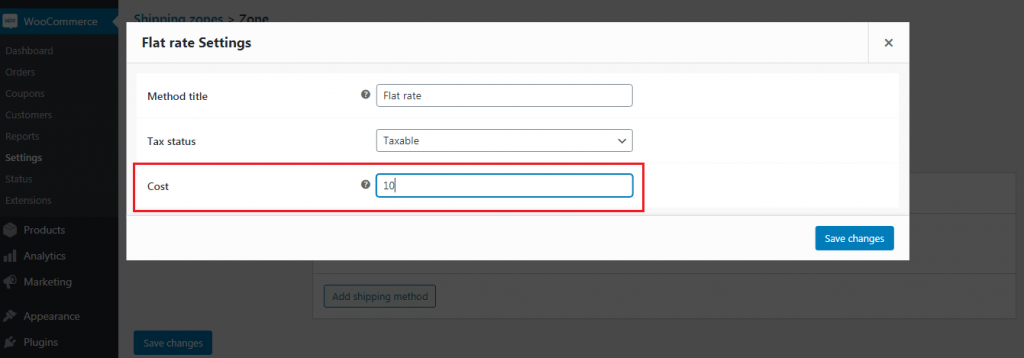
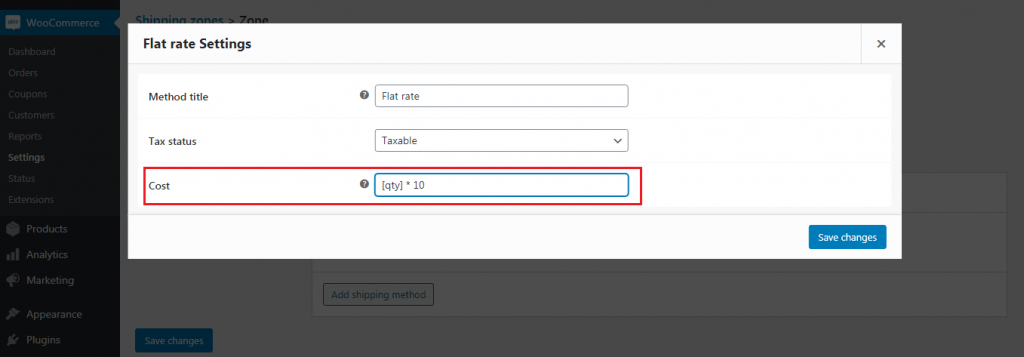
- Flat rate charges one fixed price. You type the cost. It can be per order or per item.
- Free shipping costs the customer nothing. You can require a minimum order amount.
- Local pickup lets customers collect the order from you.
To set the price, click Edit under the method name. Type the cost and save.

Set the rest of the world
Under the zones list there is a zone called Locations not covered by your other zones. Add a method there if you ship everywhere. Leave it empty if you do not.
Shipping classes
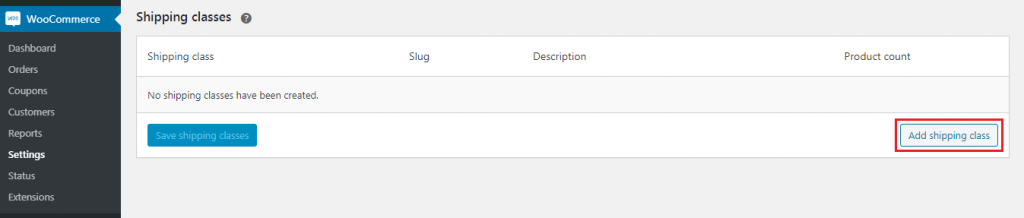
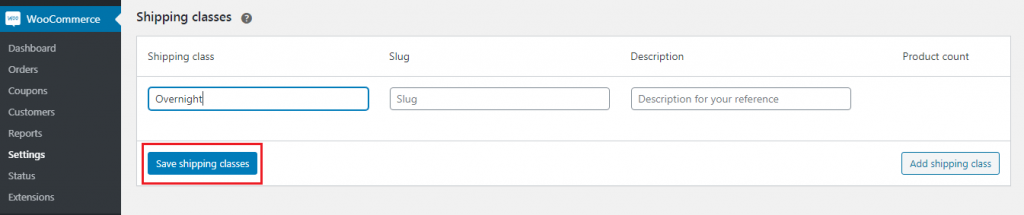
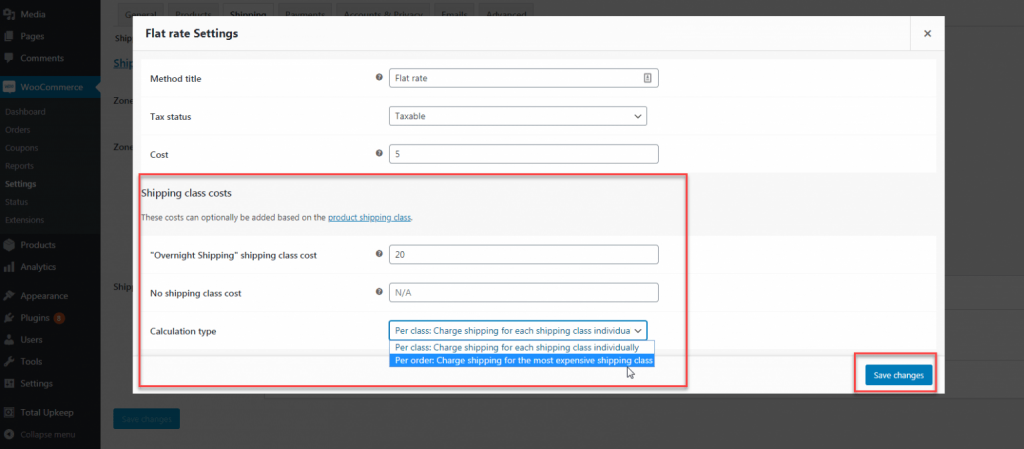
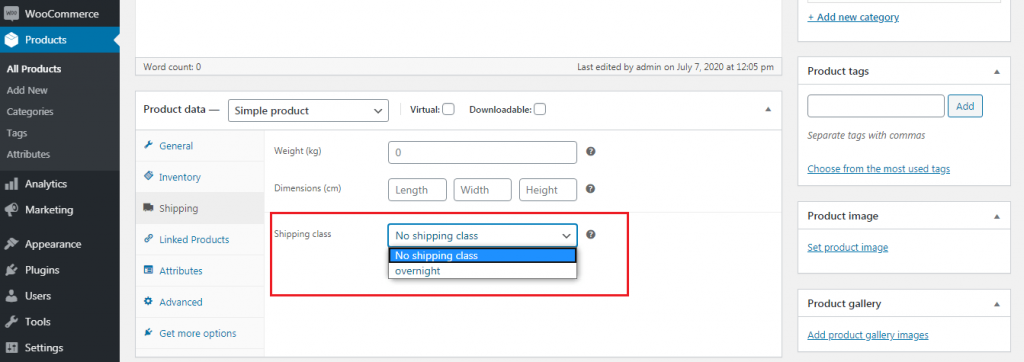
A shipping class groups items that cost more to send, such as heavy goods. Open the Shipping classes tab, add a class, and then give it its own price inside the flat rate method.
Test your setup
- Add a product to the cart on your shop.
- Go to the cart or checkout page.
- Enter an address inside a zone.
- Check that the right price shows up.
Tip: Zones are checked from top to bottom. Drag the most specific zone to the top of the list.
Tip: Add each product's weight and size. Some methods and plugins need them to work out the cost.
Quick recap
- Open WooCommerce, Settings, then Shipping.
- Create a zone and pick its regions.
- Add flat rate, free shipping or local pickup.
- Test at checkout before you go live.