

What is Multisite?
Multisite is a built-in WordPress feature. One install holds a "network" of sites. You have one dashboard, one set of plugins and one set of themes to look after. It is like a building with many flats under one roof and one caretaker.
It suits schools, companies with many branches or a blog network. Each site can still have its own content and users.
Before you start
Warning: Take a full backup of your files and database. Turning on Multisite changes core files. Turn off all plugins first (go to Plugins and use Deactivate).
Choose how sites are addressed:
- Sub-directories, for example
example.com/shop. - Sub-domains, for example
shop.example.com. This needs a wildcard DNS record. DNS is the internet's phone book. A wildcard record sends all sub-domain names to your site. Ask Hostvento support if you need help with it.
An older site with existing posts may be limited to sub-domains only. A new install can use either.
Step 1: Allow Multisite
- Open File Manager in your control panel.
- Edit
wp-config.php. - Above the line that says "That's all, stop editing", add the line below.
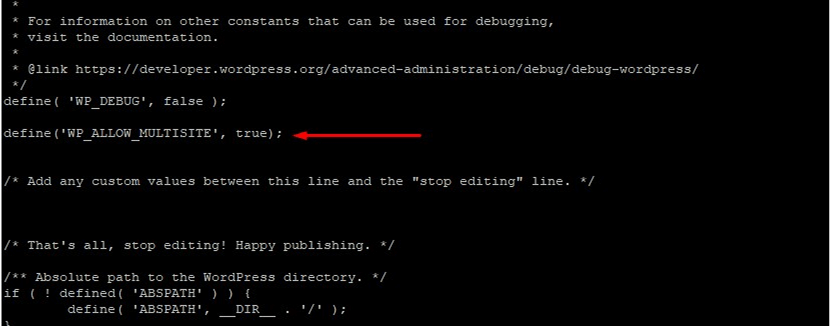
- Save the file.
define( 'WP_ALLOW_MULTISITE', true );Step 2: Install the network
- Log in to the dashboard.
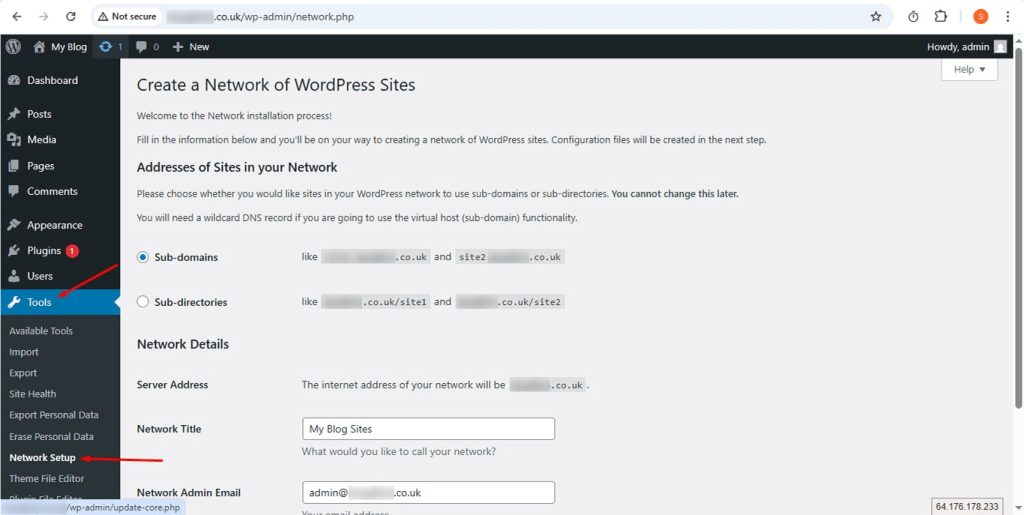
- Go to Tools and then Network Setup.
- Pick sub-domains or sub-directories.
- Type a network title and your admin email.
- Click Install.
Step 3: Add the code WordPress gives you
WordPress now shows two blocks of code. Copy each one carefully.
- Paste the first block into
wp-config.php, above the "stop editing" line. - Open
.htaccessin the same folder. Turn on hidden files if it does not show. - Replace the old WordPress rules with the second block.
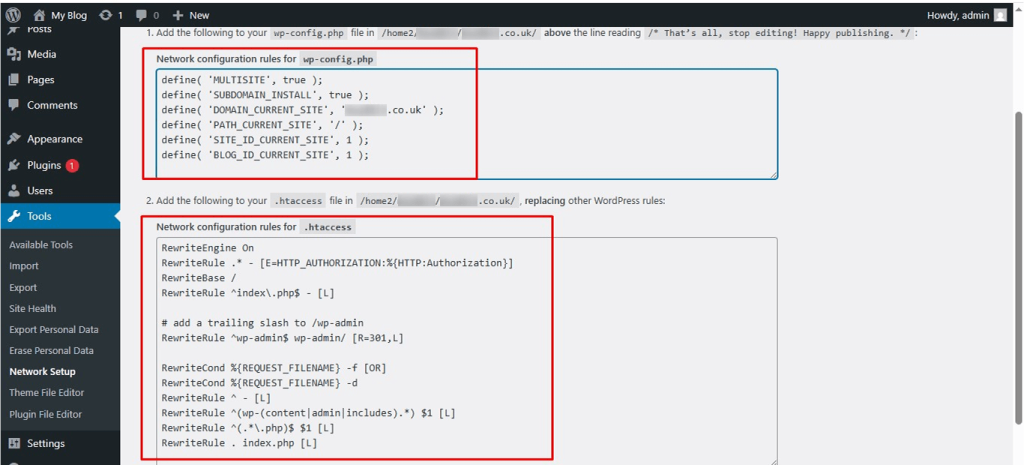
- Save both files.
- Log in again.
Step 4: Add a new site
- Go to My Sites and then Network Admin.
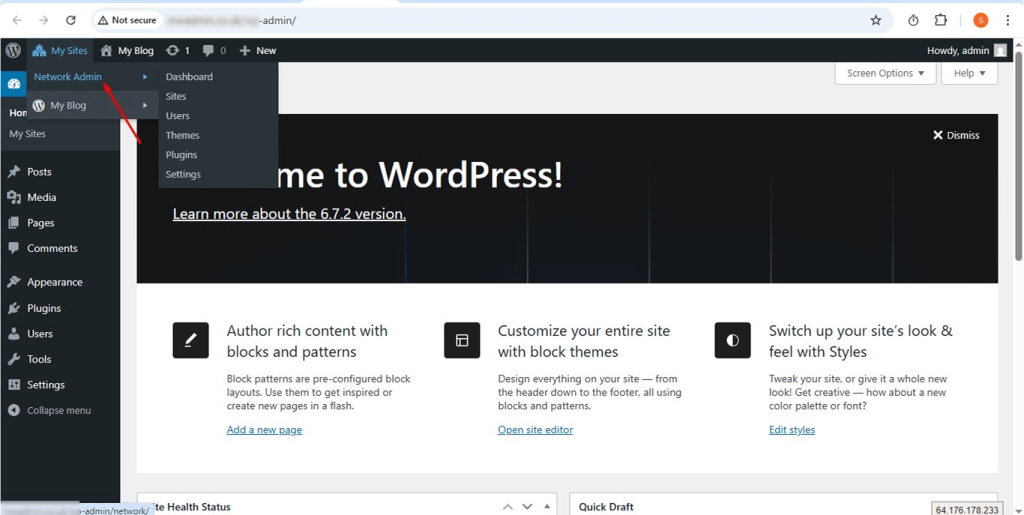
- Click Sites and then Add New.
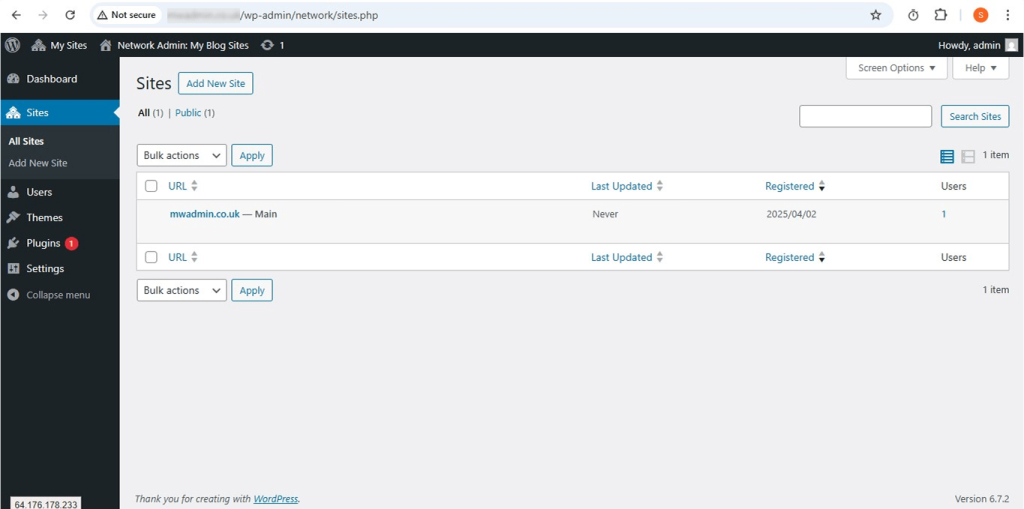
- Type the site address, title and admin email.
- Click Add Site.
Manage the network
In Network Admin you add themes, install plugins for all sites and manage users. Only a "Super Admin" can do these.
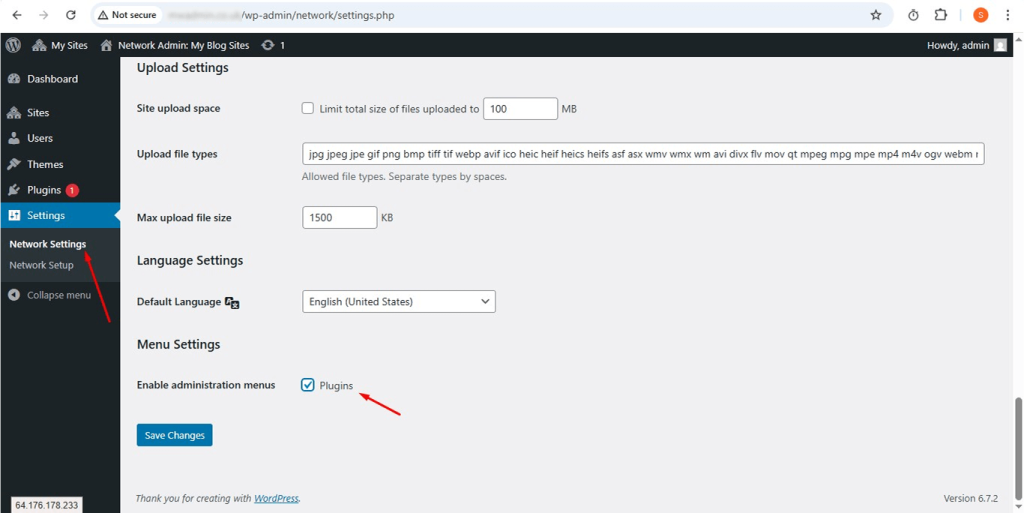
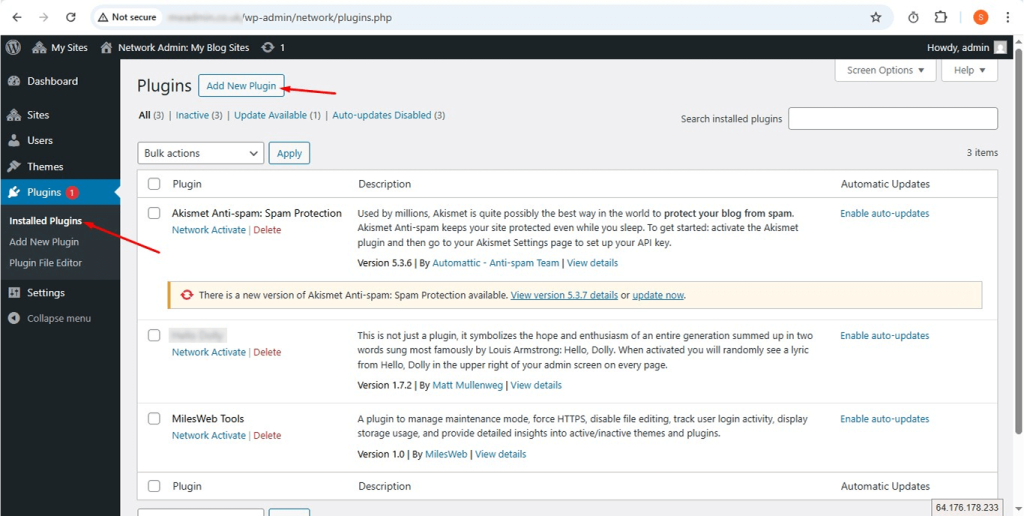
Tip: Make sure your hosting plan has enough power for many sites. Ask Hostvento support if you are unsure.
Quick recap
- Multisite runs many sites from one install.
- Back up and turn off plugins first.
- Add the allow line, run Network Setup, then paste the two code blocks.
- Add sites in Network Admin.