

What are these things?
Visual Studio is a program from Microsoft for building apps, such as ASP.NET websites. Plesk is a control panel. A control panel is a web page where you manage your hosting with buttons.
Web Deploy is a way to copy a website to a server. It sends only the parts that changed. Publishing means sending your finished site to the server so the world can see it.
Web Deploy works only on Windows hosting that has it turned on. Ask Hostvento support whether your plan supports it.
Before you start
- Have Visual Studio on your computer with your project open.
- Have your Plesk login.
- Take a backup of the live site first. Publishing can overwrite files on the server.
Step A: get the publish settings from Plesk
- Log in to Plesk. Your welcome email gives the address and login.
- Open Websites & Domains.
- Find your domain and click Web Deploy Publishing Settings. If you cannot see it, Web Deploy may be off for your plan.
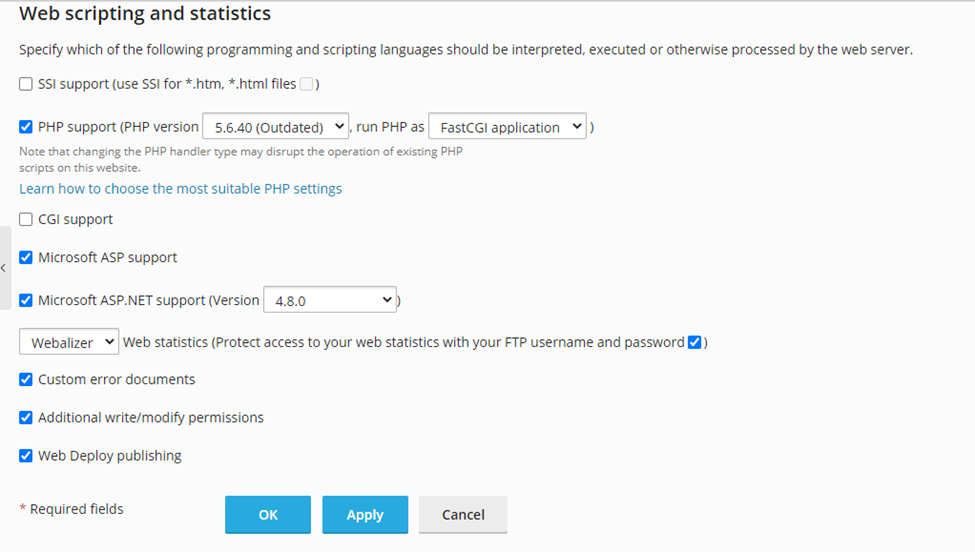
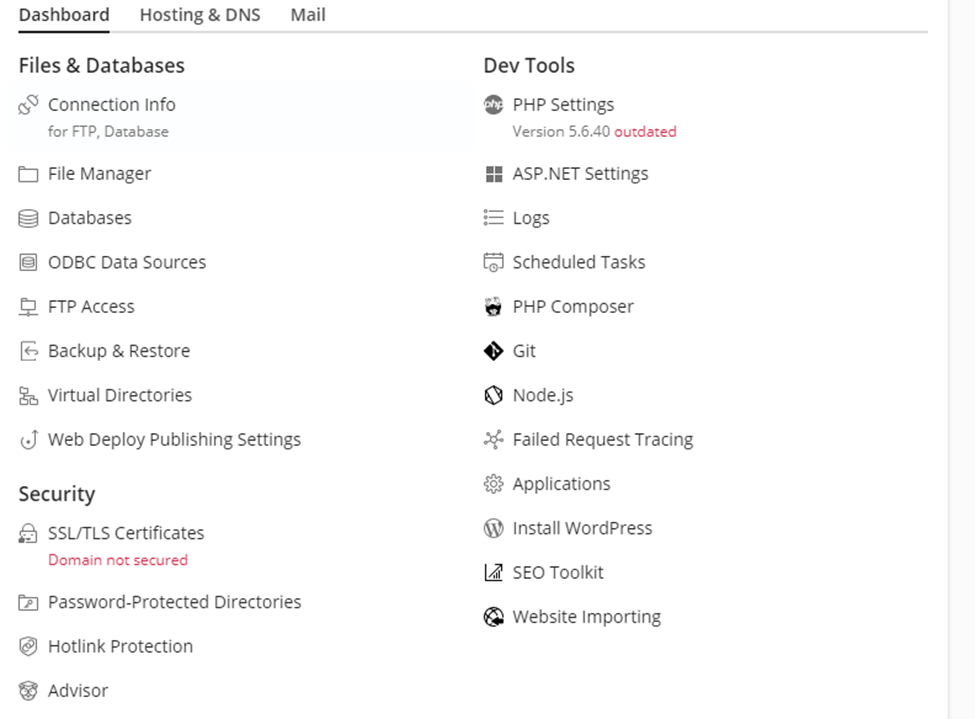
- Click Download publishing settings. A file ending in
.publishsettingsis saved.
Step B: publish from Visual Studio
- In Visual Studio, right-click your project in the Solution Explorer.
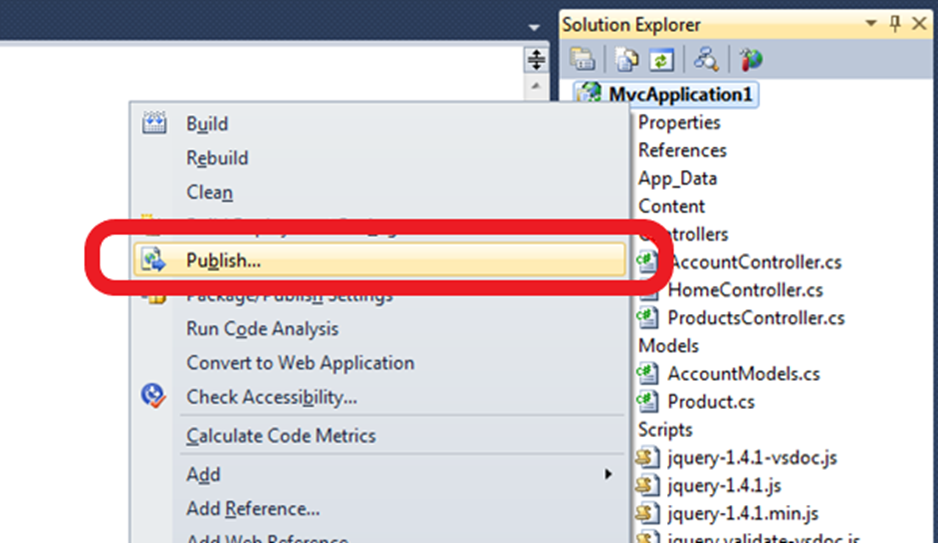
- Click Publish.
- Choose Import Profile or Import.
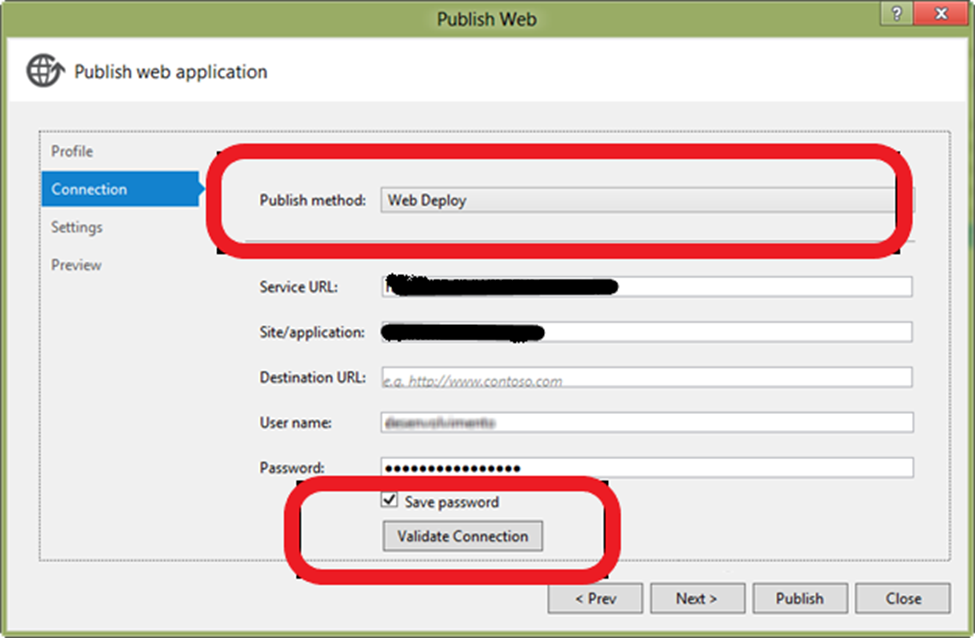
- Select the
.publishsettingsfile you downloaded. - Look at the connection details. The Server, Site name and User name are filled in for you.
- Click Validate Connection. Wait for the green tick.
- If you see a certificate warning, you may tick the option to allow an untrusted certificate. Do this only for your own server.
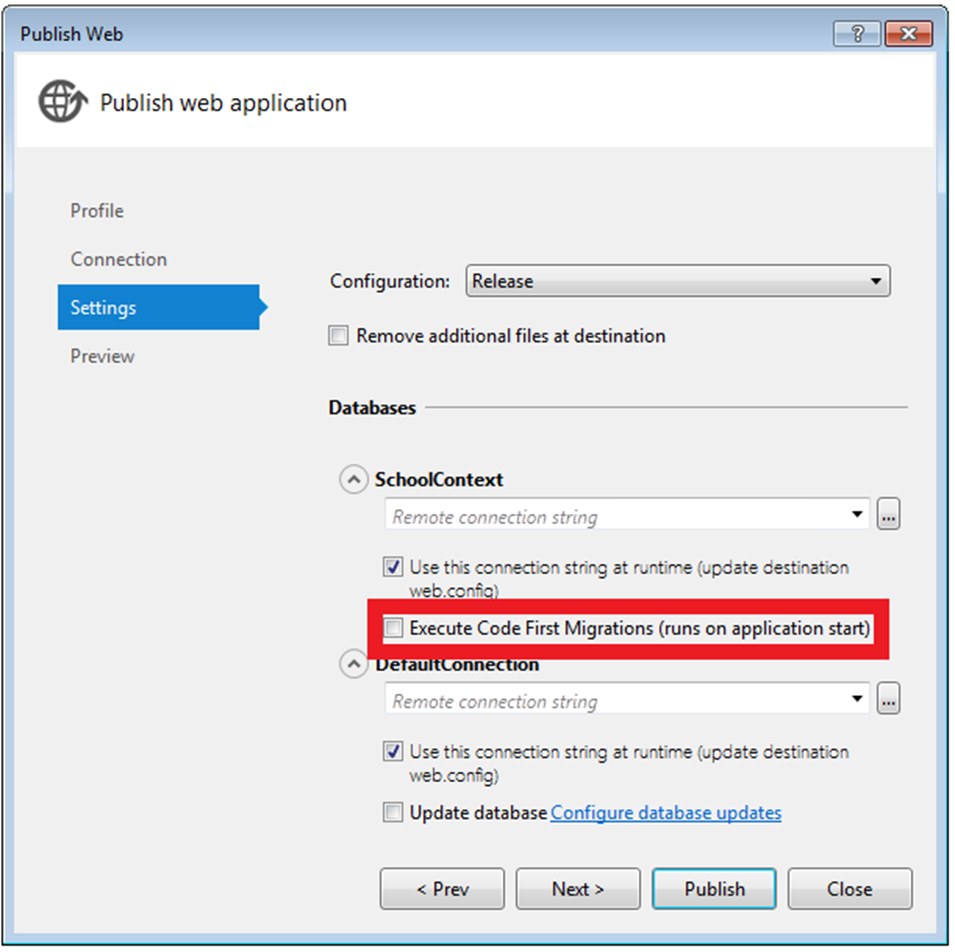
- Open Settings. Pick the right Configuration, usually Release.
- Click Publish.
Tip: If you use a database, check that the connection string points to the live database and not your own computer.
If it fails
- Check that the user name and password are right.
- Check that Web Deploy is on for your plan.
- Read the red message in the Output window. It often names the problem.
Still stuck? Open a ticket at https://secure.hostvento.com/submitticket.php.
Quick recap
- Web Deploy copies your site from Visual Studio to the server.
- Download the publishing settings file from Plesk.
- Import it in the Visual Studio Publish window.
- Validate the connection, then click Publish.
- Back up the live site first.