

What are private nameservers?
DNS is like a phone book for the internet. Nameservers are the computers that hold the phone book entries for your domain. Normally they carry a hosting company's name. Private nameservers carry your own domain name instead. They are also called child nameservers or glue records.
The word "glue" fits well. Your domain says "my nameserver is ns1.yourdomain.com". But to find that, the world must already know the number address of ns1. The glue record stores that number at the registry, so the loop is closed.
An IP address is the number address of a server. Each private nameserver needs one.
Before you start
- Get two IP addresses from your hosting provider. For Hostvento hosting, look in your welcome email, or ask Hostvento support.
- Do not invent addresses. A wrong one can take your site and email offline.
- Write down your current nameservers so you can go back.
- Make sure the hosting server has a DNS zone for your domain.
Steps in a Hostvento client area
- Log in at https://secure.hostvento.com/clientarea.php.
- Open Domains and then My Domains.
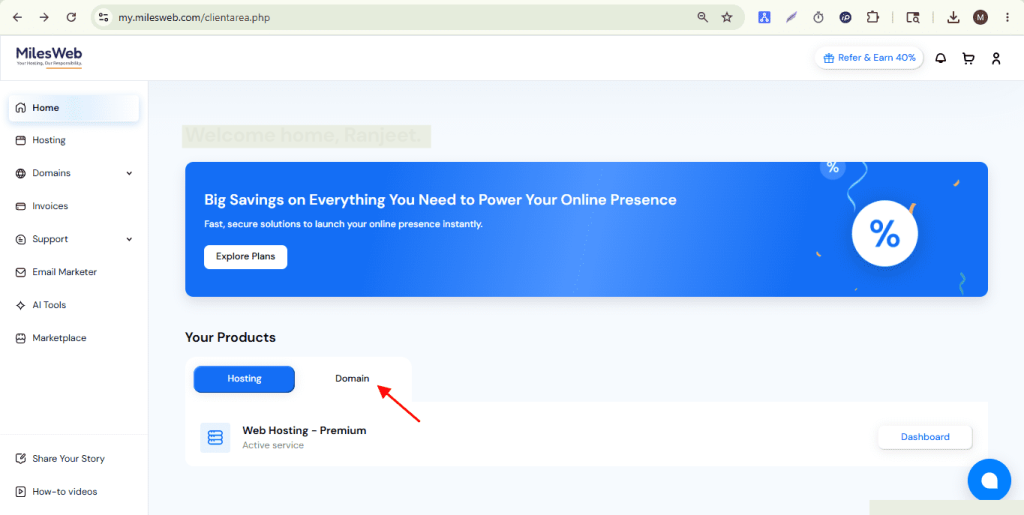
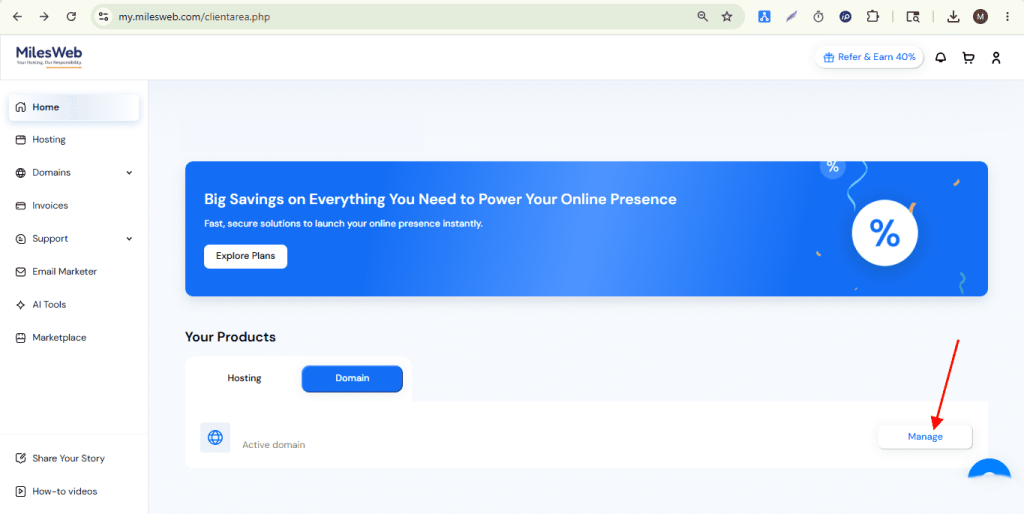
- Click the domain you want to use.
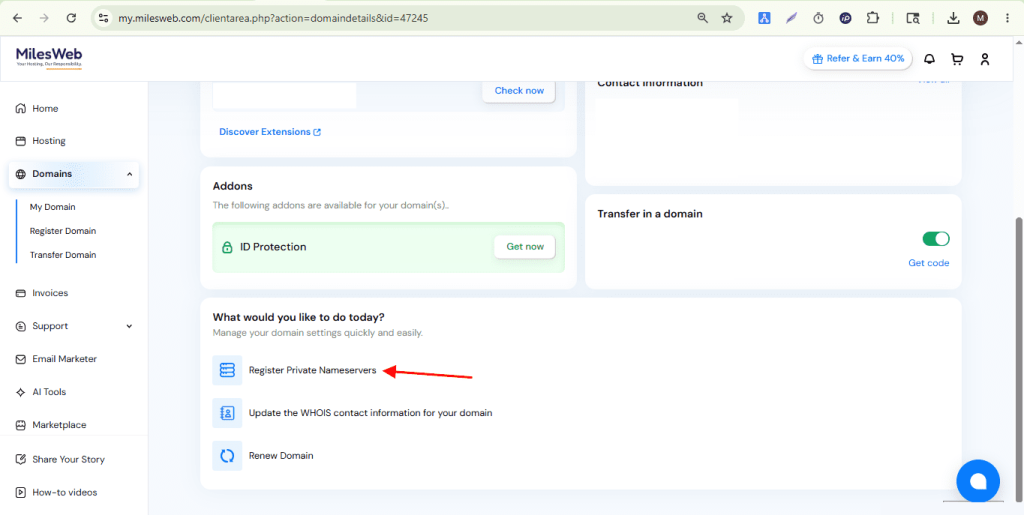
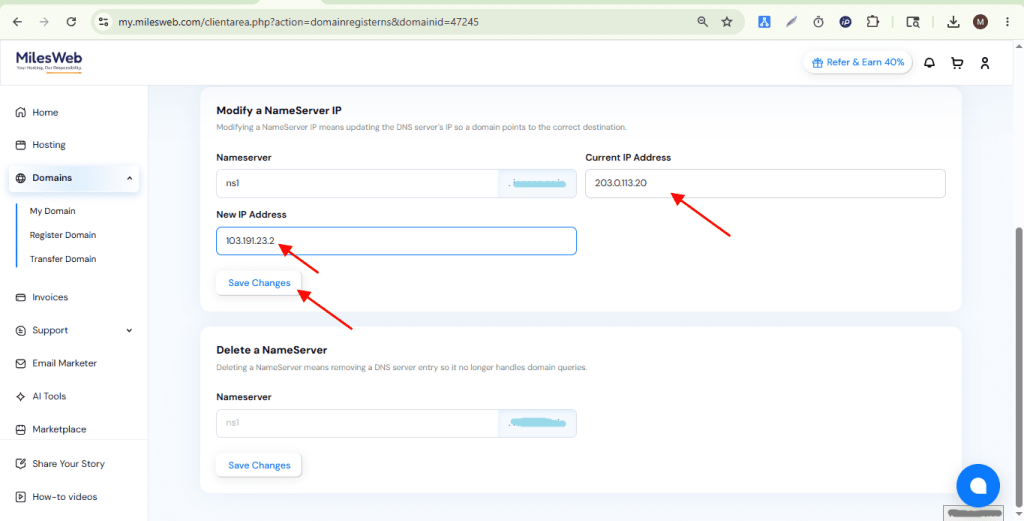
- Open Management Tools and then Register Nameservers. This option may not show for every domain ending.
- In the first box, type
ns1. Then type the first IP address.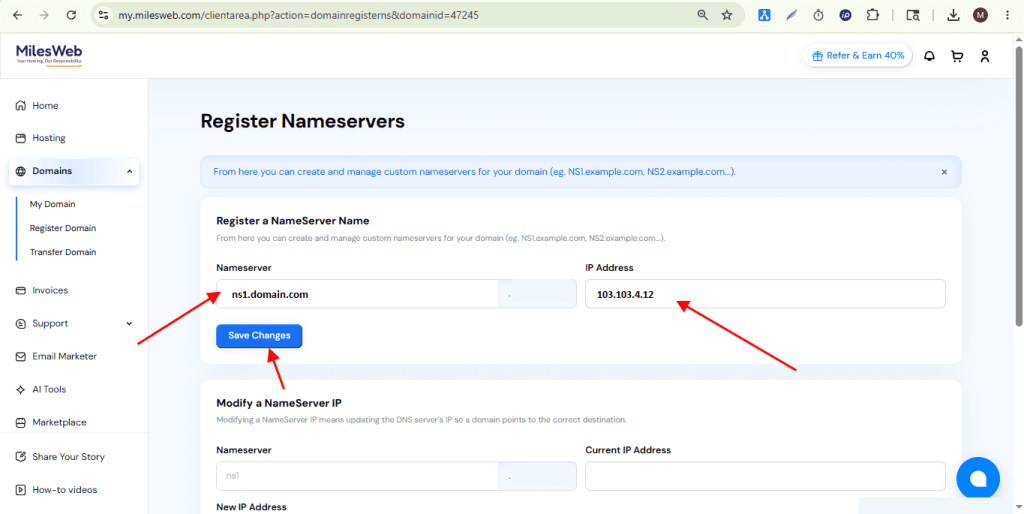
- Click Save Changes.
- Do the same for
ns2with the second IP address.
Steps at another registrar
Names differ from place to place. Look in the domain's settings for words like Private nameservers, Child nameservers, Host names or Glue records. The idea is the same. Add a host name and an IP address.
Use the new nameservers
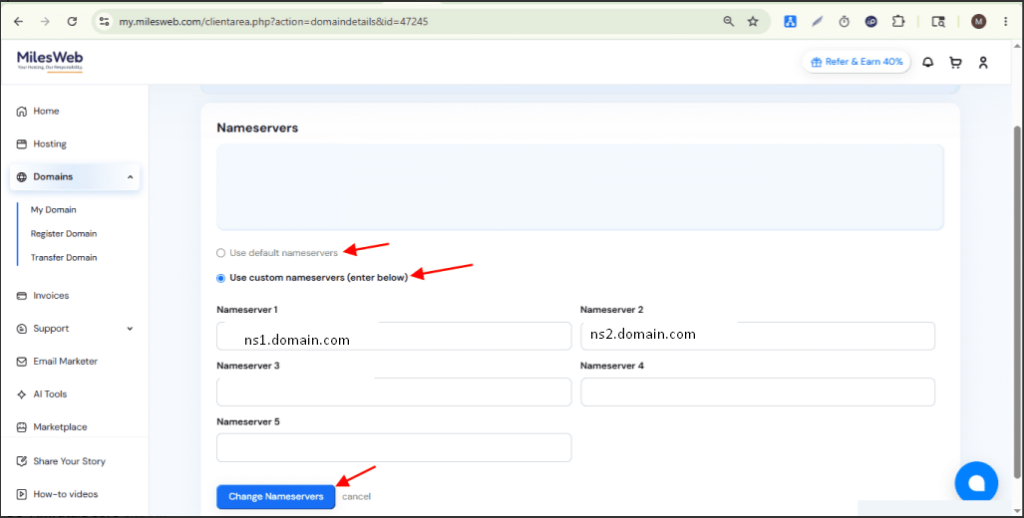
- Open the Nameservers page of the domain.
- Choose custom nameservers.
- Type
ns1.yourdomain.comandns2.yourdomain.com. - Click Change Nameservers.
Waiting time
Changes spread slowly. This is called propagation. It may take a few hours, up to a day or more.
Need help? Open a ticket at https://secure.hostvento.com/submitticket.php.
Quick recap
- Private nameservers use your own domain name.
- Each one needs an IP address from your host.
- Register ns1 and ns2 first, then set them on the domain.
- Keep your old settings in case you must go back.
- Wait for propagation.