

What are private nameservers?
DNS is like a phone book for the internet. Nameservers are the computers that hold the pages of that book for your domain. Private nameservers use your own domain name, like ns1.example.com, instead of your host's name. This is also called a "child nameserver" or "glue record".
WHM is the Web Host Manager. It is the admin panel for a server. It is above cPanel.
Before you start
- You need a server with root access and WHM.
- You need two IP addresses for the server. Your welcome email or Hostvento support can tell you them.
- You need a domain name that you control.
Warning: Wrong DNS changes can take your sites offline. Note your current settings before you edit anything.
Steps in WHM
- Log in to WHM as root.
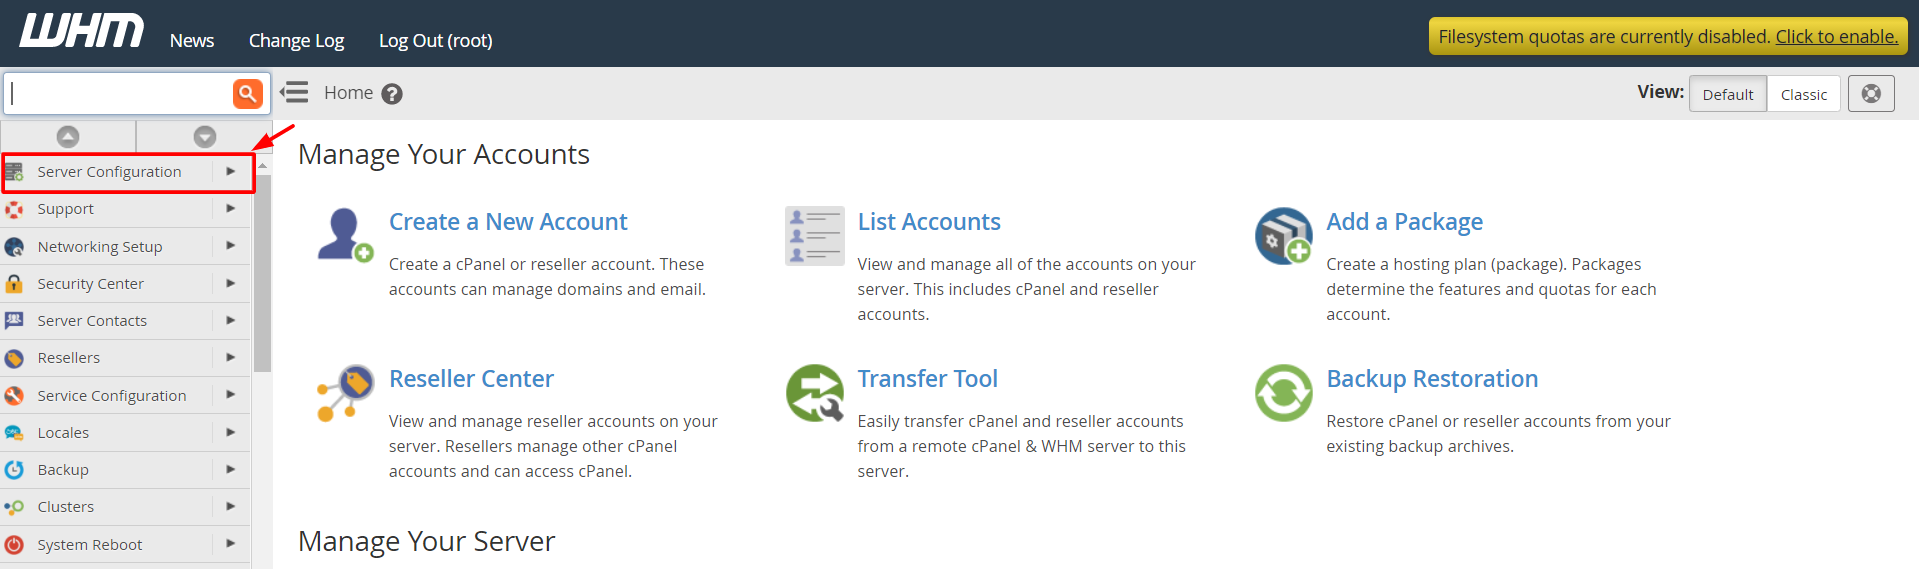
- In the search box on the left, type Basic WebHost Manager Setup. Click it.
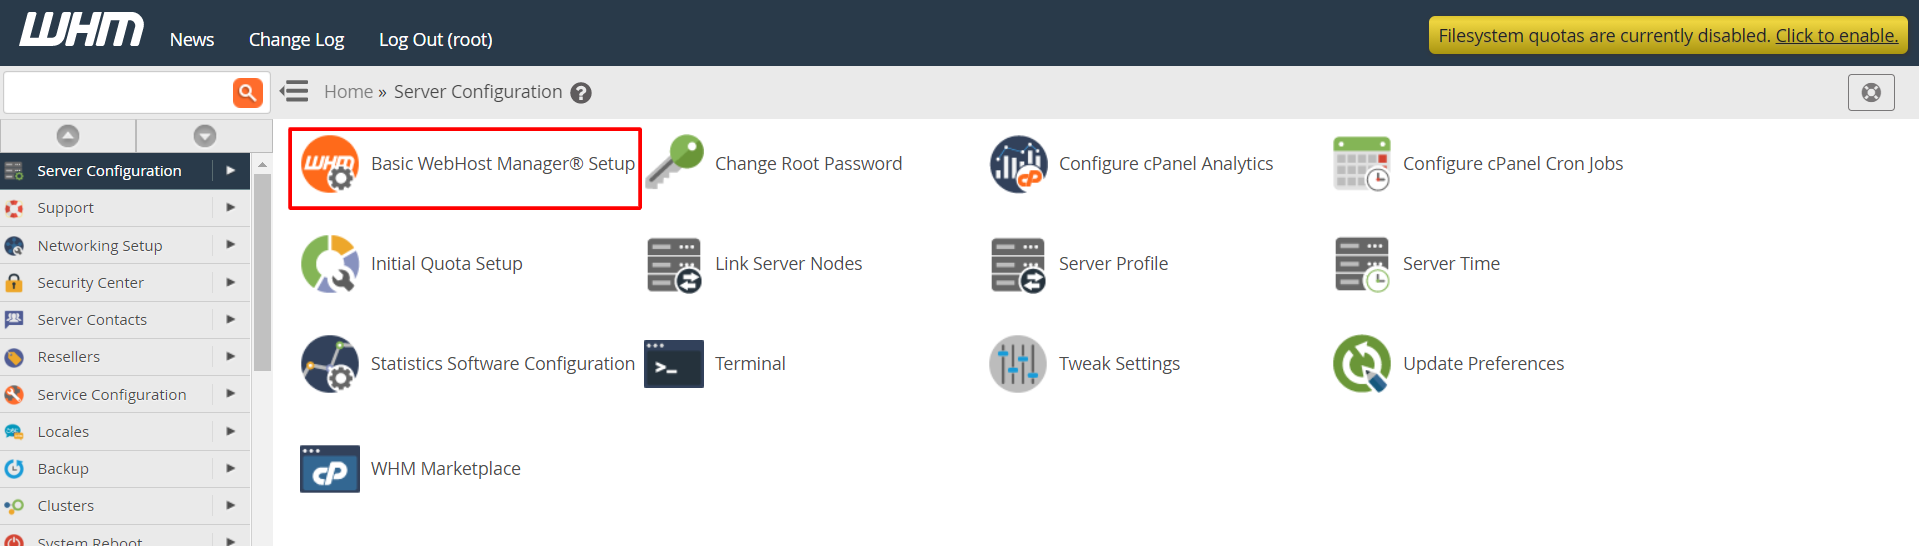
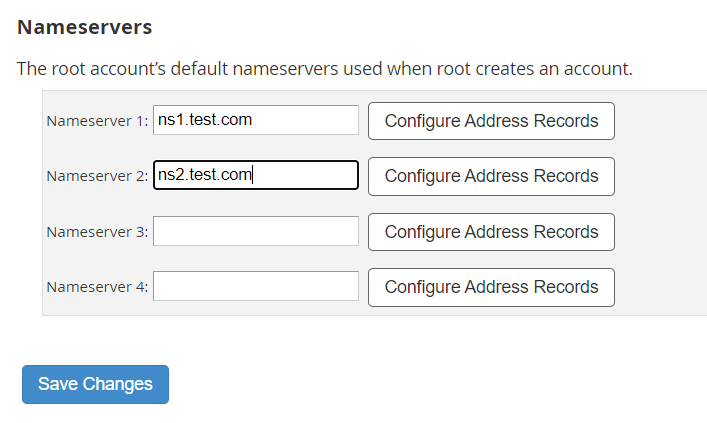
- Find the nameserver fields. Type
ns1.yourdomain.comandns2.yourdomain.com. Use your real domain. - Click Save Changes.
- Search for Add an A Entry for your Hostname. Use it for hostname records if offered.
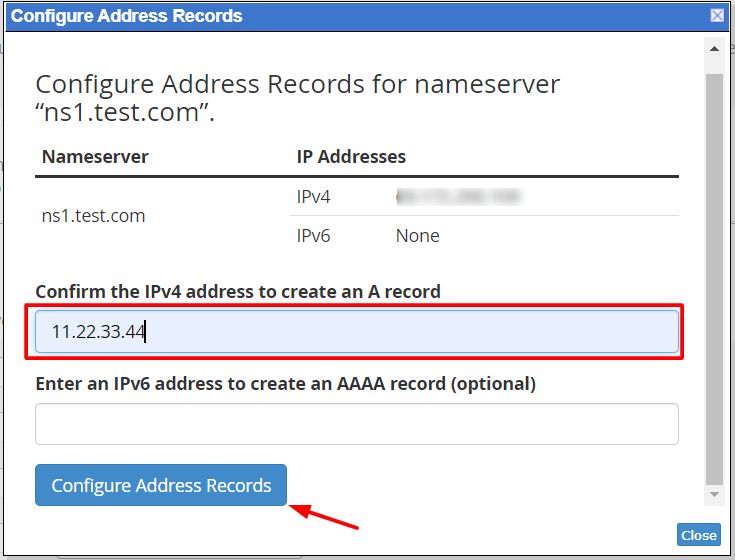
- Search for Edit DNS Zone and open your domain's zone.
- Add an A record for
ns1pointing to your first IP address. - Add an A record for
ns2pointing to your second IP address. - Save the zone.
Register the nameservers at the registrar
The registrar is where you bought the domain. If it is in your Hostvento account, follow these steps.
- Log in to your client area.
- Open the Domains menu and choose My Domains.
- Open the domain and look for Register Nameservers or a similar option.
- Enter
ns1and the first IP address. Save. - Do the same for
ns2and the second IP.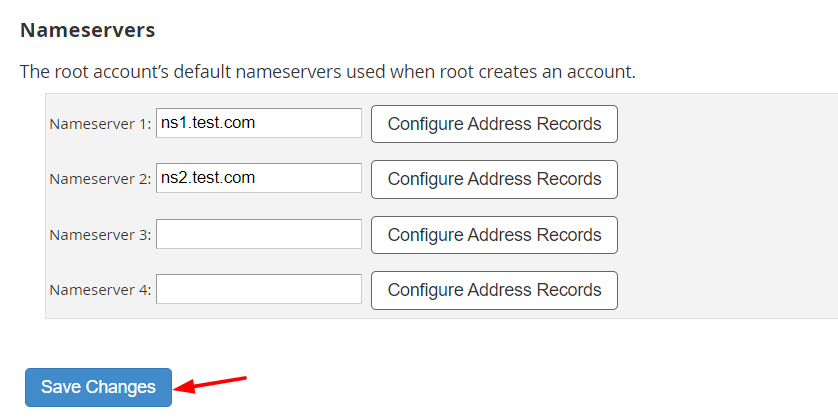
Then set the domain to use these new nameservers. Allow some hours for the change to spread.
Tip: You can check with
dig ns1.yourdomain.com. It asks DNS for the address of your nameserver.Quick recap
- Private nameservers use your own domain name.
- Set them in WHM and create two A records.
- Register them at your registrar with the matching IPs.
- Wait for the change to spread, then test.