

What are nameservers?
A nameserver is a computer that knows where your website lives. Think of it as a signpost. When someone types your domain, the nameservers tell their browser which hosting server to visit.
If your domain is at GoDaddy but your hosting is at Hostvento, the signpost must point to Hostvento. You do this by changing the nameservers at GoDaddy.
Before you start
- Find your Hostvento nameservers. They are in your welcome email. You can also ask Hostvento support.
- Keep your GoDaddy login details ready.
Warning: Changing nameservers can take your website and email offline for a short time. If your site is live, note down your old nameservers first. Take a backup of important DNS records too.
Steps
- Log in to your GoDaddy account.
- Open your profile menu and choose My Products.
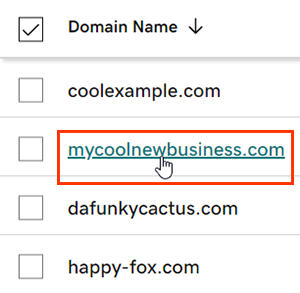
- Find your domain in the list. Click DNS next to it, or click the domain name.
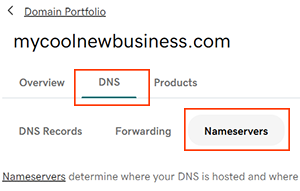
- Scroll down to the Nameservers section.
- Click Change Nameservers.
- Choose I'll use my own nameservers (the wording may differ a little).
- Type your first nameserver from your welcome email.
- Click Add Nameserver and type the second one. Add more if your email lists more.
- Click Save.
- Confirm if GoDaddy shows a warning message.
GoDaddy may change its menus over time. If you cannot find a button, look for Manage DNS or Domain Settings.
What happens next?
The change does not work at once. The whole internet needs time to learn the new nameservers. This is called DNS propagation. It can take a few hours, and sometimes up to 48 hours.
During this time some visitors see the old site and some see the new one. This is normal.
Check that it worked
- Wait a few hours.
- Open your domain in a browser.
- Use a free online nameserver lookup tool to see the current nameservers.
Tip: Also make sure your domain has been added in your hosting account. If it has not, the site will not load after the change. Ask Hostvento support if unsure.
Quick recap
- Nameservers tell the internet where your website lives.
- Change them in the DNS section of your domain at GoDaddy.
- Get the correct values from your Hostvento welcome email.
- Allow up to 48 hours for the change to spread.