

What is a user role?
A role is a list of things a person is allowed to do. Think of keys in a school. The teacher has a key to the class. The cleaner has a key to the halls. Each person gets only the keys they need.
In Plesk, you make a role first. Then you make a user and give that user the role. A web designer might only need file and database access. They do not need billing or email.
Create a role
- Log in to Plesk.
- Click Users in the left menu. In some versions, you find it under Account.
- Open the User Roles tab.
- Click Create User Role.
- Type a name, such as "Web designer".
- Open the tabs and tick what this role may do. The permissions are grouped, for example Websites & Domains, Mail, Files and Databases.
- Click OK.
Add a user with that role
- Open the Users tab.
- Click Create User Account.
- Type the person's contact name and email address.
- Choose your new role in the User role list.
- Choose which subscriptions or sites the user may reach, if the form asks.
- Type a username and a strong password.
- Click OK.
Share the login details with the person in a safe way.
Edit or delete a role
- Open Users, then User Roles.
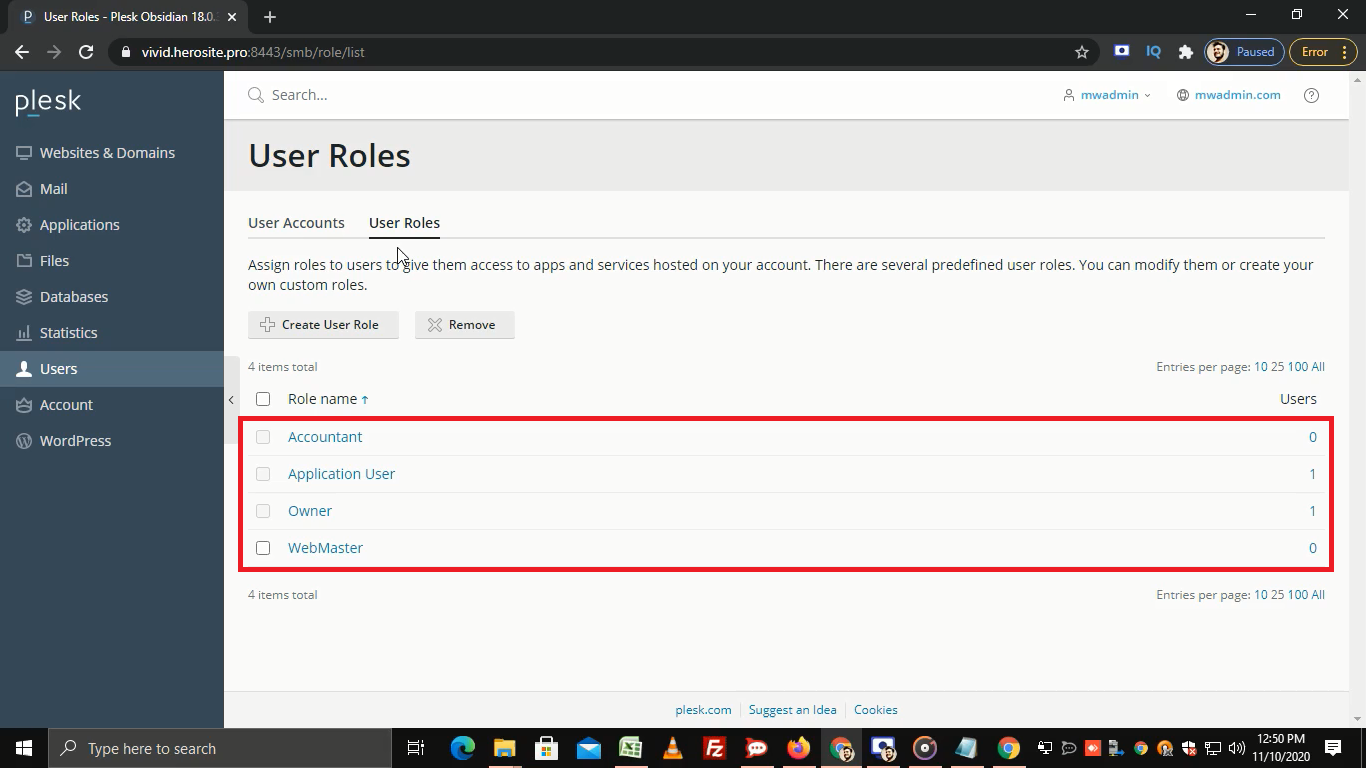
- Click the role name to change its permissions. Then click OK.
- To delete a role, tick its box and click Remove.
Warning: if you delete a role, users who had it lose their access. Move those users to another role first.
Tip: Start with fewer permissions. You can always add more later. It is harder to undo a mistake once someone has used too much access.
If you do not see these menus, your plan may not include them. Ask Hostvento support.
Quick recap
- A role is a set of allowed actions.
- Create it under Users, then User Roles.
- Give the role to a new user account.
- Give each person only the access they need.