

What is a Plesk user?
A Plesk user is another person who can sign in to your control panel. A control panel is a web page where you manage hosting. Each user gets a role. A role is a set of rules about what the person may do. It is like a school: a teacher and a pupil have different keys.
This lets a web designer, a helper or a staff member work on your site without knowing your main password.
Create a user
- Log in to Plesk.
- Click Users in the left menu. On some versions, open Account then User Accounts.
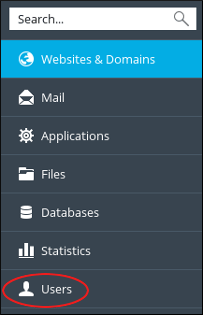
- Click Create User Account.
- Type the person's contact name and their email address.
- Choose a user role. Roles can be created in the User Roles tab. Each role sets which things the user may open.
- Pick which subscriptions or sites the user may access.
- Type a username and a strong password, or let Plesk email an invite.
- Click OK.
Make a new role
- Go to Users.
- Open the User Roles tab.
- Click Create User Role.
- Name the role, such as "Web designer".
- Tick the permissions you want to allow.
- Click OK.
Change or remove a user
- Go to Users.
- Click the person's name to edit details or change the role.
- To delete, tick the box next to the name and click Remove.
Tip: Warning: give the least access that does the job. Remove users as soon as their work is finished.
If the Users menu is missing, your plan may not include it. Open a support ticket.
Quick recap
- A Plesk user is a person with their own login.
- Roles decide what each person can do.
- Use Users then Create User Account.
- Give the smallest access needed.
- Remove users when they leave.