

What is a virtual directory?
A directory is a folder. A virtual directory is a web address that points to a folder in another place. If visitors open yourdomain.com/docs, the server may show files from a different folder. It works like a signpost.
Virtual directories belong to IIS, the web server used on Windows hosting. If you do not see the option in Plesk, your plan may not be Windows-based. Ask Hostvento support.
Warning: a wrong change can stop part of your site from loading. Take a backup first.
Steps to edit
- Log in to Plesk.
- Click Websites & Domains.
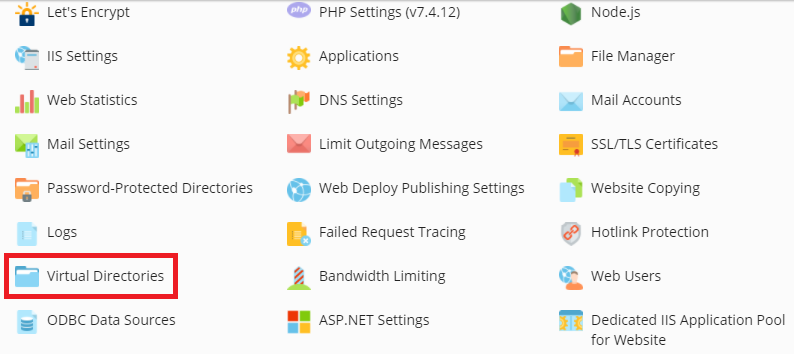
- Find your domain and click Virtual Directories.
- Click the name of the virtual directory in the list.
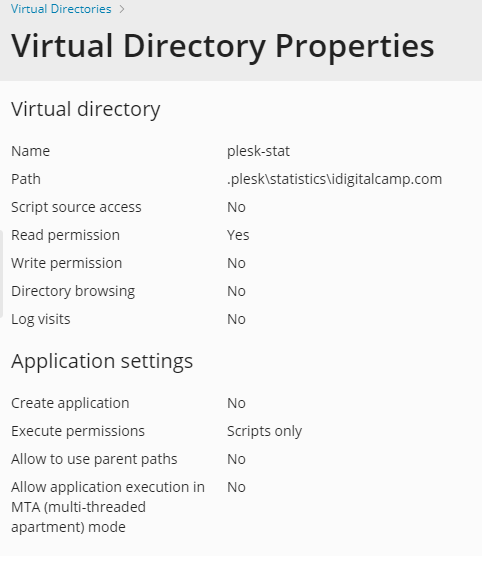
- Change the settings you need:
- Path: the real folder that the address points to.
- Access: read, write, and script rights.
- Script options: which kind of script may run.
- Directory browsing: shows a file list if there is no start page. Keep it off unless needed.
- Click OK to save.
Change the web address name
The name in the web address cannot usually be edited. To change it, create a new virtual directory with the new name. Then remove the old one.
- Click Create Virtual Directory and fill in the new name and the same path.
- Test that the new address works.
- Back in the list, tick the old directory and click Remove.
Removing a virtual directory takes away the address only. Your files stay in their folder.
Test your change
- Open the address in your browser, for example
yourdomain.com/docs. - Check that the right files show.
- If you see an error, open the directory again and check the path.
Tip: Give write access only if visitors really need to upload files. Fewer rights mean a safer site.
Need help? Open a support ticket.
Quick recap
- Open Virtual Directories and click the directory name.
- Change the path or access rights, then click OK.
- To rename it, make a new one and remove the old one.
- Back up first and test after.