

What is WordPress?
WordPress is free software for building websites. You can make a blog, a shop or a small business site with it. Plesk is a control panel, which is a web page where you manage your hosting. Plesk has a tool called WordPress Toolkit that installs WordPress for you.
A "custom" install lets you pick the details instead of using the quick defaults.
Steps
- Log in to Plesk. Your welcome email has the details.
- Click WordPress in the left menu. You can also open Websites & Domains and find the WordPress button there.
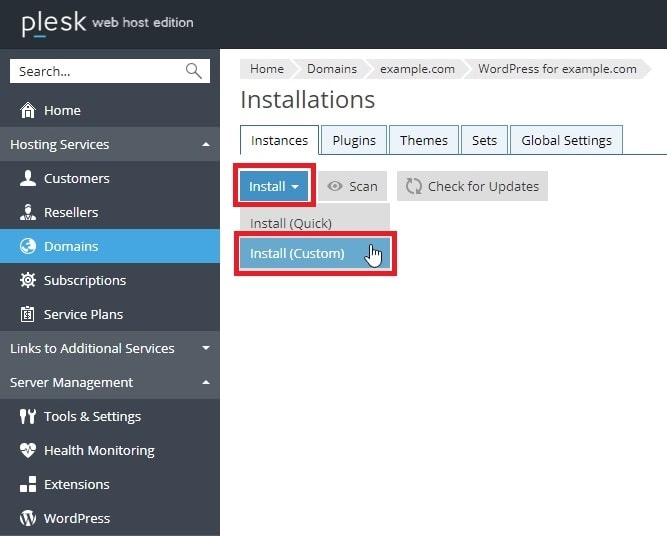
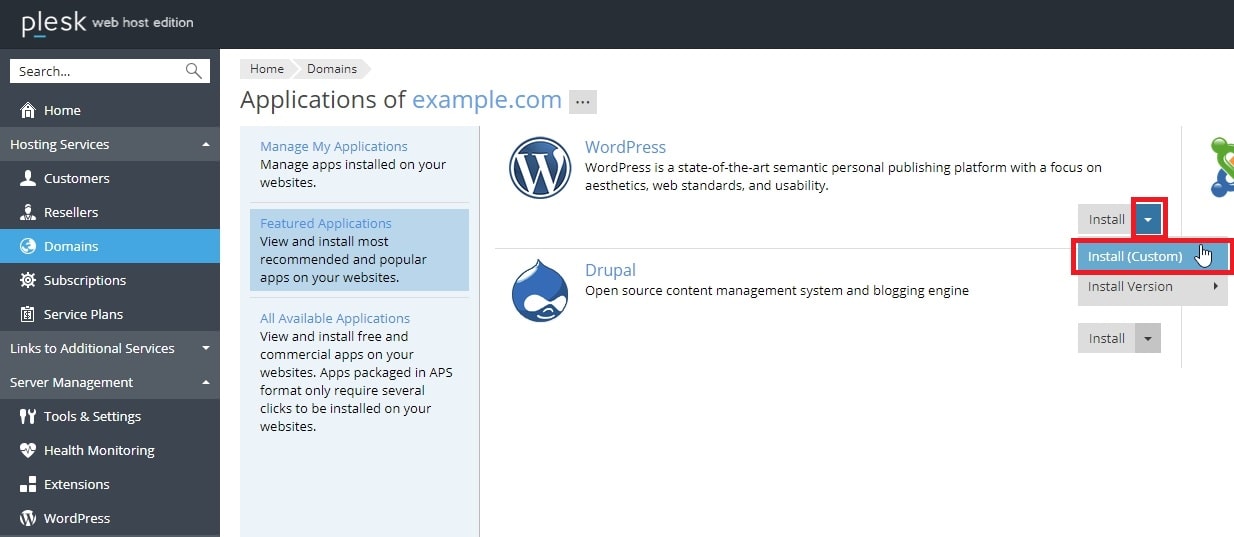
- Click Install.
- Choose Custom if you see a choice between quick and custom.
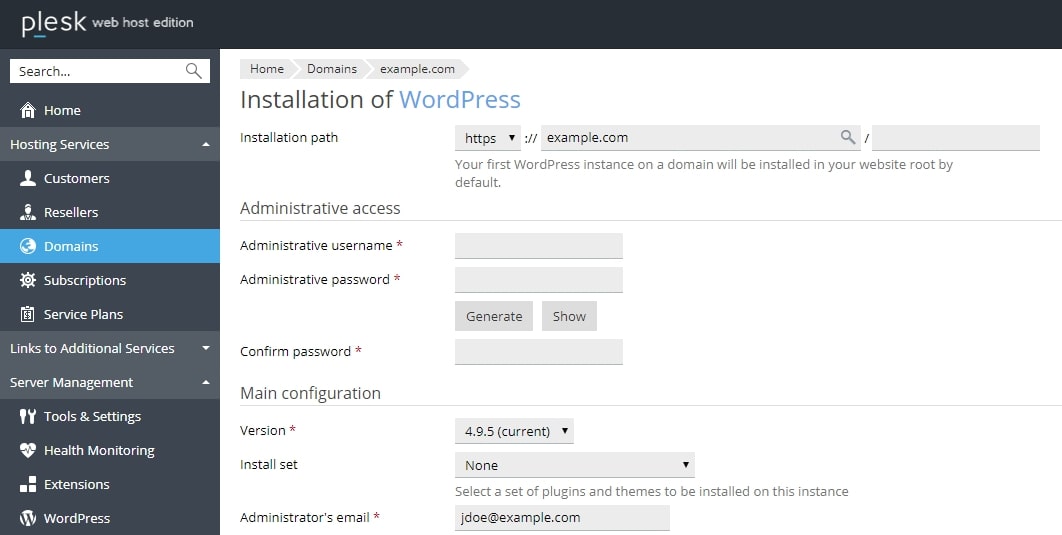
- Pick the domain where WordPress should go.
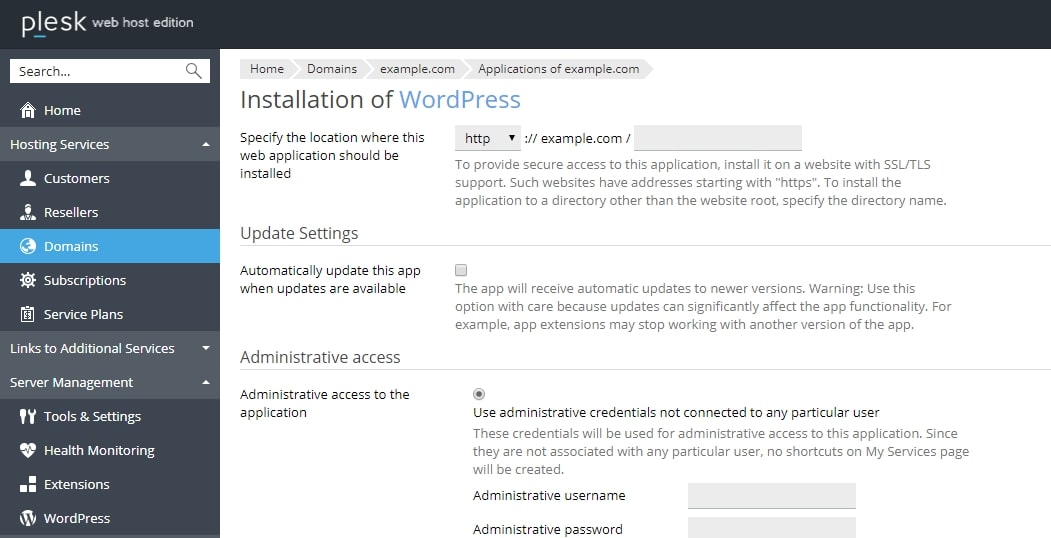
- Choose the install path. Leave it empty to use the main address. Type a folder name, such as
blog, to place the site atyourdomain.com/blog. - Type a name for your site in the Website title box.
- Pick the site language.
- Create an admin username and a strong password. Write them down somewhere safe. Avoid the name "admin", because attackers guess it first.
- Open the database settings. A database is a storage box for your site's posts and settings. You can change its name and user, or let Plesk pick them.
- Choose your update settings. Automatic updates keep your site safe.
- Click Install and wait until Plesk says it is done.
Tip: Warning: do not install into a folder that already holds your live site. The new files could overwrite the old ones. Take a backup first.
After the install
- Open the new site in your browser to see that it loads.
- Go to
yourdomain.com/wp-adminto log in with the admin details you chose.
If the WordPress button is missing, ask Hostvento support whether WordPress Toolkit is on your plan. You can open a support ticket.
Quick recap
- Open WordPress in Plesk and click Install.
- Choose the custom option to set path, language, admin and database.
- Use a strong password and not the name "admin".
- Back up before installing over any existing site.
- Log in at
/wp-adminwhen finished.