

What is FTP?
FTP stands for File Transfer Protocol. It is a way to move files between your computer and your hosting. Think of it as a delivery truck for your website files. An FTP account is the key that lets the truck in. You use it with a program such as FileZilla.
Plesk is a control panel, a web page where you manage your hosting.
Create an FTP account
- Log in to Plesk.
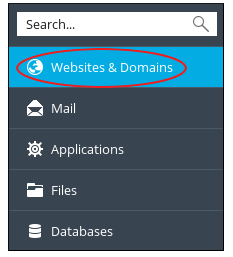
- Click Websites & Domains.
- Find your domain and click FTP (also called FTP Access).
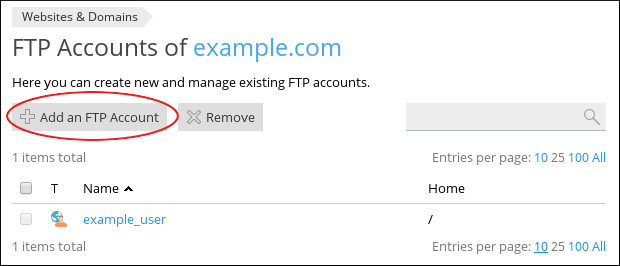
- Click Add FTP Account.
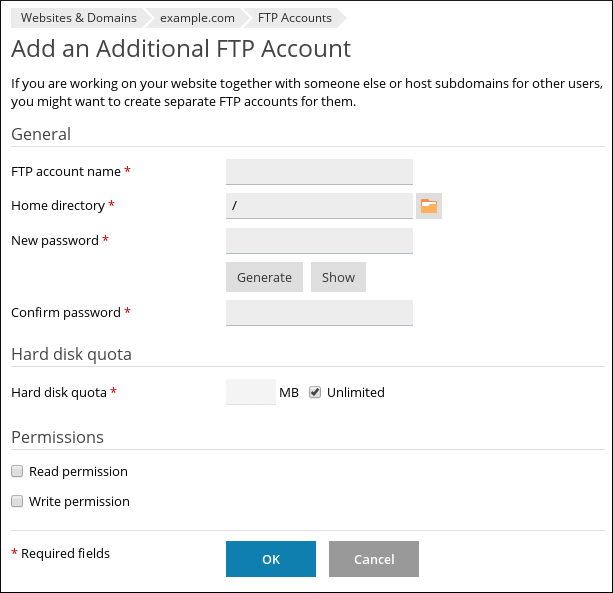
- Type a username.
- Choose the home directory. This is the folder that user can reach. Use
/for the whole site, or pick a smaller folder to limit access. - Type a strong password. Save it safely.
- Set a disk space limit if you want one.
- Click OK.
Connect with FileZilla
- Open FileZilla and find the quick connect bar.
- In Host, type your domain name or the server name from your welcome email.
- Type your FTP username and password.
- Leave Port empty or type the port support gives you.
- Click Quickconnect.
- Drag files to the
httpdocsfolder to put them on your site.
Change or delete an account
- Go to the same FTP page.
- Click the account name to change its password or folder.
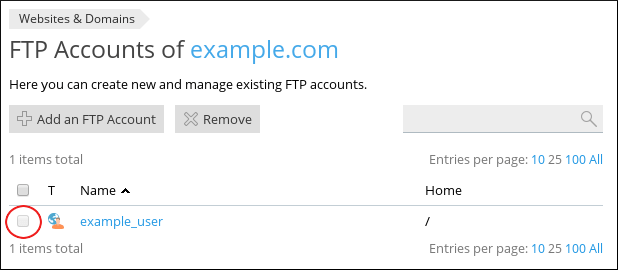
- To delete it, tick the box and click Remove.
Tip: Give each person their own account and the smallest folder they need. Remove accounts when someone no longer needs them.
Need help? Open a support ticket.
Quick recap
- FTP moves files to your hosting.
- Use FTP then Add FTP Account.
- Pick a limited folder and a strong password.
- Connect with FileZilla.
- Remove accounts you no longer need.