
What is a self-signed certificate?
An SSL certificate is a digital ID card for a website. Normally a trusted company, called a Certificate Authority, issues it. With a self-signed certificate, you sign your own card. The lock still scrambles the data. But browsers do not trust you, so visitors see a warning such as "Your connection is not private".
When to use one
- Testing a site or an app.
- Private tools that only you or your team use.
- Waiting for a real certificate to arrive.
Do not use it for a public website. Use a free or paid trusted certificate instead.
In cPanel
- Log in to cPanel.
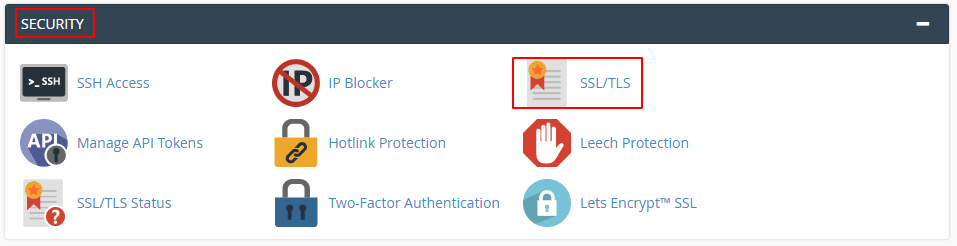
- Open SSL/TLS.
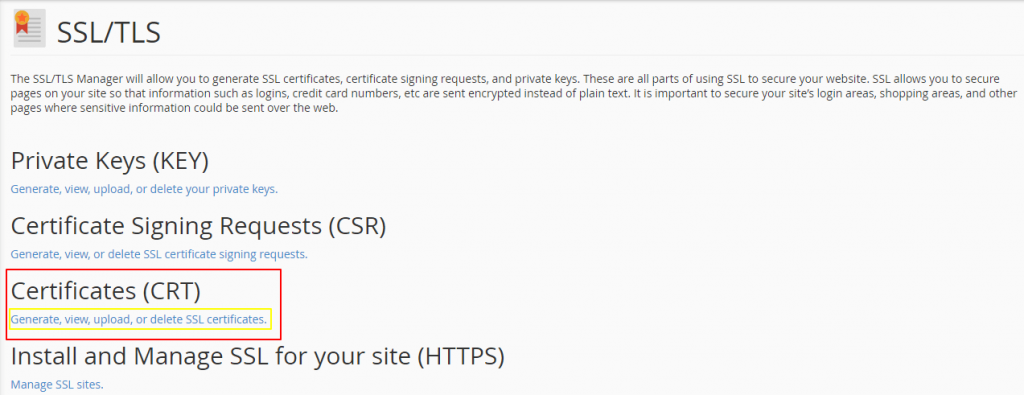
- Click Generate, view, upload, or delete SSL certificates.
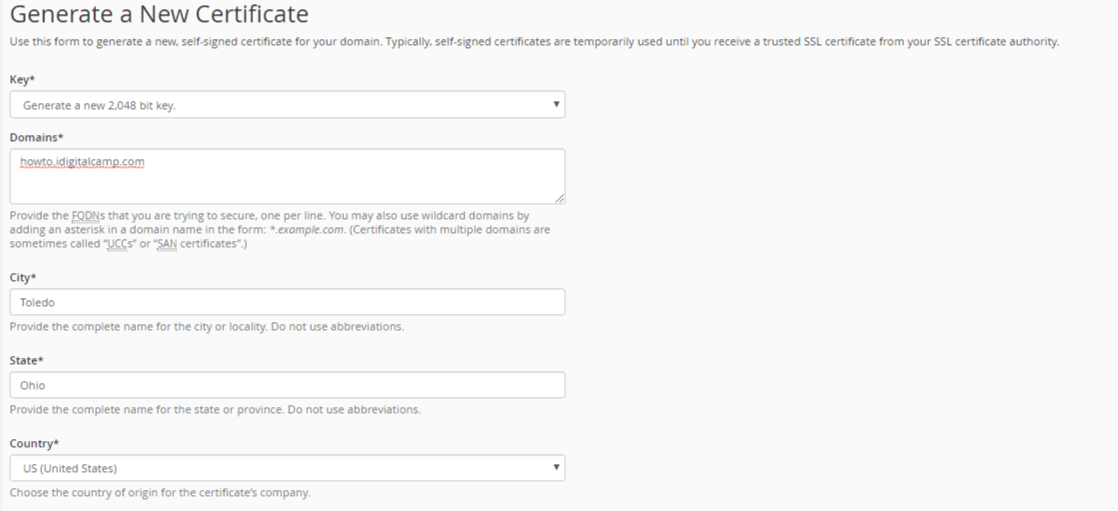
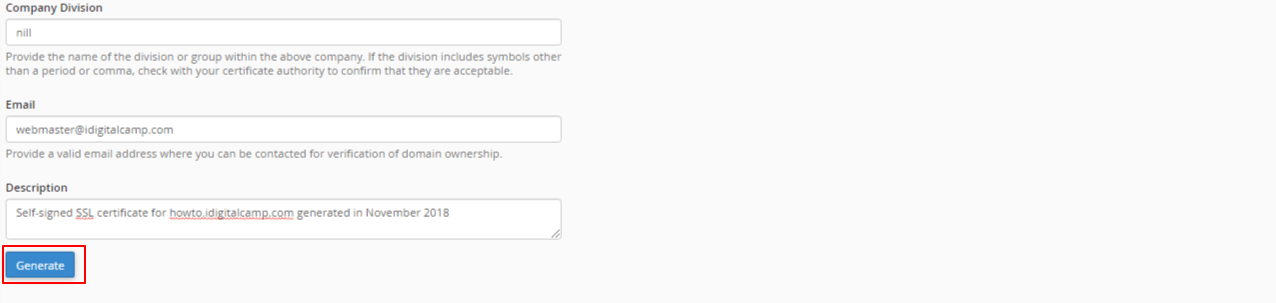
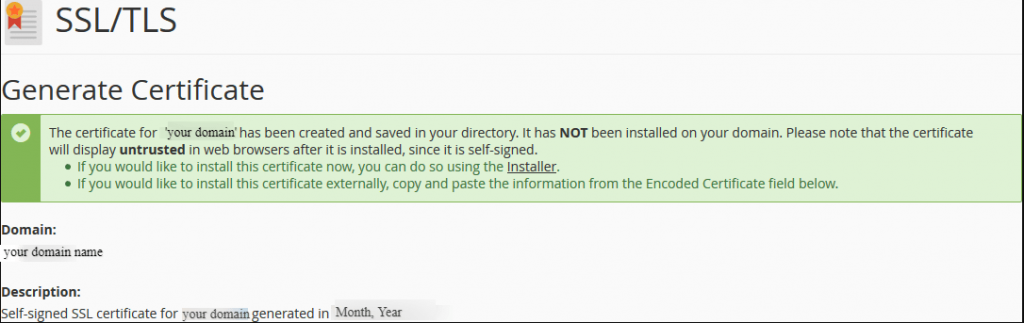
- Under Generate, choose a key size such as RSA, 2048 bit.
- Type your domain in the Domains box.
- Fill in city, state, country and company.
- Enter your email address.
- Click Generate.
- Go to Manage SSL sites, pick the domain and install the new certificate.
In WHM
WHM is the Web Host Manager, used by resellers and server owners.
- Log in to WHM.
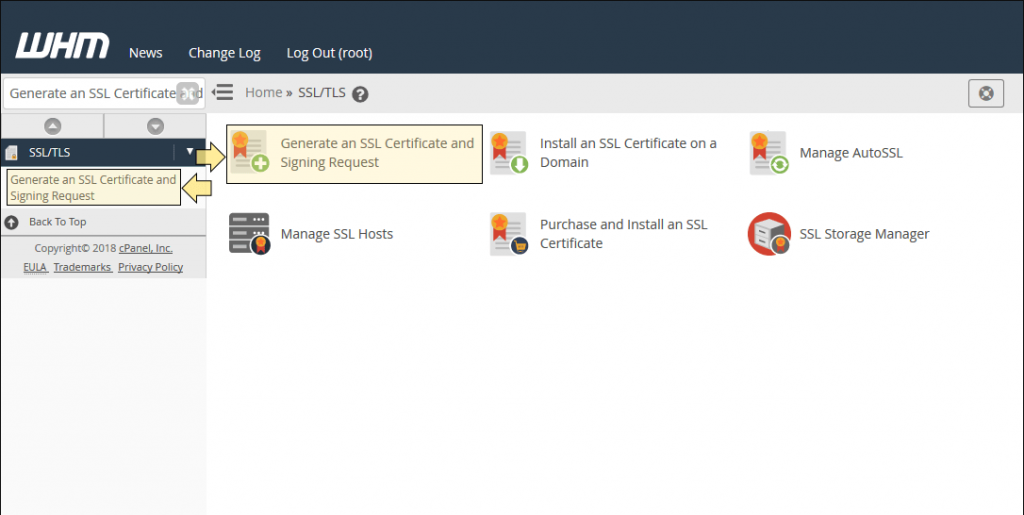
- Type Generate an SSL Certificate in the search box.
- Click Generate an SSL Certificate and Signing Request.
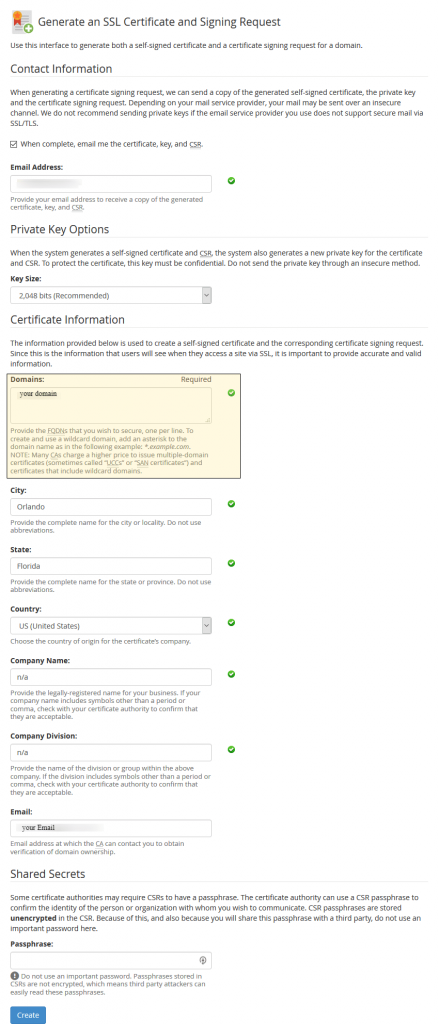
- Choose the key type and fill in the domain and company details.
- Click Create. WHM shows a private key, a CSR and a self-signed certificate.
- Copy these and keep them safe.
- Open Install an SSL Certificate on a Domain and install the certificate and key.
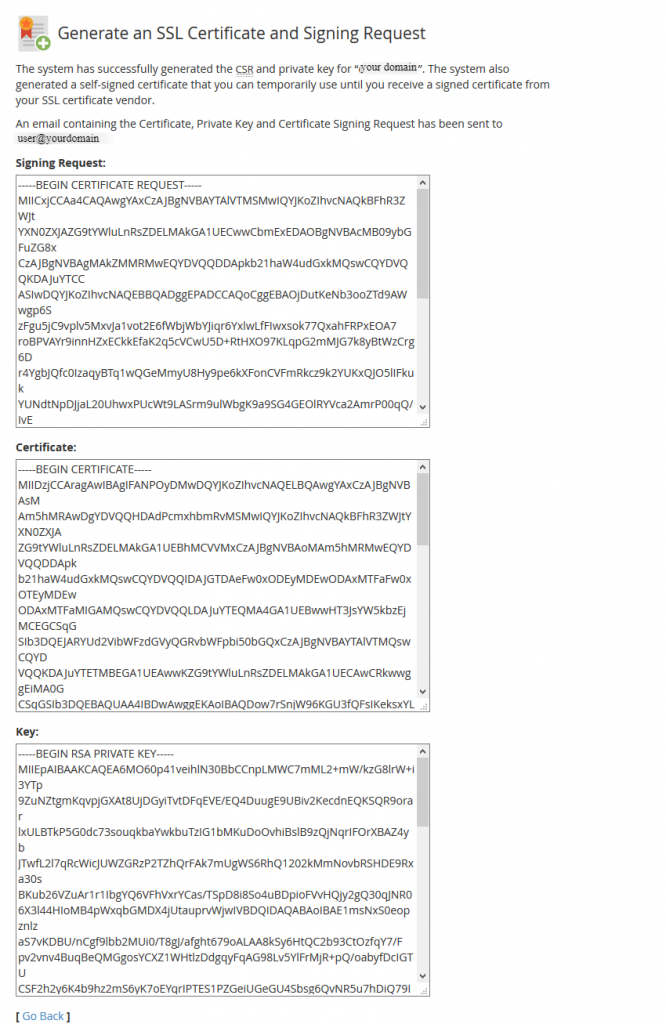
Warning: installing a self-signed certificate on a live domain can replace a working one. Check what is installed first, and keep a copy.
Tip: To remove the browser warning for your own test, you can tell your own computer to trust the certificate. Visitors will still see the warning. Ask Hostvento support about trusted options.
Quick recap
- Self-signed means you sign your own certificate.
- It encrypts, but browsers show a warning.
- Good for testing, not for public sites.
- Use SSL/TLS in cPanel or the generate tool in WHM.