
What are WHM and WHMCS?
WHM (Web Host Manager) is the control panel that a server owner uses. It creates and manages hosting accounts. WHMCS is a billing and support system. It takes orders, sends invoices and answers tickets.
When you connect them, WHMCS can tell WHM what to do. A customer pays, and WHMCS asks WHM to build the account. Think of WHMCS as the shop counter and WHM as the workshop behind it.
This guide is for people who run their own server or reseller setup. You need your WHM login details and root access (the all-powerful server admin login) or a reseller login.
Before you start
- Know the server's hostname or IP address. An IP address is the number that names a server on the internet.
- Know your WHM username. For a full server this is
root. - Make sure WHMCS can reach the server. The server firewall must allow WHMCS to connect to WHM on port 2087.
Steps
- Log in to your WHM panel.
- In the search box at the top left, type API Tokens and open Manage API Tokens.
- Click Generate Token.
- Type a name, such as
whmcs, then click Save. - Copy the token that appears. It is shown only once, so keep it safe.
- Log in to the WHMCS admin area.
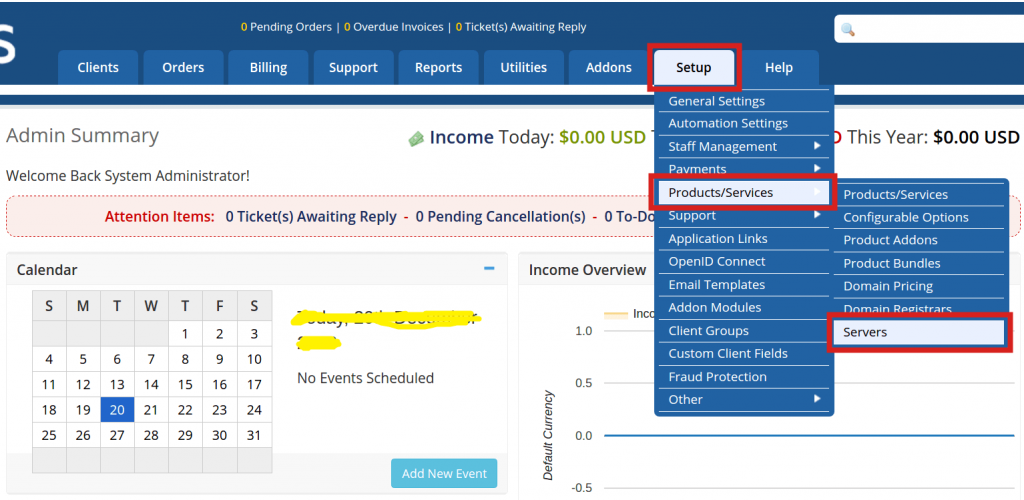
- Go to Setup, then Products/Services, then Servers.
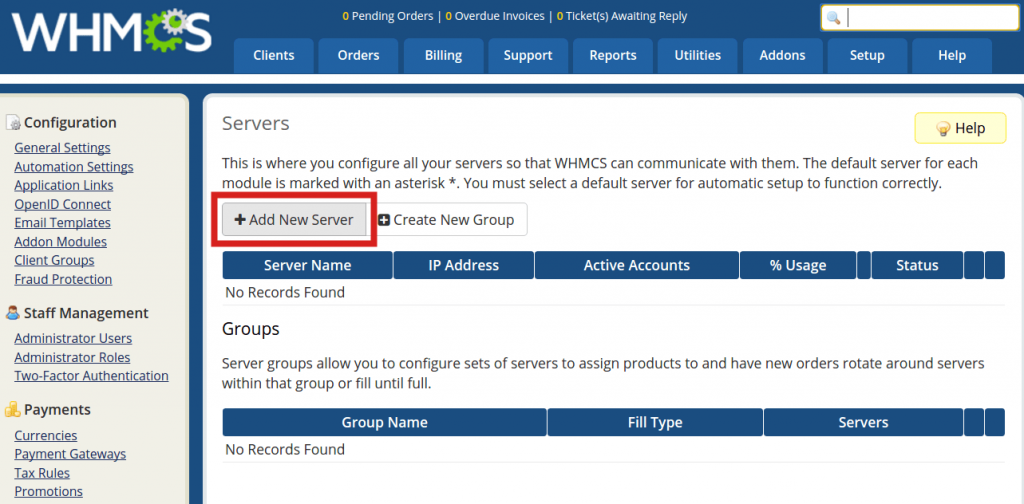
- Click Add New Server.
- Fill in a name, the hostname or IP address, and the server's nameservers. Nameservers are the servers that tell the internet where your domains live. Ask Hostvento support if you do not know them.
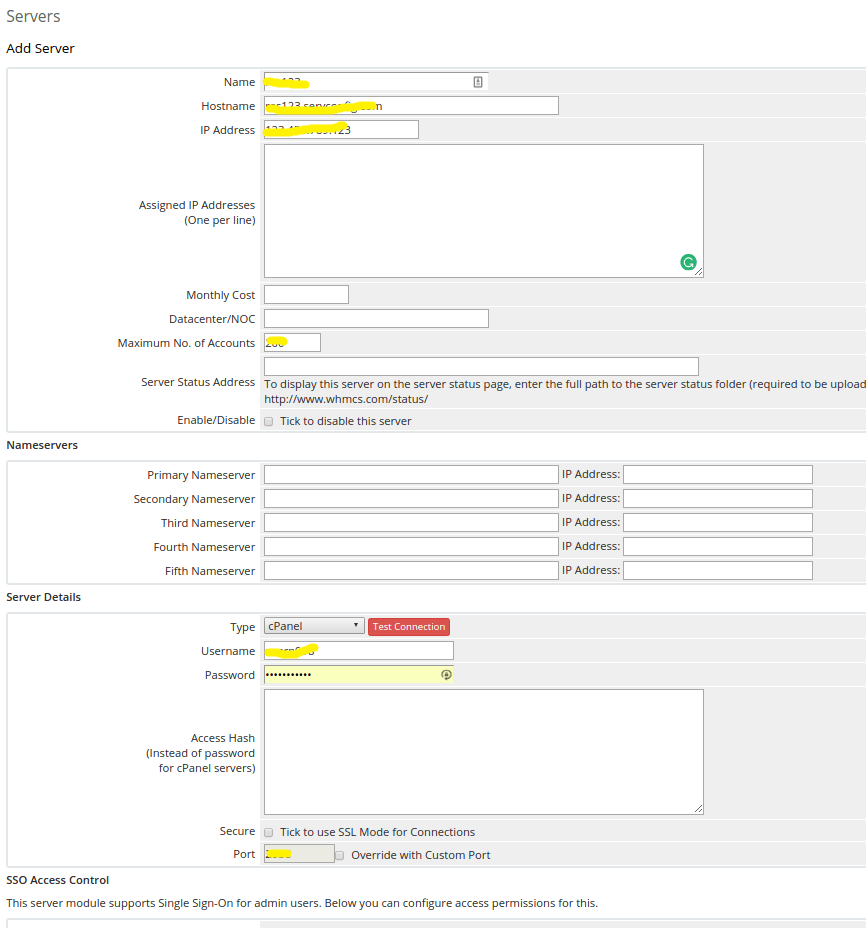
- In the Module list, choose cPanel.
- Enter the username (for example
root) and paste the token into the Access Hash box. - Tick Secure so the connection is encrypted.
- Click Test Connection.
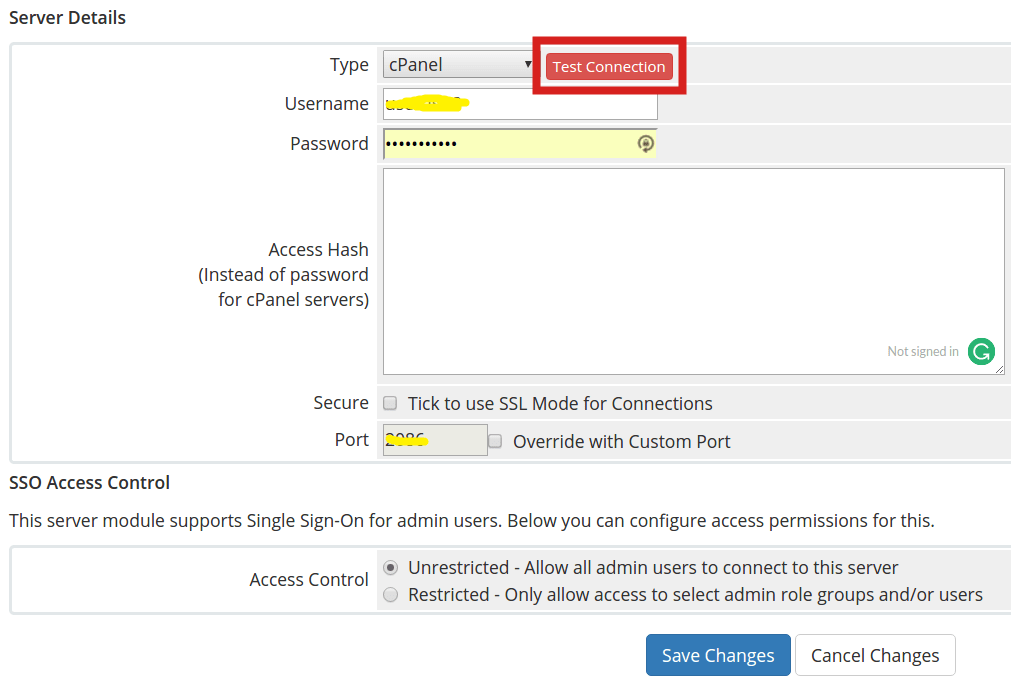
- If you see a success message, click Save Changes.
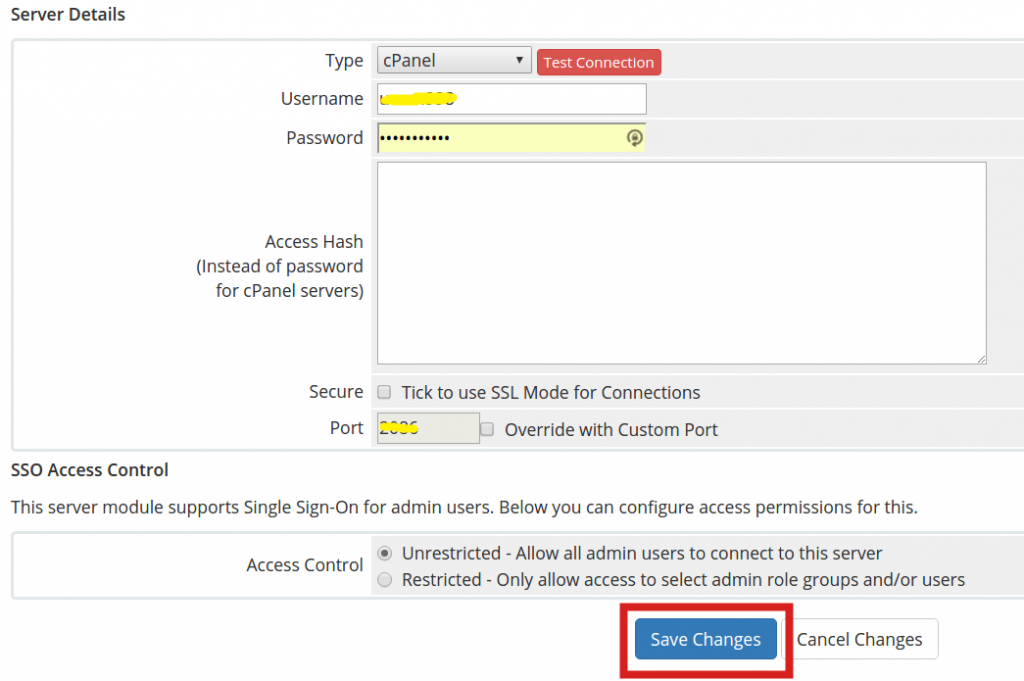
Tip: Treat the token like a password. Anyone who has it can control your server.
If the test fails
- Check that the hostname and token are typed correctly.
- Check the firewall allows WHMCS to reach port 2087.
- Check the token was not deleted or has not expired.
Still stuck? Open a support ticket and Hostvento will help.
Quick recap
- WHM builds accounts. WHMCS handles billing and orders.
- Create an API token in WHM first.
- Add a new server in WHMCS under Setup, Products/Services, Servers.
- Choose the cPanel module, paste the token, and use Test Connection.