

What is a nameserver?
DNS is like a phone book for the internet. It turns a website name into a number that computers understand. A nameserver is the computer that holds that phone book page for your domain. Most domains use two nameservers, so one can help if the other is busy.
A default nameserver is the one that WHM puts in each new account unless you pick another.
Before you start
- You need root or reseller access to WHM.
- You need the names of your nameservers. They look like
ns1.example.com. Your welcome email or Hostvento support can tell you the right ones. Do not guess them. - Changing these only affects new accounts. Old accounts keep their settings.
Steps for the server owner (root)
- Log in to WHM.
- Type Basic WebHost Manager Setup in the search box. In newer versions it may be called Basic cPanel & WHM Setup.
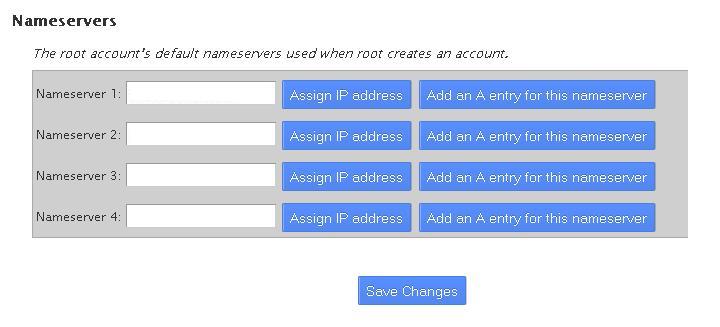
- Open it and scroll to the Nameservers area.
- Type your first nameserver in Primary Nameserver.
- Type your second in Secondary Nameserver.
- Click Assign IP Address if the page offers it. This links the name to an IP address, which is the number address of the server.
- Scroll down and click Save Changes.
Steps for a reseller
- Search for Edit Reseller Nameservers and Privileges or look for Reseller Center.
- Fill in the nameserver boxes with your own nameservers.
- Click Save.
Tip: Each nameserver name must also exist as a record at your domain registrar. The registrar is where you bought the domain. If it does not, the name will not work.
Check your work
- Create a test account.
- Open Modify an Account or the DNS zone for it.
- Confirm the new nameservers appear.
It can take a few hours for the internet to learn about the change.
Quick recap
- Nameservers hold the DNS phone book page for a domain.
- Set them in Basic WebHost Manager Setup (root) or the reseller nameserver tool.
- Only new accounts use the new defaults.
- Ask Hostvento support if you do not know your nameserver names.