

What is FTP?
FTP stands for File Transfer Protocol. It is a way to send files between two computers over a network. Think of it as a mailbox: one computer drops files in, another picks them up. A computer that offers files is called a server. IIS is the Windows tool that can act as that server. IIS stands for Internet Information Services.
This guide is for a Windows 10 PC. It needs an administrator account, which is an account allowed to change system settings.
Steps
Part 1: Turn on the FTP feature
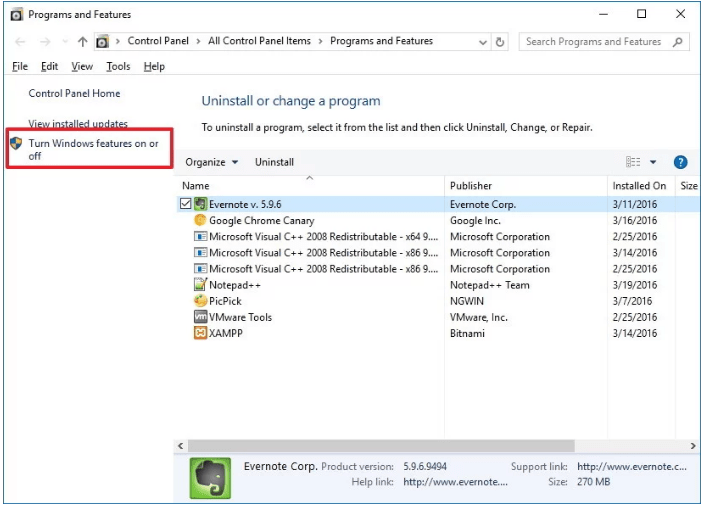
- Click the Start button and type Turn Windows features on or off. Open it.
- Find Internet Information Services in the list and click the plus sign.
- Tick FTP Server. Also tick FTP Service under it.
- Under Web Management Tools, tick IIS Management Console.
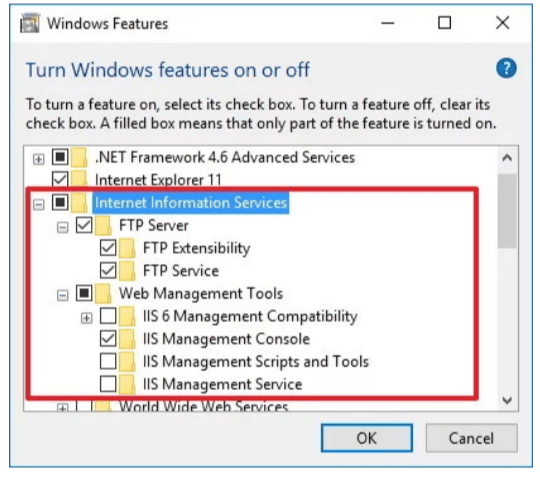
- Click OK and wait. Windows installs the parts. Then click Close.
Part 2: Create the FTP site
- Create a folder for your files, for example
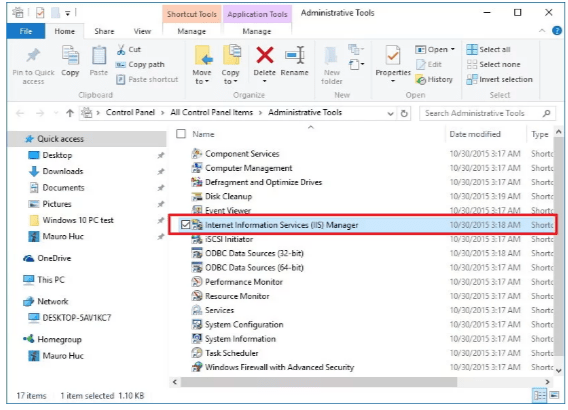
C:\FTPShare. - Click Start, type IIS and open Internet Information Services (IIS) Manager.
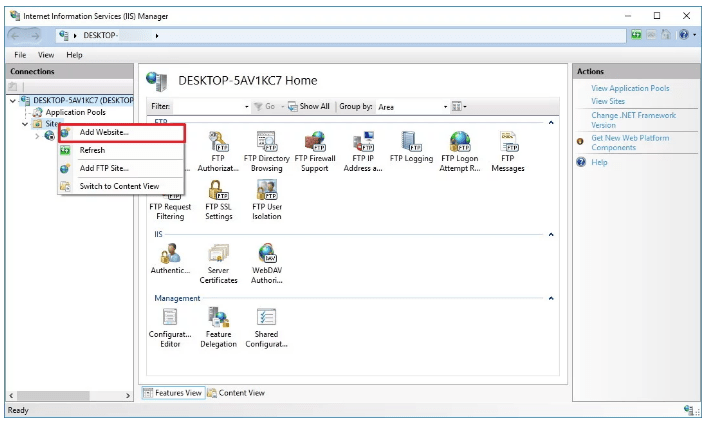
- On the left, right-click Sites and choose Add FTP Site.
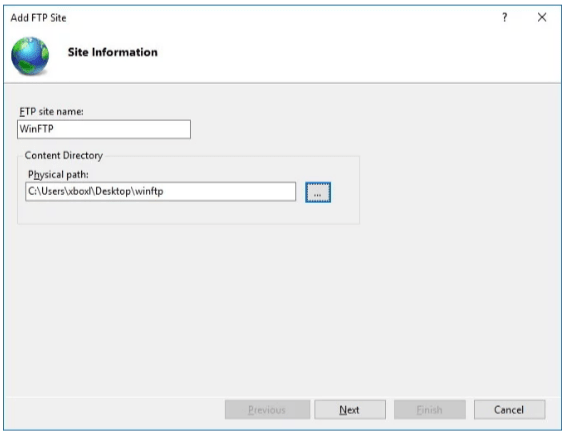
- Type a name for the site. Choose your folder as the Physical path. Click Next.
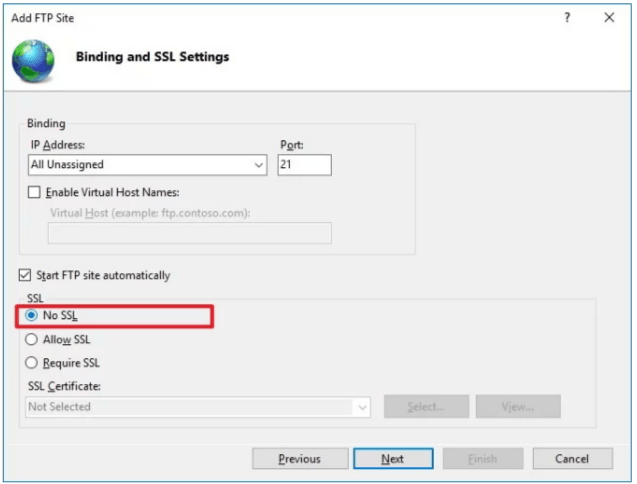
- Leave the IP address as All Unassigned and the port as 21. A port is like a numbered door on a computer. Port 21 is the usual door for FTP.
- Under SSL, choose No SSL for a quick local test. SSL means encryption, which hides your data from snoopers. Use SSL if you can.
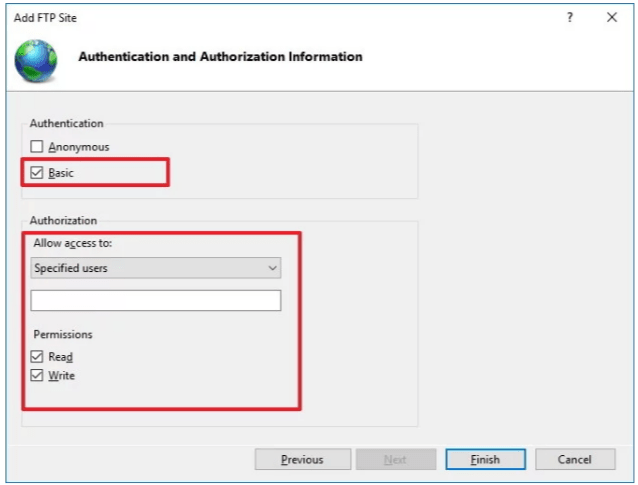
- Click Next. Under Authentication, tick Basic. This means people log in with a Windows username and password.
- Under Authorization, choose Specified users and type the Windows username that may connect. Tick Read, and tick Write if the user may upload.
- Click Finish.
Part 3: Allow FTP through the firewall
A firewall is a guard that blocks unwanted network traffic. It must let FTP in.
- Click Start, type Allow an app through Windows Firewall and open it.
- Click Change settings.
- Tick FTP Server for the Private network, and for Public only if you really need it.
- Click OK.
Part 4: Test it
- Open File Explorer.
- Type
ftp://localhostin the address bar and press Enter. - Sign in with the username and password you allowed.
Tip: Windows 10 is not new. Newer Windows versions use almost the same steps. Plain FTP sends passwords without hiding them, so do not use it across the open internet without SSL.
Quick recap
- FTP moves files between computers. IIS is the Windows server for it.
- Turn on FTP Server in Windows features.
- Add an FTP site in IIS Manager with port 21, Basic login and the right permissions.
- Allow FTP in Windows Firewall.
- Test with
ftp://localhost.